Content Management System (CMS) - CKEditor
Content Management Systems (CMS) are used by the content administrator of a web site. Generally the content administrator is not someone who knows how to use html or php. So, a CMS that uses a relatively simple user interface is provided with the web site. The exercises that follow will allow you to create a CMS using CKEditor, a text editor, and CKFinder, a file browser.
In this exercise a PHP file will be created that has a text editor area. We will be using a free text editor named CKEditor.
Initial Preparations:
- Navigate to the Hand-Out folder for Web Design 2 in the Lawless folder on the (J:) drive.
Copy the ckeditor folder and paste it into the folder on the (I:) drive that you are using for this tutorial.
- On the (I:) drive create a new folder in your project folder named admin. (You can do this in Dreamweaver if you'd prefer)
- Navigate to the Hand-Out folder for Web Design 2 in the Lawless folder on the (J:) drive.
Copy password_protect.php and paste it in the admin folder created previously.
- For this exercise there will need to be another table added to your existing database. In Dreamweaver duplicate the file db_table.php. Rename the new file cke_add_table.php. Delete the existing code in cke_add_table.php and replace it with the following: (NOTE: An account has been added to the mySQL server for each student. Your account uses the same login name and password that you use for your school account. Do not forget to add your user name and password in the places indicated in the code.)
<?php

	ini_set('display_errors', 1);

	$con = mysql_connect("localhost","YOUR SCHOOL LOGIN NAME HERE","YOUR SCHOOL PASSWORD HERE");

	if (!$con){die('Could not connect: ' . mysql_error());}

	mysql_select_db("YOUR SCHOOL LOGIN HERE", $con); //select the database that will get a table

	// create the table with fields named id, page_title and page_content

	$sql = "CREATE TABLE site_content

	(

	id INT(5) NOT NULL AUTO_INCREMENT PRIMARY KEY,

	page_title TEXT,

	page_content TEXT

	)";

	mysql_query($sql,$con);// execute the query

	// show the names of the tables that are in your database

	echo '<p>These tables exist in your database:</p>';

	$sql2 = "SHOW TABLES FROM YOUR SCHOOL LOGIN NAME HERE";

	$result = mysql_query($sql2);

	while ($row = mysql_fetch_row($result)) {

	echo "$row[0]";

	echo '<br />';

	}

	mysql_close($con);// close the connection

	?>
- Save the changes to cke_add_table.php and FTP it to the web server.
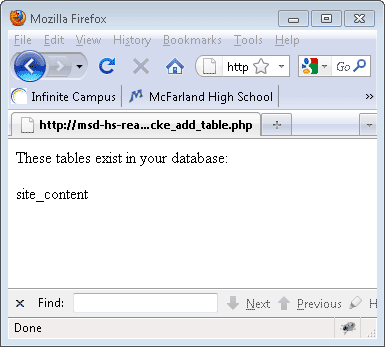
- Preview cke_add_table.php in a browser to create the desired table. (IMPORTANT: Notice there is code that was added to this page so that after the table was created MySQL was queried to find all of the tables in your database and then display the names.)
- In Dreamweaver create a new PHP file named cke_dynamic_page.php in the root directory of this project. (Not in the admin site in other words) Delete the existing code and replace it with the following:
<?php

	ini_set('display_errors', 1);

	$con = mysql_connect("localhost","YOUR SCHOOL LOGIN NAME HERE","YOUR SCHOOL PASSWORD HERE");

	if (!$con){die('Could not connect: ' . mysql_error());}

	mysql_select_db("YOUR SCHOOL LOGIN NAME HERE", $con);

	if(isset($_GET['id'])) $id=$_GET['id']; else $id=1;

	$query="SELECT * FROM site_content WHERE id=$id";

	$result=mysql_query($query,$con);// execute the query

	$page_title=mysql_result($result,0,"page_title");

	$page_content=mysql_result($result,0,"page_content");

	?>

	<!DOCTYPE html PUBLIC "-//W3C//DTD XHTML 1.0 Strict//EN" "http://www.w3.org/TR/xhtml1/DTD/xhtml1-strict.dtd">

	<html xmlns="http://www.w3.org/1999/xhtml">

	<head>

	<meta http-equiv="Content-Type" content="text/html; charset=utf-8" />

	<title><?php echo $page_title; ?></title>

	</head>

	<body>

	<a href="cke_dynamic_page.php?id=1">Page 1</a>

	<a href="cke_dynamic_page.php?id=2">Page 2</a>

	<a href="cke_dynamic_page.php?id=3">Page 3</a>

	<hr />

	<?php echo $page_content; ?>

	</body>

	</html>
- Save the changes to cke_dynamic_page.php and FTP it to the web server. DO NOT PREVIEW THE PAGE. IT WILL NOT WORK AT THIS POINT.
Exercise Directions:
- In Dreamweaver FTP the admin folder (password_protect.php will be sent along with the folder) into the mysql_tutorial folder on the web server.
- In Dreamweaver FTP the ckeditor folder into the mysql_tutorial folder on the web server. This folder has a large number of files and may take a few minutes to transfer.
- In Dreamweaver, in the admin folder, create a new PHP file named index.php.
- Between the <head> and </head> tags of index.php add the following line of code:
<script type="text/javascript" src="../ckeditor/ckeditor.js"></script>This javascript code links index.php with a file in the ckeditor folder named ckeditor.js. This link will be necessary on any page that will use CKEditor.
- Next we will create a web form in the body of index.php. Copy the following code and paste it between the <body> and </body> tags.
<form action="index.php<?php if(isset($id)) echo '?id='.$id; ?>" method="post">

	<input name="ud_id" id="ud_id" type="hidden" value="<?php if(isset($id)) echo $id;  ?>">

	Page Title: <input type="text" name="ud_page_title" value="<?php if(isset($ud_page_title)) echo $ud_page_title;  ?>" /><br /><br />

	<textarea id="ud_page_content" name="ud_page_content"><?php if(isset($ud_page_content)) echo $ud_page_content;   ?></textarea>

	<script type="text/javascript">

	    CKEDITOR.replace( 'ud_page_content' );

	</script>

	<input name="submit" type="submit" value="Submit Info"/>

	</form>
- Let's look at the above code in more detail:
<form action="index.php<?php if(isset($id)) echo '?id='.$id; ?>" method="post">
- The action attribute instructs the browser to go to index.php (itself) when the submit button is pressed.
- The php code checks to see if the variable $id has a value. If so, the code adds ?id= to the end of index.php and then echos the value in $id. The result is an link that could appear as index.php?id=2.
<input name="ud_id" id="ud_id" type="hidden" value="<?php if(isset($id)) echo $id; ?>">
- This code adds an invisible text field to the form named ud_id.
- The value parameter is given a value that is determined using PHP code.
- The PHP code checks to see if $id has a value stored. If so the value will be echoed and become the value of the text field ud_id.
<textarea id="ud_page_content" name="ud_page_content"><?php if(isset($ud_page_content)) echo $ud_page_content; ?></textarea>
- This code adds a text area named ud_page_content to the web form.
- The PHP code checks to see if the variable $ud_page_content is holding data. If it is then the data is echoed in the text area
<script type="text/javascript">

		    CKEDITOR.replace( 'ud_page_content' );

		</script>
- This javascript code replaces the text area named ud_page_content with an instance of the CKEditor text editor
- In the code view of index.php create some empty space at the top of the page. Copy the PHP code below and paste it into index.php.
<?php

	ini_set('display_errors', 1);

	$con = mysql_connect("localhost","YOUR SCHOOL LOGIN NAME HERE","YOUR SCHOOL PASSWORD HERE");

	if (!$con){die('Could not connect: ' . mysql_error());}

	mysql_select_db("ENTER YOUR SCHOOL LOGIN NAME HERE", $con); //select the database to be used

	// if arriving here from a link with a query string execute this block of code

	if(isset($_GET['id']))

	{

	$id=$_GET['id'];

	$query="SELECT * FROM site_content WHERE id=$id";

	$result=mysql_query($query,$con);// execute the query

	$ud_page_title=mysql_result($result,0,"page_title");

	$ud_page_content=mysql_result($result,0,"page_content");

	}

	// if the submit button was pressed execute this block of code

	if (isset($_POST['submit']))

	{

	$ud_page_content=$_POST['ud_page_content'];

	$ud_page_title=$_POST['ud_page_title'];

	if($_POST['ud_id'] != "")//because if it is "" that means there was not no id value and is a new record to be created

	{

	$id=$_POST['ud_id'];

	$query="UPDATE site_content SET page_title='$ud_page_title', page_content='$ud_page_content' WHERE id='$id'";

	mysql_query($query);

	}

	else // new record is being inserted

	{

	mysql_query("INSERT INTO site_content (id, page_title, page_content) VALUES (NULL, '$ud_page_title','$ud_page_content')");

	$id = mysql_insert_id();

	$query="SELECT * FROM site_content WHERE id=$id";

	$result=mysql_query($query,$con);// execute the query

	$ud_page_title=mysql_result($result,0,"page_title");

	$ud_page_content=mysql_result($result,0,"page_content");

	}

	}

	mysql_close($con);

	?>
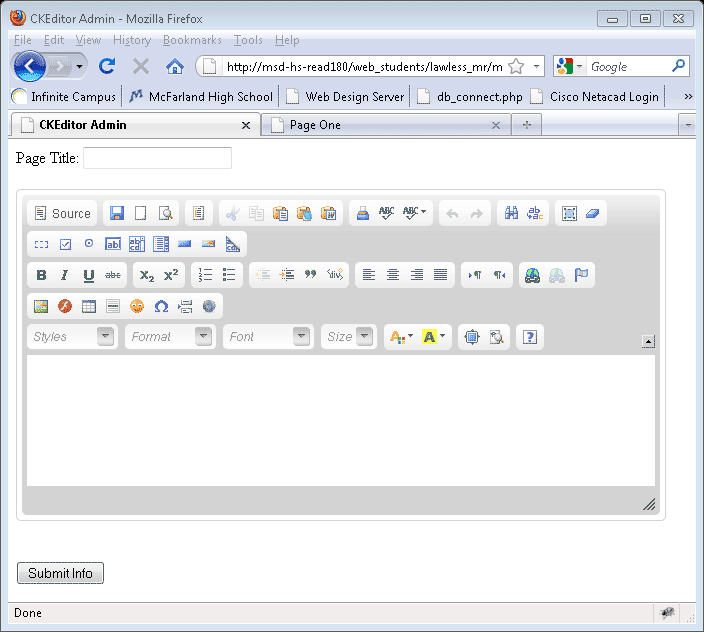
- Save the changes to index.php and FTP it to the web server. Preview index.php in a web browser. WARNING: Do not press the Submit Info button at this point in the exercise!!! (Image will vary somewhat from that shown below because I changed the size to better fit on this page.)
- Let's look at the new code in more detail;
if(isset($_GET['id']))

		{

		$id=$_GET['id'];

		$query="SELECT * FROM site_content WHERE id=$id";

		$result=mysql_query($query,$con);// execute the query

		$ud_page_title=mysql_result($result,0,"page_title");

		$ud_page_content=mysql_result($result,0,"page_content");

		}
- This code first checks to see if the link to the page included a query with a value for id. If so, the block of code will be executed.
- First the $id variable receives a value from $_GET['id'];
- The $id value is used to query for the correct record.
- The queried page_title field is placed in the variable $ud_page_title.
- The queried page_content field is placed in the variable $ud_page_content.
if (isset($_POST['submit']))

		{

		$ud_page_content=$_POST['ud_page_content'];

		$ud_page_title=$_POST['ud_page_title'];

		if($_POST['ud_id'] != "")//because if it is "" that means there was an id value and a record needs to be updates

		{

		$id=$_POST['ud_id'];

		$query="UPDATE site_content SET page_title='$ud_page_title', page_content='$ud_page_content' WHERE id='$id'";

		mysql_query($query);

		}

		else // a new record is being inserted

		{

		mysql_query("INSERT INTO site_content (id, page_title, page_content) VALUES (NULL, '$ud_page_title','$ud_page_content')");

		$id = mysql_insert_id();

		}

		}
- This code first checks to see if the submit button was pressed. If so the block of code will be executed.
- The posted data from the text editor is placed in the variable $ud_page_content
- The posted data from the text field ud_page_title is placed in the variable $ud_page_title
- Next the code checks to see if the hidden text field ud_id is not empty. If so, the next block of code will be executed which uses the posted id value to update the correct record.
- Else, if the text field ud_id is empty then the next block of code is executed. This code will execute a query to insert a new record.
- After the new record has been inserted the new id value is retrieved using mysql_insert_id(); and placed in the variable $id.
- Now it is time to try out our admin page.
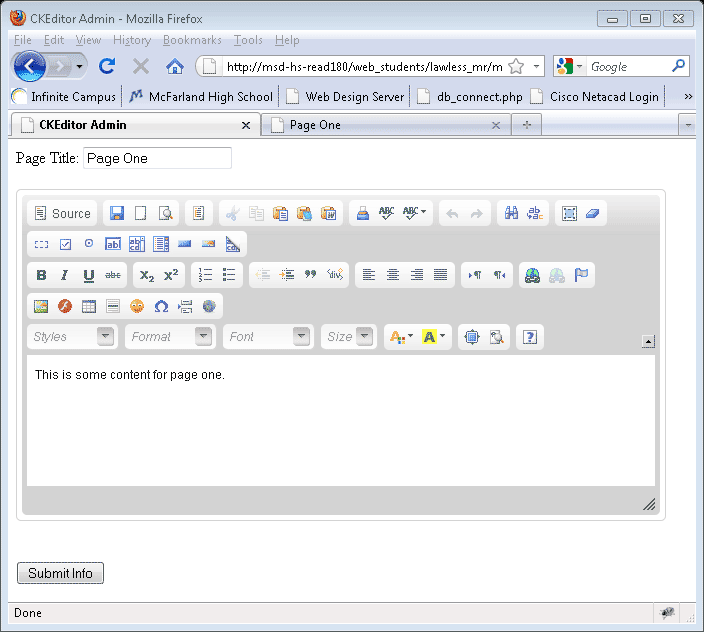
- In the Page Title field of index.php enter the following text: Page One
- In the text editor area enter the following text: This is some content for page one.
- Press the Submit Info button.
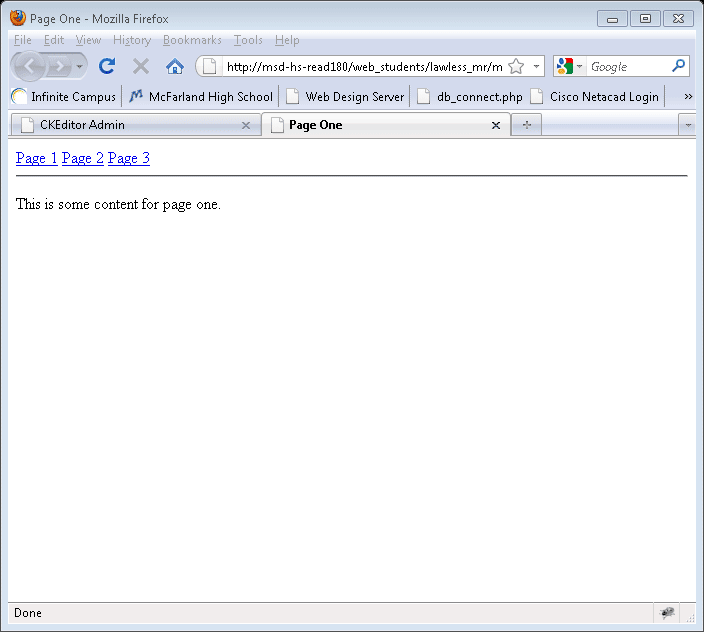
- Open a new tab in the browser. Preview cke_dynamic_page.php in the new tab. Remember that if an id value is not provided the page will default to an id value of 1. (NOTE: There is no content for pages 2 and 3 so choosing those links will lead to an error message being diaplyed in the browser.)
- Go back to index.php. In the text editor area add more text after the existing text. Press the Submit Info button. Go back to cke_dynamic_page.php and refresh the page. Note that the page content was updated to reflect what is now stored in the database.
- In Dreamweaver open admin/index.php. Just after the <body> tag add the following code:
<a href="index.php">Add New Page</a>

	<hr />
- NOTICE: This code adds a link to index.php (itself) which will load an empty form because an id number is not provided and the submit button was not pressed.
- Save the changes to index.php and FTP the file to the web server.
- Refresh index.php in the browser so that the new link will be available. Press the Add New Page link.
- In the Page Title field enter: Page Two. In the text editor area enter: This is some content for page two. Press the Submit Info button.
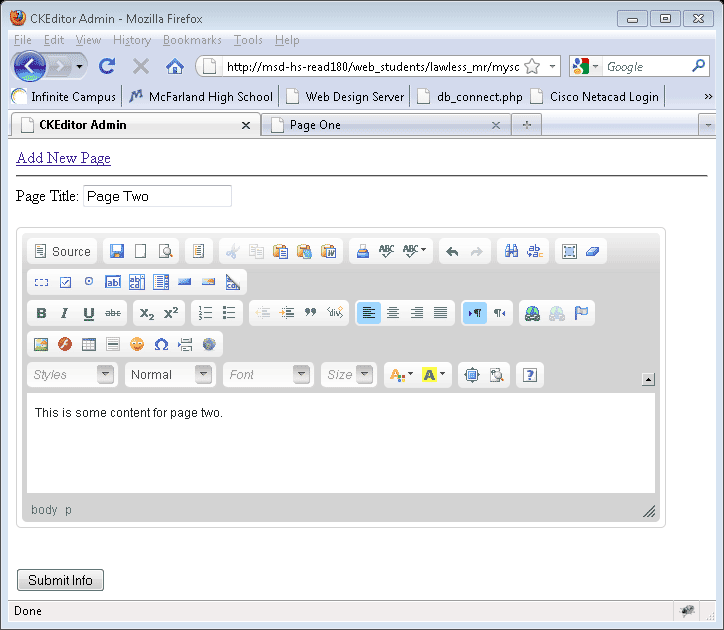
- Click on the Add New Page link. In the Page Title field enter: Page Three. In the text editor area enter: This is some content for page three. Press the Submit Info button.
- In the browser go to the tab that is displaying cke_dynamic_page.php. Click on each of the links for Page 1, Page 2 and Page 3. Confirm that each link displays the content entered in index.php.
Final Touches
Security is an issue we have not dealt with during this exercise. At this point the admin folder fields are open to the public. This of course is not acceptable. There are a number of methods that could be used to protect either the entire admin folder or individual files within the admin directory. Due to the limitations of our web server we are going to use a method that allows us to protect individual files rather than the entire directory. Follow the steps below to protect the file index.php from being used by the general public.
- In Dreamweaver, in the admin folder open the file password_protect.php. Scroll down and find this code:
$LOGIN_INFORMATION = array(

	  'zubrag' => 'root',

	  'admin' => 'adminpass'

	);
- Change the values in the code so that there is a name and password (teacher, teacher_pass) that I can use to view your index.php file and a name and password for you to use.
$LOGIN_INFORMATION = array(

	  'teacher' => 'teacher_pass',

	  'your-login-name' => 'your-password'

	);
- Save the changes to password_protect.php and FTP it to the admin folder on the web server.
- In Dreamweaver, in the admin folder open index.php. After the line:
ini_set('display_errors', 1); add this line of code:
include('password_protect.php');
The added code instructs the web server to include the code of password_protect.php in with the code of index.php.
- Save the changes to index.php and FTP it to the web server.
- Close the web browser that you have been using to preview index.php. Open the browser again and return to index.php. Enter your name and password to confirm that the page has been secured and that you have access.
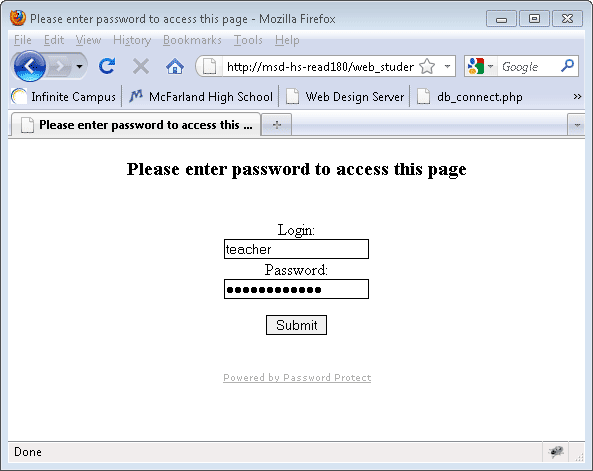
- Due to it's complexity, we will not examine the code in password_protect.php. Also, I would never use this security method on an actual web site. But due to the limitations of our web server this will have to suffice.
PHP - include() and include_once()
Sometimes there are pieces of PHP code that appear on every page in your site. For example, each of our pages begins with the code that connects our pages to the MySQL database we are using for the lessons. This code appears as:
$con = mysql_connect("localhost","YOUR SCHOOL LOGIN NAME HERE","YOUR SCHOOL PASSWORD HERE");

if (!$con){die('Could not connect: ' . mysql_error());}

mysql_select_db("ENTER YOUR DATA BASE NAME HERE", $con); //select the database to be used
There are a couple of disadvantages to having this code on each page.
- While working on your web page the password and login name would be visible to anyone passing by your computer
- If you decide to make changes to either the login name or password the changes would have to be made on every page
To solve this problem we will remove the MySQL connection code from index.php and place it in another file named connector.php. Then, in index.php we will use an include() statement that instructs the web server to include the code of connector.php in with the code of index.php.
Directions:
- In Dreamweaver create a new PHP file in the admin folder named connector.php.
- In Dreamweaver in the admin folder open index.php. Cut the following code:
$con = mysql_connect("localhost","YOUR SCHOOL LOGIN NAME HERE","YOUR SCHOOL PASSWORD HERE");

	if (!$con){die('Could not connect: ' . mysql_error());}

	mysql_select_db("ENTER YOUR DATA BASE NAME HERE", $con); //select the database to be used
and replace it with:
include('connector.php'); // add the code in connector.php here
- Save the changes to index.php and FTP it to the admin folder on the web server.
- Delete all of the existing code in connector.php. Enter <?php and ?>. Paste the code cut from index.php between the php tags so it appears as:
<?php

	$con = mysql_connect("localhost","YOUR SCHOOL LOGIN NAME HERE","YOUR SCHOOL PASSWORD HERE");

	if (!$con){die('Could not connect: ' . mysql_error());}

	mysql_select_db("ENTER YOUR DATA BASE NAME HERE", $con); //select the database to be used

	?>
- Save the changes to connector.php and FTP it to the admin folder on the web server. Preview index.php in a browser to confirm that it still works correctly.
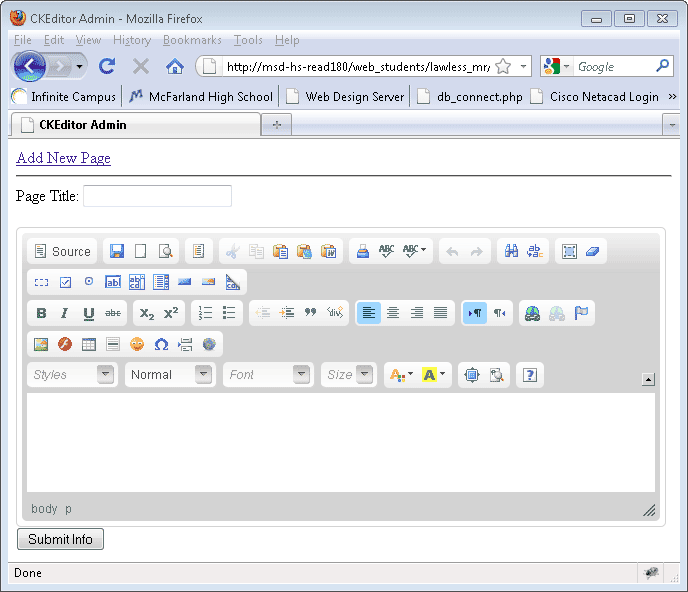
Special note: There is an include_once() statement that can be used in place of the include() statement. The include_once() statement prevents a file from being included more than once. Generally it is safer to use the include_once() statement if you are unsure about how many times a piece code might get included.
Admin - CKFinder
Part of building a Content Management System (CMS) is adding the ability to add and delete files from the web server. Remember, right now you have the ability to add or delete files from the server but that is because you know how to use Dreamweaver and you have direct access to the web server. However, most people would neither have Dreamweaver nor know how it is used.
In order to get around this problem we will add file browser capability to our admin pages. CKFinder is a file browser that can easily be incorporated into CKEditor. Follow the steps below to add file browser functionality to your admin pages.
Initial preparations:
- On your computer navigate to the Hand-Out folder for Web Design 2 in the Lawless folder on the (J:) drive.
Copy the ckfinder folder and paste it into the folder on the (I:) drive that you are using for this tutorial.
- In Dreamweaver open the ckfinder folder. Open config.php.
- At approximately line 63 find this code:
$baseUrl = '/ckfinder/userfiles/';and replace it with:
$baseUrl = '/web_students/YOUR-LAST-NAME_YOUR-FIRST-NAME/mysql_tutorial/ckfinder/userfiles/';
- At approximately line 33 find this code:
return false;and replace it with
return true;WARNING: Changing this value to true creates a very large security problem for your web site. We will correct this issue at a later point in this exercise.
- Save the changes to config.php. FTP the entire ckfinder folder to the mysql_tutorial folder on the web server. This make take a few minutes as it is a rather large set of files.
- In the admin folder open index.php. Copy this code:
<script type="text/javascript" src="../ckfinder/ckfinder.js"></script> and paste it after this line found in the head section:
<script type="text/javascript" src="../ckeditor/ckeditor.js"></script>
- Also in index.php find this code in the body section:
<script type="text/javascript">

	    CKEDITOR.replace( 'ud_page_content' );

	</script>
and replace it with this code
<script type="text/javascript">

	 var editor = CKEDITOR.replace( 'ud_page_content',

	 {


	 });

	 CKFinder.setupCKEditor( editor, '../ckfinder/' );

	</script>
- Save the changes to index.php and FTP it to the admin folder on the web server.
- Preview index.php?id=2 in a browser.
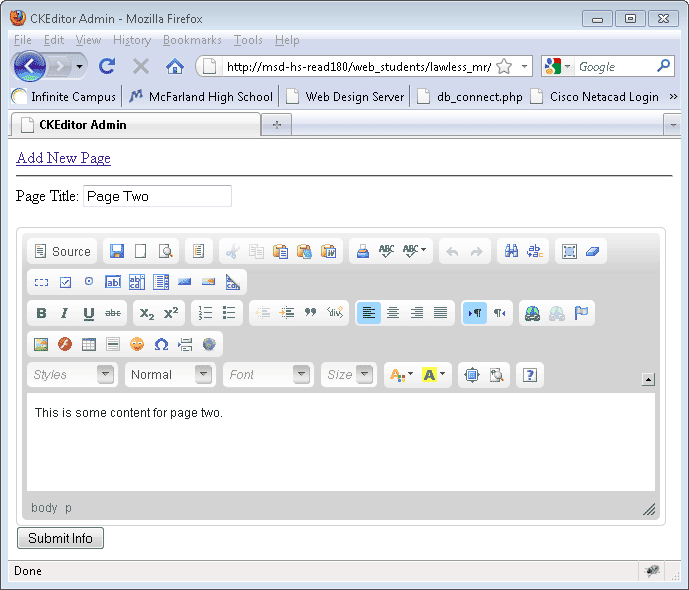
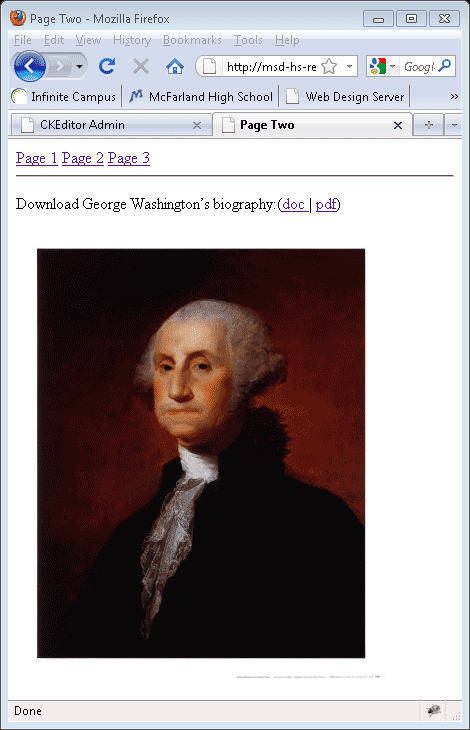
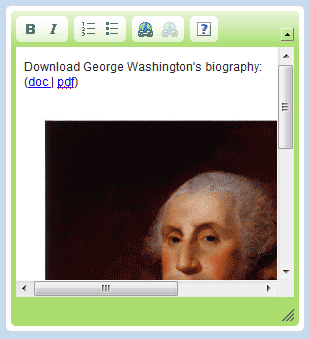
- Remove the existing text in the text editor area and replace it with Download George Washington's biography: (doc | pdf)
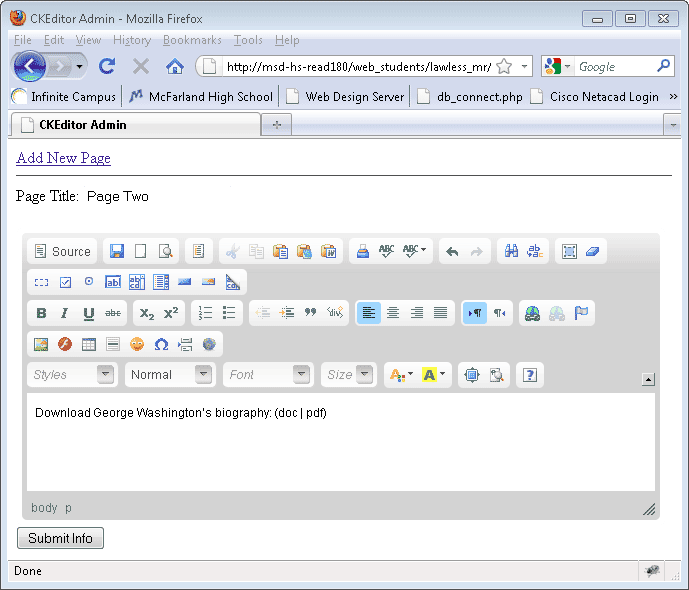
- In the text editor area select the text doc. Press the link button
 . This will allow us to create a link to a file. . This will allow us to create a link to a file.
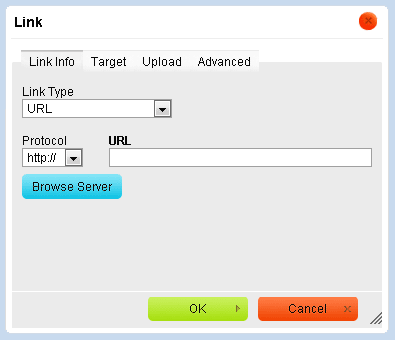
- Press the Browse Server button in the Link dialog window.
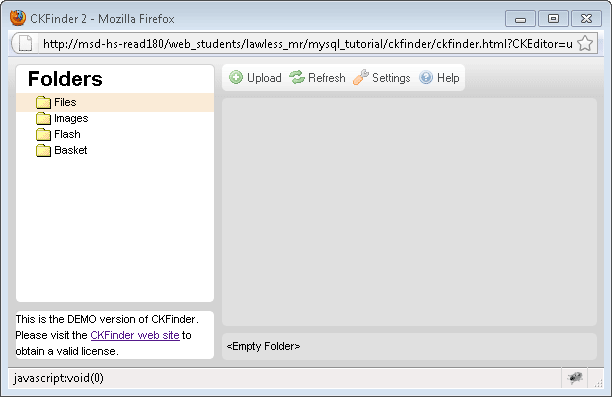
- Press the Upload link. Any file that will be linked to your web page must be uploaded to the web server before it can be used.
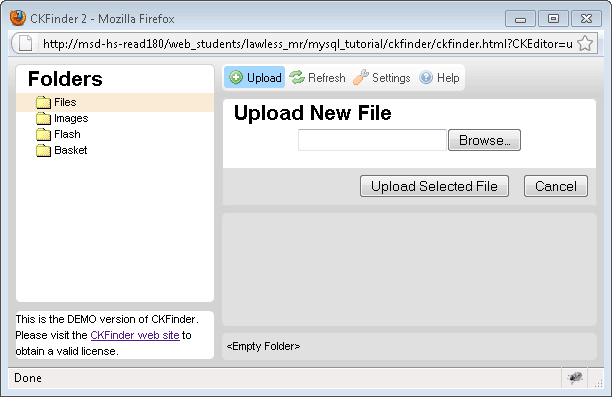
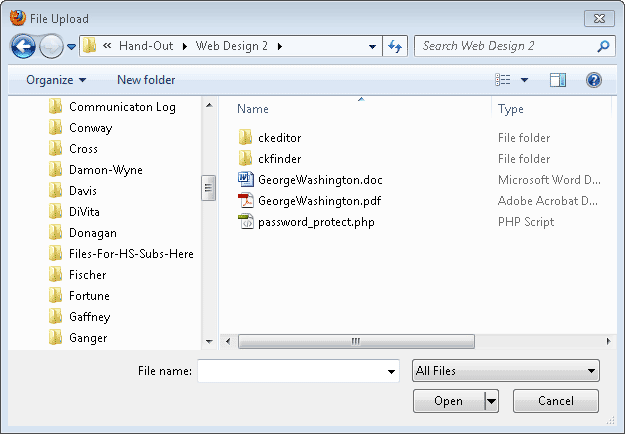
- Press the Browse button. Navigate to the Web Design 2, Hand-Out folder on the (J:) drive. Select the Word document named GeorgeWashington.doc. Press the Open button.
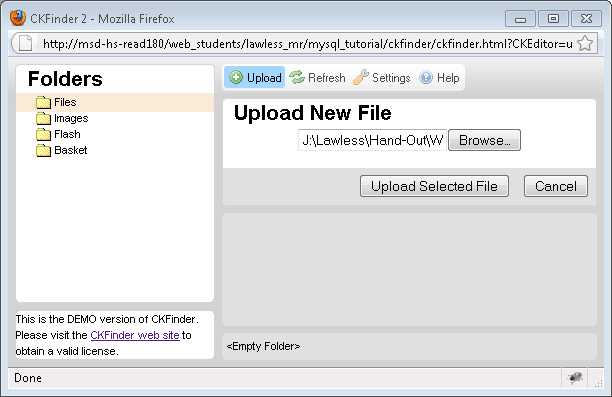
- Press the Upload Selected File button.
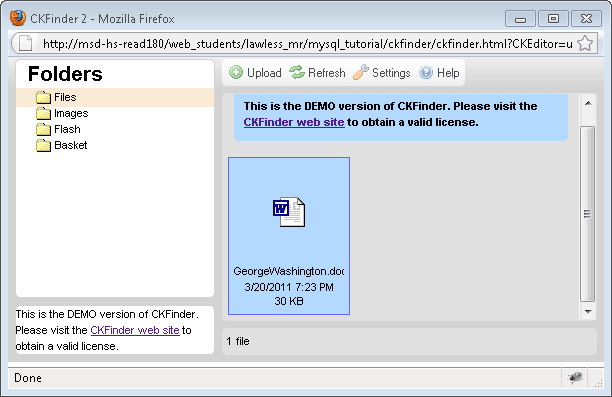
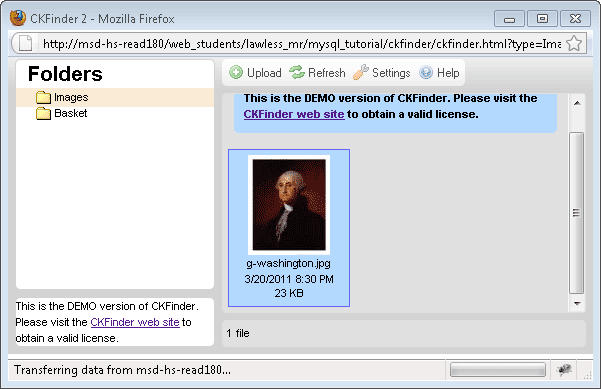
- Double-click on the thumbnail of the uploaded George Washington Word document.
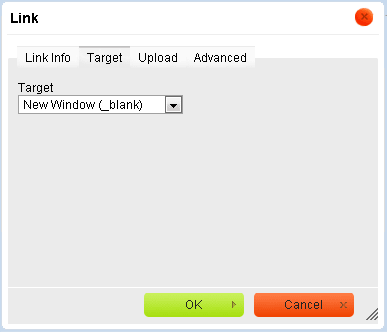
- Press the Target tab.
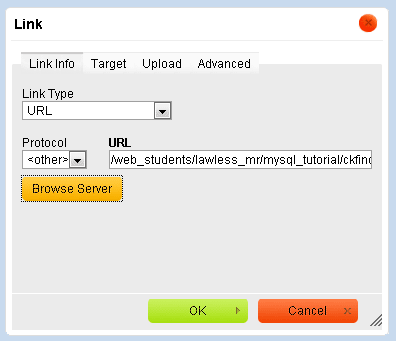
- Select New Window (_blank) from the Target drop-down list. This instructs the browser to open the file in a new window or tab when the link is selected by a web user. Press the OK button.
- Notice that the doc text is now shown as a link.
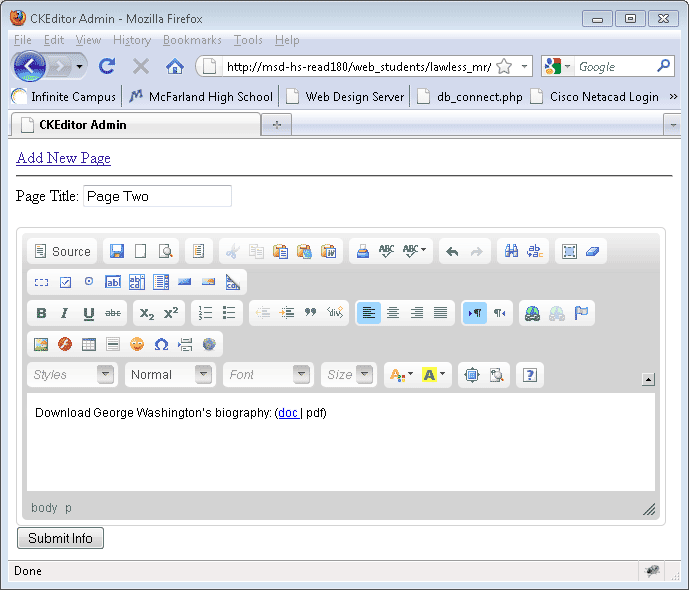
- In the text editor area select the pdf text. Repeat the steps above to upload the GeorgeWashington.pdf file to the web server and create a link to the file. When finished press the Submit Info button.
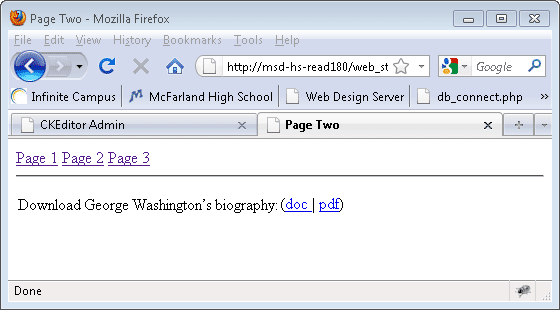
- In a browser preview cke_dynamic_page.php?id=2.
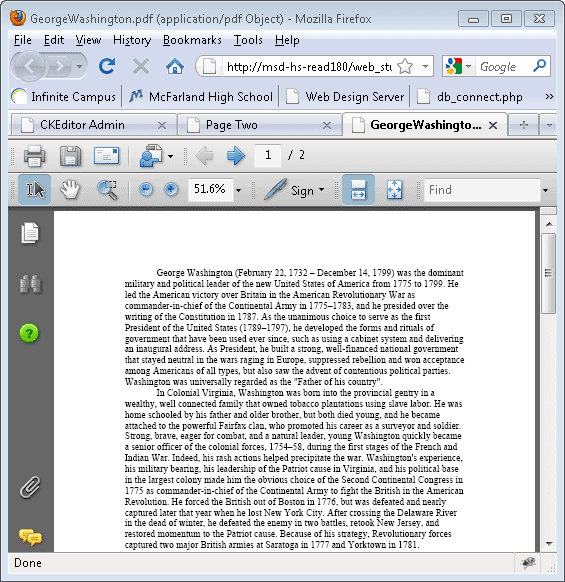
- Click on the pdf link to confirm that it is actually linked to GeorgeWashington.pdf.
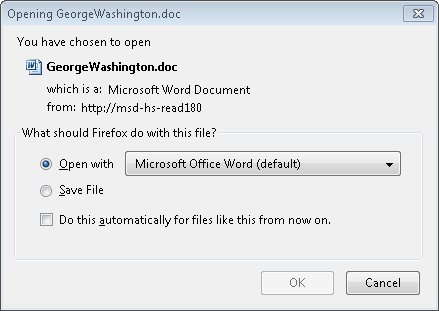
- To confirm that the link to the GeorgeWashington.doc file works click on the doc link. You may either select the Open with or Save File choice.
- Next let's add an image of George Washington to our web page. Remember, any file that you will use on your web page must be uploaded to the server before it can be used. In the text area of index.php?id=2 place the cursor at the end of the existing text and then press the Enter key.
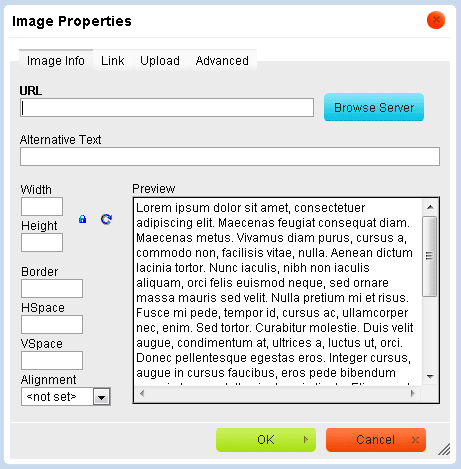
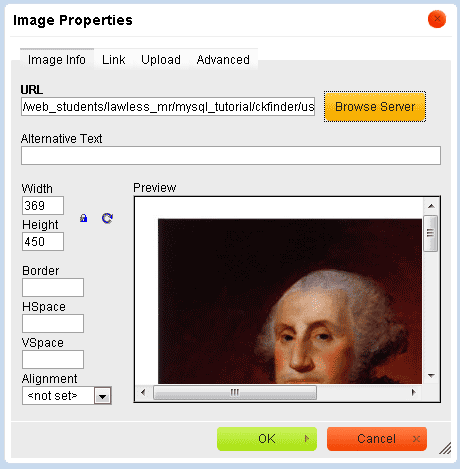
- Press the Image
 button. Press the Browse Server button. button. Press the Browse Server button.
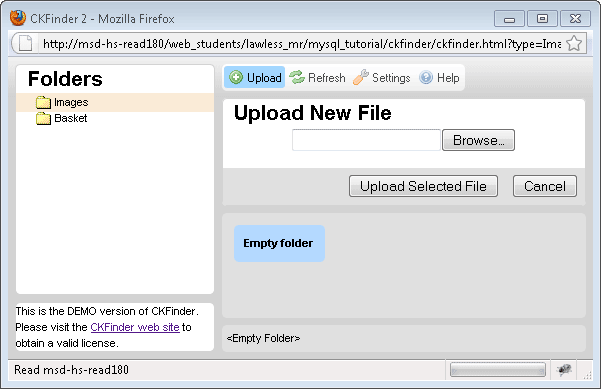
- Press the Upload button. Press the Browse button.
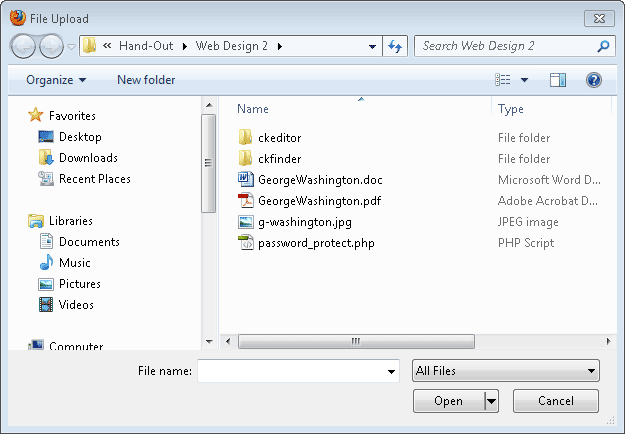
- Select the file g-washington.jpg and then press the Open button.
- Press the Upload Selected File button.
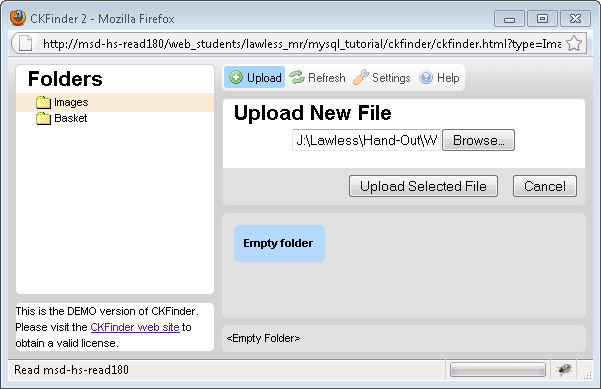
- Double-click on the thumbnail of the image.
- Press the OK button.
- Press the Submit Info button on index.php.
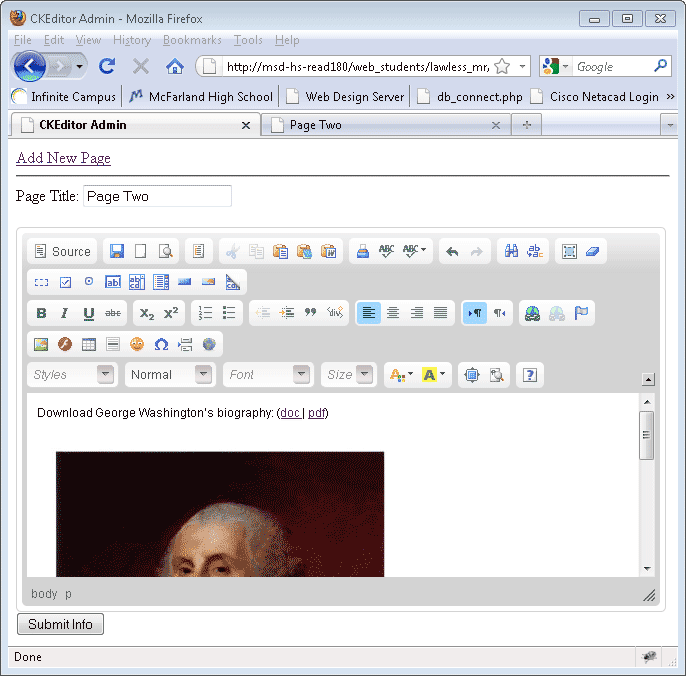
- Preview cke_dynamic_page.php?id=2 in a web browser. Confirm that the image of George Washington appears on the web page.
- Earlier in this exercise we created a security risk by changing a value from false to true. In a browser view this file:
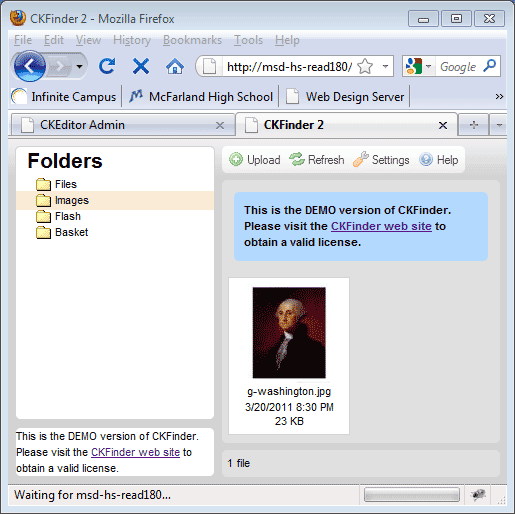
- http://hs-web-class/web_students/ENTER YOUR FOLDER NAME HERE/mysql_tutorial/ckfinder/ckfinder.html
- Notice that you were able to enter the file browser without any kind of authentication (password, user name) entry
- Follow these steps to add a layer of security to the CKFinder file browser:
- Open index.php. Immediately after the first line of code, <?php, add these two lines:
session_start();

		$_SESSION['IsAuthorized']=true;
- Save the changes to index.php and FTP it to the web server
- In the ckfinder folder Open config.php. Immediately after the first line of code, <?php, add this line:
session_start();
- In config.php at about line 34 find return true; and replace it with: (or just add the two forward slashes to the existing code)
//return false;
- In config.php at about line 28 find:
//return isset($_SESSION['IsAuthorized']) && $_SESSION['IsAuthorized'];and remove the two forward slashes so that it is uncommented and thus becomes active code.
- Save the changes to config.php and FTP it to the web server.
- In order to test the new security you will need to close your browser. This will eliminate any authorization that may already exist with your current browsing session. Open the browser again and view:
http://hs-web-class/web_students/ENTER YOUR FOLDER NAME HERE/mysql_tutorial/ckfinder/ckfinder.html
This time you will be denied access.

- To gain access to the CKFinder file browser you will first need to view index.php in the browser. To view index.php you need to enter a valid name and password. If you do not know a valid name and password you cannot view index.php and the CKFinder file browser is not activated.
Admin - CKFinder Options
In this exercise you will learn about some additional features of CKFinder
- In a web browser view your admin page index.php?id=2.
- Press the Image
 button. In the Image Properties window that opens press the Browse Server button to get to the CKFinder window. button. In the Image Properties window that opens press the Browse Server button to get to the CKFinder window.
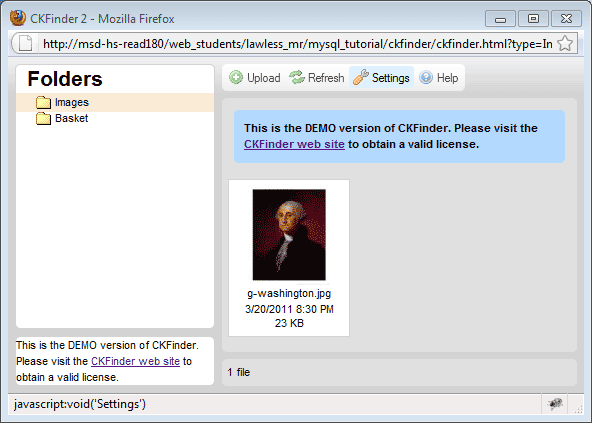
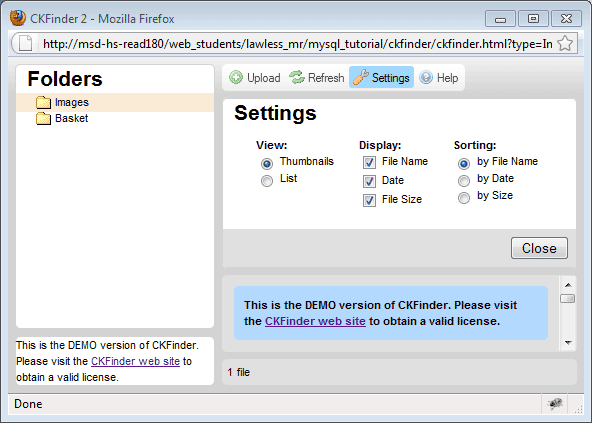
- In the CKFinder window press the Settings button. Notice that you can select the view, display options and sorting method. Press the Close button.
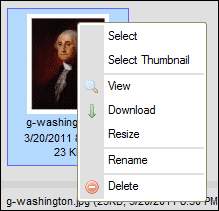
- In the CKFinder window right-click on the George Washington thumbnail. Notice that you can delete the file from the web server, rename the file and other options. Selecting the Download option would take a copy of the file and place it on your computer. The original file would remain on the web server. The Resize option lets you change the size of the thumbnail and/or change the size of the actual image.
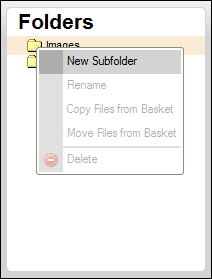
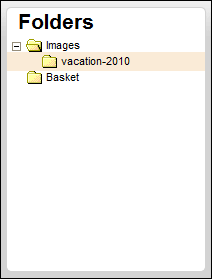
- In the CKFinder window locate the Images folder. Right-click on the folder. Select New Subfolder. Enter the name vacation-2010 and then press the OK button. Notice there is now a folder named vacation-2010 in the Images folder. You can make as many folders as is necessary to keep your images organized. And yes, you can make more folders in your new folders.
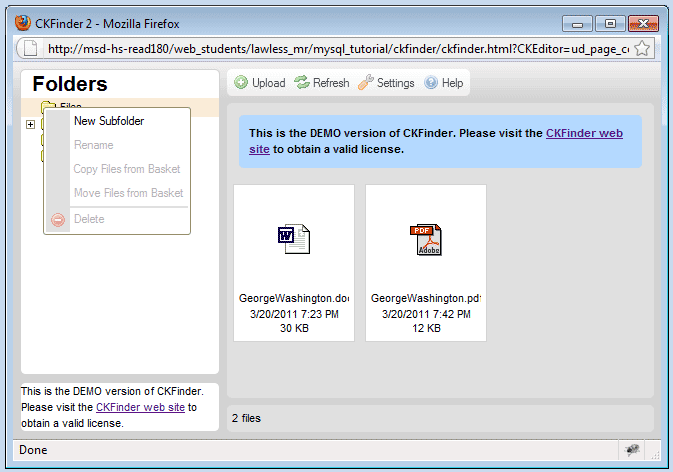
- Remember that you can also upload other types of files such as .doc and .pdf to the web server. Everything you just did in the Images folder can be done in the Files folder for those types of files.
CKEditor - Style Sheet Classes & IDs
In this exercise you will learn how to use style sheet classes and ids with CKEditor.
- In Dreamweaver create a new CSS document named cke_tutorial.css.
- Now, we will add some styles to the existing links on cke_dynamic_page.php. Paste the following code in cke_tutorial.css.
a{color:#FFFFFF;text-decoration:none;border:1px solid #000000;margin-right:20px;padding:4px;background-color:#996666;}

	a:hover{color:#996666;background-color:#FFFFFF;}

	a:visited{color:#FFFFFF;background-color:#996666;}
- Save the changes to cke_tutorial.css and FTP it to the mysql_tutorial folder on the web server.
- In Dreamweaver open cke_dynamic_page.php. So that cke_dynamic_page.php will be linked to the style sheet named cke_tutorial.css add the following code into the <head> section.
<link href="cke_tutorial.css" rel="stylesheet" type="text/css" />
- Save the changes to cke_dynamic_page.php and FTP it into the mysql_tutorial folder on the web server.
- In a browser preview cke_dynamic_page.php?id=2. Confirm that all of the links are displaying the new styles.
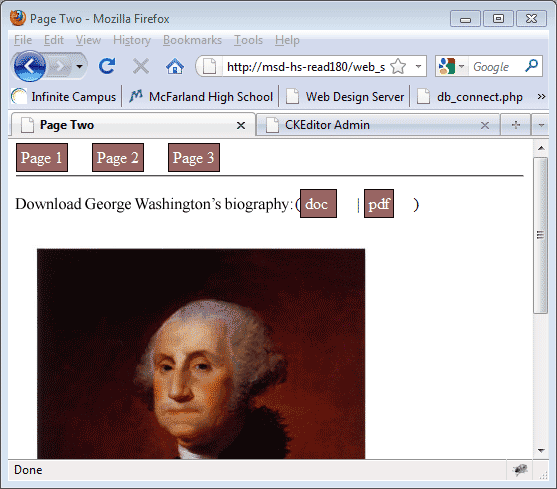
- The link styles create a rather appealing look for the menu links to Page 1, Page 2 and Page 3. However the links for doc and pdf do not look appropriate. In order to isolate these links from the menu links we will add more styles in our style sheet and then in CKEditor we will edit our links so that they follow our new rules.
- Add the following styles to cke_tutorial.css
a.body_link{color:#CC9900;text-decoration:none;border:none;margin-right:0;padding:0;background-color:transparent;}

		a.body_link:hover{text-decoration:underline;}

		a.body_link:visited{color:#CC9900;}
- Save the changes to cke_tutorial.css and FTP it to the mysql_tutorial folder on the web server
- In a browser view index.php?id=2. Right-click on the doc link and choose Edit Link.
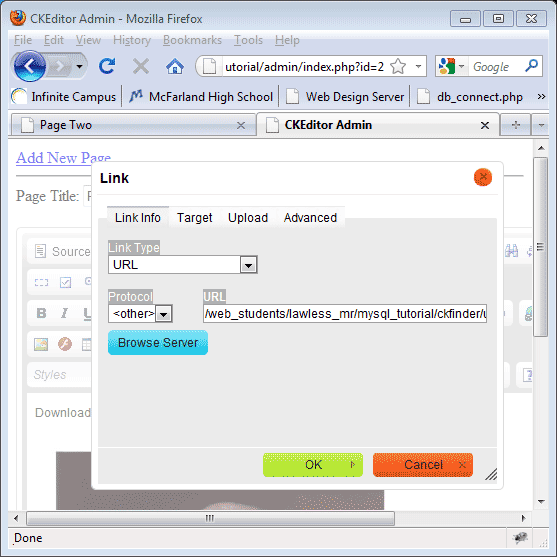
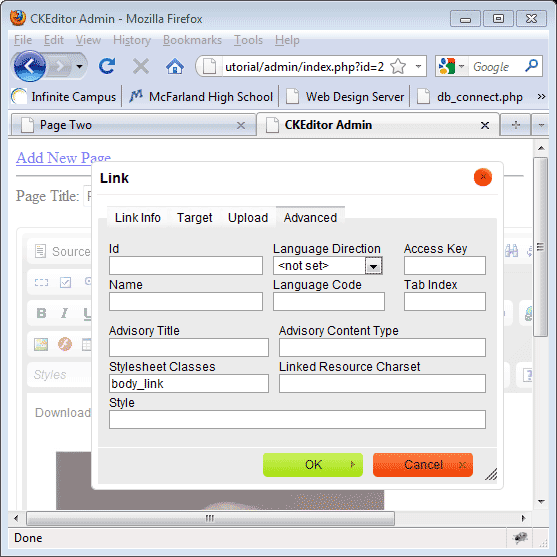
- Select the Advanced tab. Enter body_link in the Stylesheet Classes field. Press the OK button.
- Right-click on the pdf link and repeat the steps applied to the doc link. Press the Submit Info button.
- Preview cke_dynamic_page.php?id=2 in a browser. Confirm that the doc and pdf links now use the new styles.

CKEditor - Options Using Config.js
In this exercise you will learn how to make changes to the standard CKEditor configuration. For example you can change the width, height, color and many other options.
Follow the directions in the steps below to make changes to the default appearance and function of the CKEditor text editor. A complete list of available options can be found at: http://docs.cksource.com/ckeditor_api/symbols/CKEDITOR.config.html.
There is a file in the ckeditor folder named config.js. Config is short for configuration. Any code in the configuration file will alter the default configuration of the CKEditor text editors you place on your web pages.
- In Dreamweaver open the ckeditor folder. Open the file named config.js. Remove the following code:
// Define changes to default configuration here. For example:

	// config.language = 'fr';

	// config.uiColor = '#AADC6E';
and replace it with:
config.scayt_autoStartup = true;The letters scayt come from SpellCheckAsYouType. The code added above turns on the spell check function.
- Save the changes to config.js and FTP it into the ckeditor folder on the web server. CAUTION: Do not accidentally place it in the ckfinder folder. It also has a config.js file and it will be overwritten.
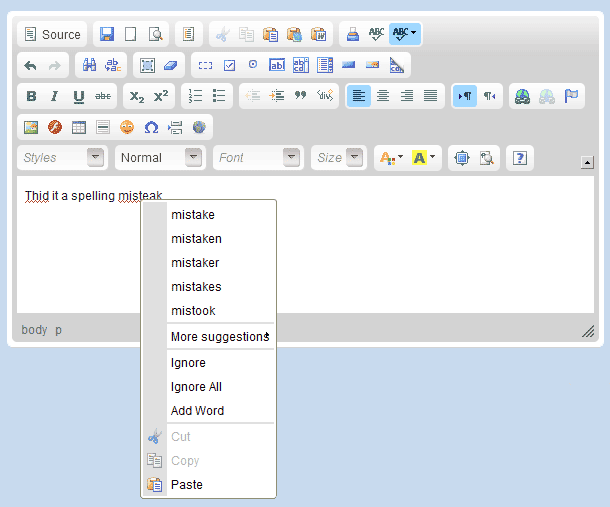
- In a browser preview index.php from the admin folder. Type in a few words that include spelling errors. Notice the red squiggly underline indicating an error. Right-clicking on a misspelled word opens a list of spelling options.
- In config.js add the following line of code after the previous line of code we added:
config.uiColor = '#AADC6E';
- Save the changes to config.js and FTP it into the ckeditor folder on the web server.
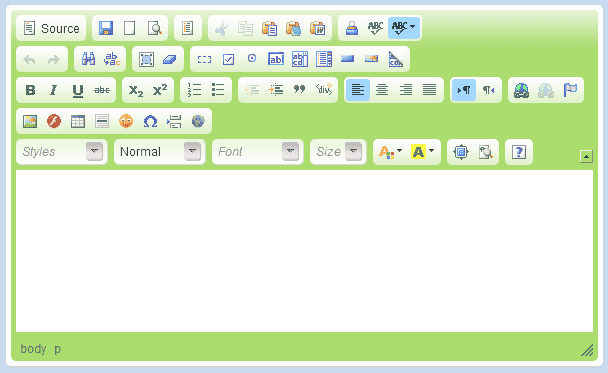
- Preview index.php in a browser. Confirm that the ckeditor instance has a new color scheme.
- In config.js add the following lines of code after the previous line of code we added:
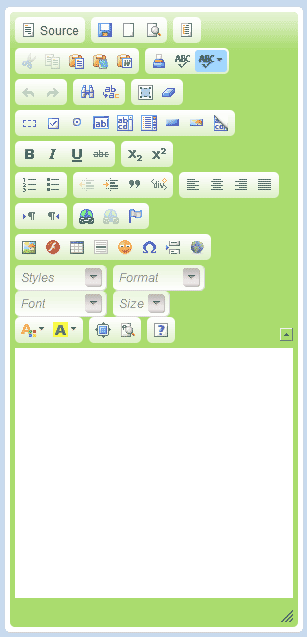
config.width = 300;

	config.height = 250;
- Save the changes to config.js and FTP it into the ckeditor folder on the web server.
- Preview index.php in a browser. Confirm that the ckeditor instance has a new width and height.
- A nice feature of CKEditor is the ability to modify the toolbar. In config.js add the following block of code after the previous lines of code we added:
config.toolbar = 'Basic';

	config.toolbar_Basic =

	[

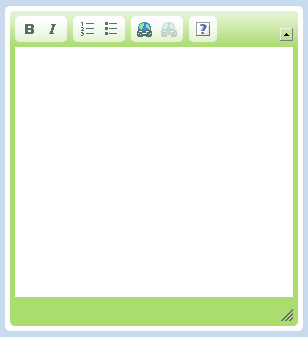
	    ['Bold', 'Italic', '-', 'NumberedList', 'BulletedList', '-', 'Link', 'Unlink','-','About']

	];
This code defines a new toolbar we named Basic. Then it lists the buttons that will be included in our Basic toolbar. By default the toolbar is set to Full. The Full toolbar includes all of the buttons.
- Save the changes to config.js and FTP it into the ckeditor folder on the web server.
- Preview index.php in a browser. Confirm that the ckeditor instance has a new toolbar. Compare the code we pasted into config.js with the set of buttons that are in our new toolbar.
- In a browser view index.php?id=2. Notice that the toolbar and editor size would not be appropriate for this admin page. In the next lesson you will learn how to customize individual instances of the CKEditor text editor.
hr />
CKEditor - Options Embedded
Often admin pages for a web site will have a need for more than one CKEditor instance. Each of these instances may require differing versions of toolbars and size. In the last lesson you saw how making changes to config.js altered the appearance of every instance of the CKEditor text editor. In this following exercise you will learn how to modify config.js and embed code on admin web pages that produces customized individual instances of the CKEditor text editor.
- In the ckeditor folder open the file config.js and add the following code: (Notice: the break between 'Italic' and 'Strike' is only there due to size restricttions of this tutorials web page.)

- Save the changes to config.js and FTP the file into the ckeditor folder on the web server.
- In Dreamweaver create a new PHP file named ckeditor_options.php in the admin folder.
- Delete all of the existing code in ckeditor_options.php and replace it with the following:
<?php

	session_start();

	include('password_protect.php');

	$_SESSION
[
'IsAuthorized'
]
=true;

	ini_set('display_errors', 1);

	?>

	<!DOCTYPE HTML PUBLIC "-//W3C//DTD HTML 4.01//EN" "http://www.w3.org/TR/html4/strict.dtd">

	<html>

	<head>

	<meta http-equiv="Content-Type" content="text/html; charset=utf-8">

	<script type="text/javascript" src="../ckeditor/ckeditor.js"></script>

	<script type="text/javascript" src="../ckfinder/ckfinder.js"></script>

	<title>CKEditor Options Embeded</title>

	</head>

	<body>

	<form action="ckeditor_options.php" method="post">

	<label>Article Title: <textarea id="article_title" name="article_title"></textarea></label>

	<script type="text/javascript">

	var editor = CKEDITOR.replace( 'article_title',

	{

	toolbar : 'ArticleTitle',

	height : 25,

	width : 600

	});

	CKFinder.setupCKEditor( editor, '../ckfinder/' );

	</script>

	</form>

	</body>

	</html>
- Save the changes to ckeditor_options.php and FTP it to the admin folder on the web server. Preview ckeditor_options.php in a browser. Confirm that the CKEditor instance is using the ArticleTitle toolbar.
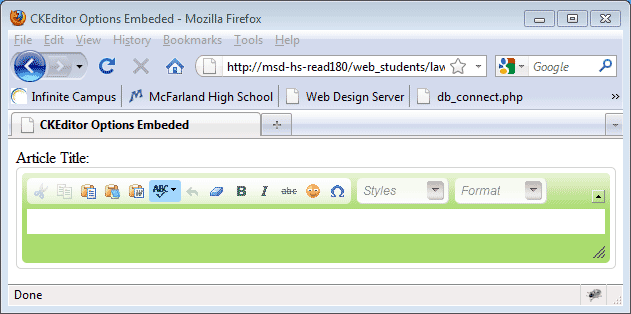
- Let's view the last code in more detail:
<label>Article Title: <textarea id="article_title" name="article_title"></textarea></label>This code creates a text area named article_title.
var editor = CKEDITOR.replace( 'article_title',

	{

	toolbar : 'ArticleTitle',

	height : 25,

	width : 600

	});
This code replaces the text area named ArticleTitle with an instance of the CKEditor text editor. The toolbar to be used is set to 'ArticleTitle' the height to 25 (pixels is the default unit of measure), and the width is set to 600 pixels.
- Imagine that our admin page will need a text editor that allows us to upload an image for use on a page. The only required button would be the 'Image' button. In config.js let's create a new toolbar named ImageOnly. Paste the following code into config.js:

- Now let's create an instance of CKEditor on ckeditor_options.php that uses the ImageOnly toolbar and includes a few other options just for learning purposes. In ckeditor_options.php add the following code just after the previous CKEditor instance:
<p> <br /></p>
<label>Article Image: <textarea id="article_image" name="article_image"></textarea></label>
<script type="text/javascript">
var editor = CKEDITOR.replace( 'article_image',
{
toolbar : 'ImageOnly',
resize_enabled : false,
toolbarCanCollapse : false,
uiColor : '#003773',
height : 200,
width : 300
});
CKFinder.setupCKEditor( editor, '../ckfinder/' );
</script>
- Save the changes to ckeditor_options.php and FTP it into the admin folder on the web server. Preview the changes in a browser. Confirm that the editor is using the ImageOnly toolbar, the resize handle has been eliminated, the toolbar collapse button has been eliminated, the uiColor (user interface Color) has been changed to a shade of blue, the height is 200 px and the width is 300px.
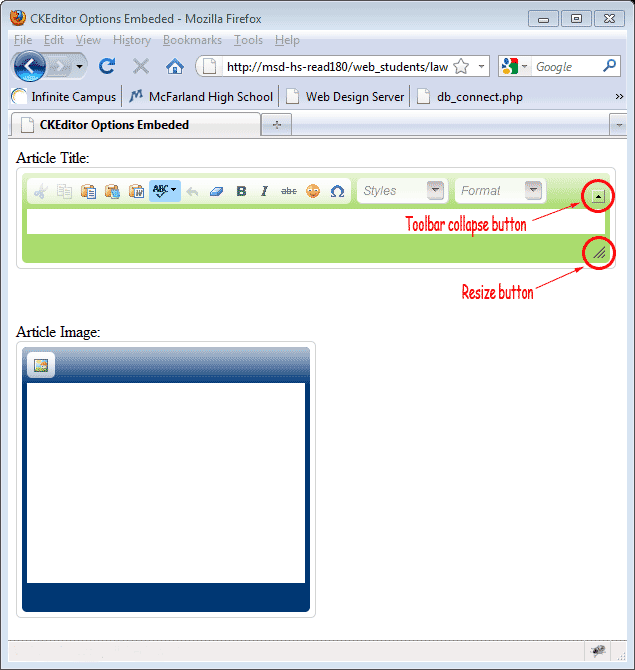
- The 'Full" toolbar has a lot of buttons, many of which you may not need. Below is the code for the "Full" toolbar. You can use pieces of this code to build your custom toolbar.
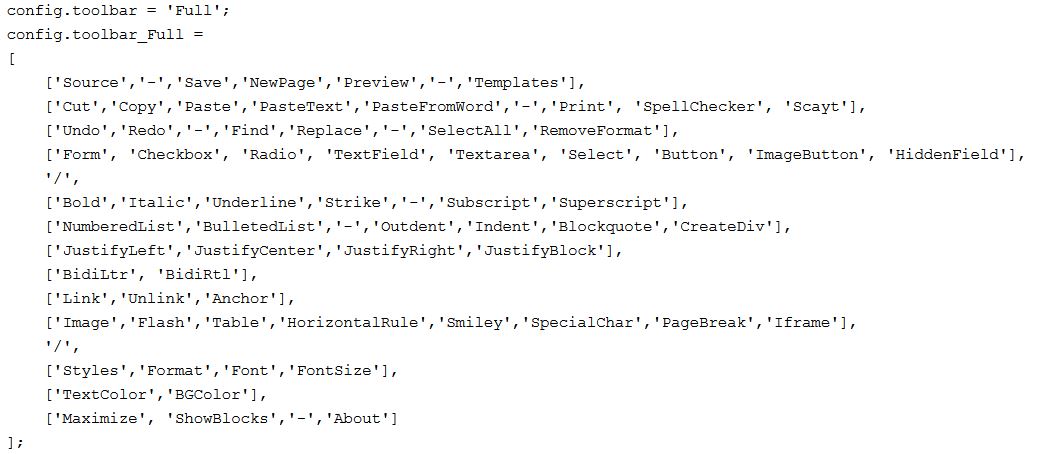
- To see a complete list of the CKEditor options go to: http://docs.cksource.com/ckeditor_api/symbols/CKEDITOR.config.html. Notice: The options are shown in the form that is used on config.js. For instance, the width example is shown as config.width = 850 but to change the width using embedded code on an admin page you would need to use the format width:850 to achieve the same results.
|
|
|


