Introduction to JavaScript

 What is JavaScript? What is JavaScript?
JavaScript is:
- designed to add interactivity to HTML pages
- a scripting language (lightweight programming language)
- usually embedded directly into HTML pages
- is free for anyone to use
Are Java and JavaScript the same?
- No, Java and JavaScript are two completely different languages that just happen to have similar names!
What can a JavaScript do?
- JavaScript gives HTML designers a programming tool. Almost anyone can put small "snippets" of code into their HTML pages
- JavaScript can put dynamic (vs only static) text into an HTML page - A JavaScript statement like the code shown below can write the contents of a variable into heading 1 tags on an HTML page
document.write("
" + name + "
")
- JavaScript can react to events like when a page has finished loading or when a user clicks on an HTML element
- JavaScript can read and write HTML elements - A JavaScript can read and change the content of an HTML element
- JavaScript can be used to validate form data before it is submitted to a server. This saves the server from extra processing
- JavaScript can be used to detect the visitor's browser
- JavaScript can be used to create cookies that can be used to store and retrieve information on the visitor's computer
JavaScript Tutorial - Setting Up a Site in Dreamweaver
- Before getting started there will need to be a folder created that will hold the tutorial site. Navigate to your I: drive. If you do not already have a folder for Web Design 2 create one now (please remember that it is a good idea to exclude spaces in the name of a folder. I would suggest using Web_Design2 for the name). Open Web_Design2 and inside it create a folder named javascript_tutorial. Open the javascript_tutorial folder and create a folder named images.
- Open Dreamweaver. (In truth, the steps completed previously where you created the folders in your I: drive could also be done through Dreamweaver when you create a new site. I find it easier to create the folders first and then use Dreamweaver for the rest of the site work)
- In Dreamweaver start a new project named JavaScript Tutorial. Press the Next button.
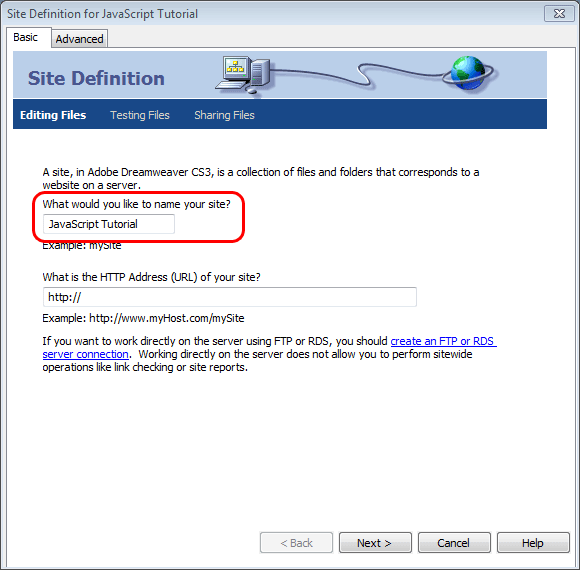
- Select the option of No, I do not want to use a server technology. Press Next.
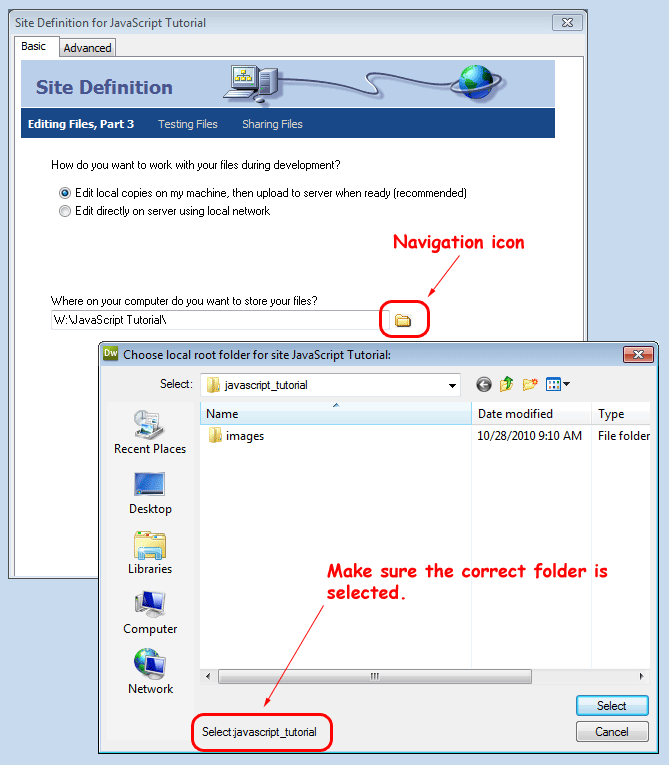
- Click on the navigation icon (looks like a folder) and navigate to the folder you created earlier for this site. press the Select button after you have confirmed that the computer will select the correct folder. (CAUTION: there is a glitch that may cause the computer to select a folder that is up one level. If that happens you will need to open the images folder of the site and then press the Select button) Press the Next button.
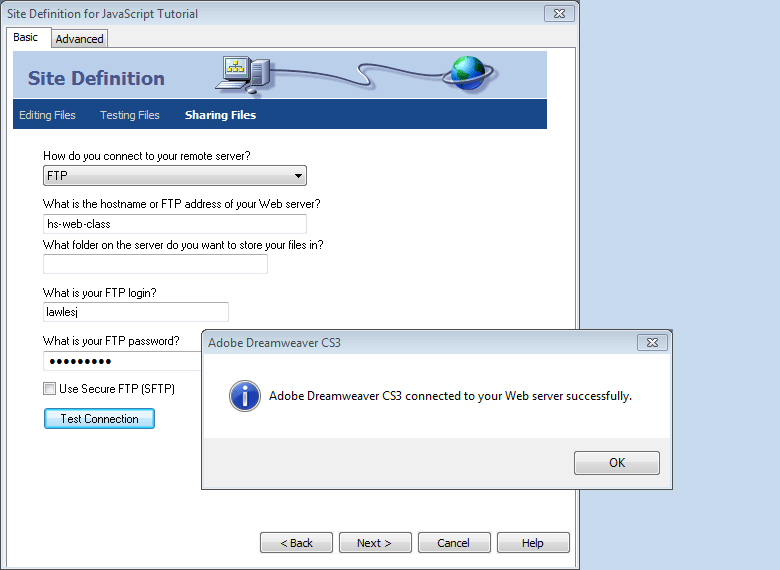
- In the How do you connect to your remote server? drop-down select FTP. Enter hs-web-class for the hostname. Enter your school login name and password where indicated. Press the Test Connection button. If you have entered everything correctly you will see a message confirming your entries. Press the Next button.
- Select the No, do not enable check in and check out. option. Press Next.
- Review the site summary to make sure everything is correct. Press the Done button.
- From the File menu select New. Choose HTML for the Page Type. Select XHTML 1.0 Strict for the DocType. Press the Create button.
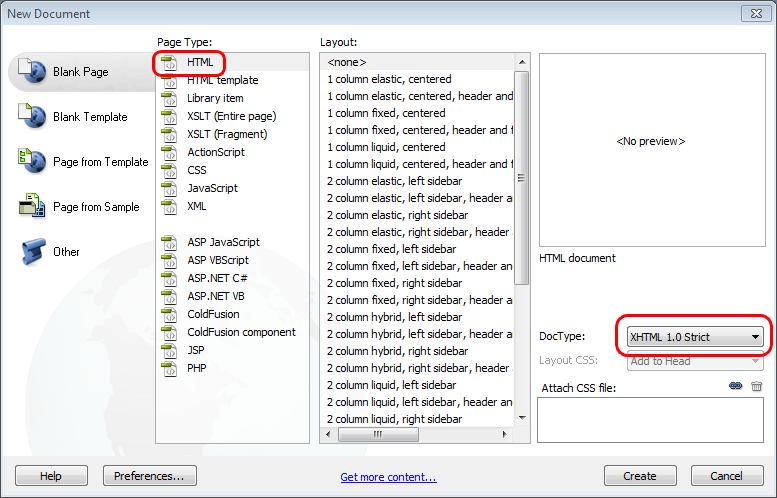
- Save the file as index.html.
JavaScript Tutorial - Your First Program
- Press the Code button to view the html code of index.html. Change the title to JavaScript Tutorial. The code will appear as:
<title>JavaScript Tutorial</title>
- Paste the following code into the body (between <body> and </body> of index.html.
<script type="text/javascript">

	document.write("I am a JavaScript programmer!");

	</script>
- Preview the page in a web browser.
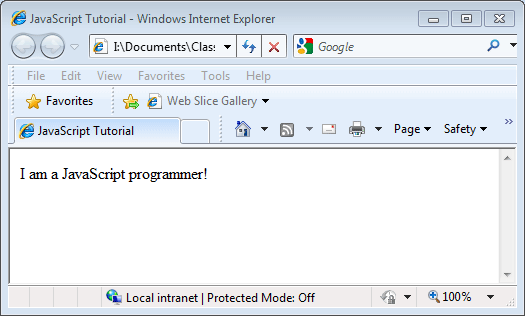
- Notice that the web page has displayed the text entered in the javascript code.
- Explanation: When inserting JavaScript into an HTML page the <script> tag is used. Inside the <script> tag we use the type attribute to define the scripting language used as javascript. The <script type="text/javascript"> and </script> tells where the JavaScript starts and ends. Any code contained between the script tags will be executed when the web page is rendered by the browser. The document.write command is a JavaScript command for writing output to a web page.
- Originally not all web browsers supported javascript. It is still possible to turn off javascript in the options settings of most browsers. When javascript is disabled it will not run any javascript code that is present. Even worse, the web browser will write the code to the web page as text. To prevent this from happening javascript coders will generally add html comment tags ( <!-- before a line of html code and --> after the code) around the javascript so it will be ignored as web page output.
<script type="text/javascript">

	<!--

	document.write("Hello World!");

	//-->

	</script>
The // found in the sample code above is used to make a comment in javascript. It is used here so --> will not be treated as code by javascript.
JavaScript Tutorial - Where to Place JavaScript
- JavaScript in the body of a page will be executed immediately while the page loads into the browser. This is not always what we want. Sometimes we want to execute a script when a page loads, or at a later event, such as when a user clicks a button. When this is the case we put the script inside a function. You will learn more about functions later.
- There are essentially three places where javascript can be added to a web page.
- In the head section (between <head> and </head>)
- In the body section (between <body> and </body>)
- In an external file
- Javascript in the <head> section:
- Javascript to be executed when it is called, or when a computer event is triggered, are placed in functions. Functions are placed in the head section. The advantage to this method is that all of the javascripts are all located in one place, and they do not clutter the html page content.
- Delete the previously added javascript in index.html.
- Paste the following code into the head section
<script type="text/javascript">

		function myFirstFunction()

		{

		 alert("This is an alert box that was called by the onload event");

		}

		</script>
- Change the body tag so that it appears as:
<body onload="myFirstFunction()">
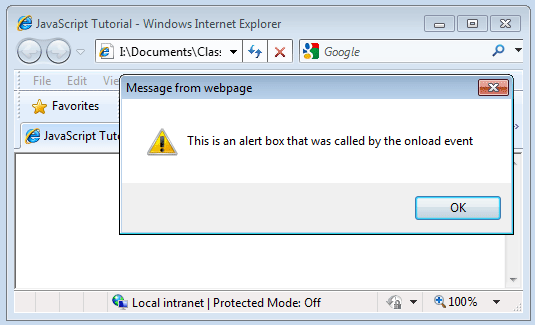
- Preview the changes in a browser. Notice the alert box. The function named myFirstFunction is called when the body of the web page loads. The function has one line of code that causes an alert box to appear.
- Javascript in the <body> section:
- If the script is not inside a function, or if the script will write page content, it should be placed in the body section.
- in the introduction to JavaScript you have already seen an example of javascript in the body section. Let's leave in the myFirstFunction function and add the following code to the body section of index.html.
<script type="text/javascript">

		document.write("This javascript message comes from the body of the web page.");

		</script>
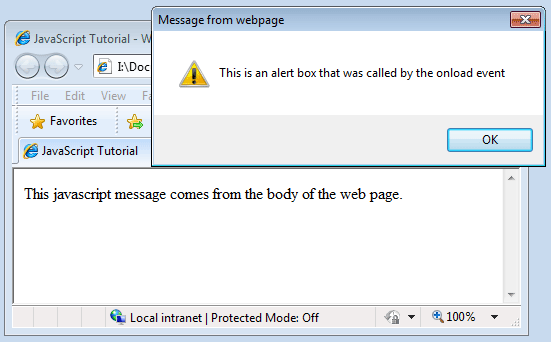
- Preview index.html in a browser. Notice how both javascript scripts are executed. There is not a limit on the number of javascript scripts that can be included on a web page.
- JavaScript in an external file:
- When you want to execute the same JavaScript on many web pages, without having to place the same code on every page, you can write JavaScript in an external file.
- All external JavaScript files must end with the .js file extension. (Alert: External JavaScript files cannot contain the <script></script> tags!)
- To use an external JavaScript file you will need to point to the .js file in the "src" attribute of the <script> tag.
- Let's try it out:
- In Dreamweaver select New from the File menu. Select JavaScript for the Page Type. Press the Create button.
- Save the new JavaScript file naming it myExternalJS.
- Paste the following function code into myExternalJS.js:
// This is my first function located on an external file.

			// It will output some text in the body of the web page

			function anotherFunction()

			{

			  document.write("This text is coming from an external javaScript file.");

			}
- Erase the JavaScript code added previously to index.html.
- Because the file index.html needs to know the location of the file myExternalJS.js paste the following code into the head section of index.html:
<script type="text/javascript" src="myExternalJS.js"></script>
- In index.html change the body tag to appear as:
<body onload="anotherFunction()">
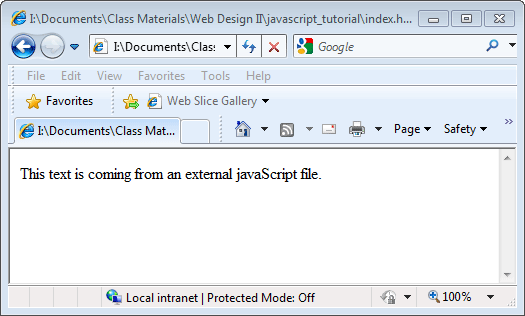
- Preview the changes in a browser. Notice that the function anotherFunction() was called by the onload event and the code located on the external file was executed.
JavaScript Tutorial - Variables
Variables are used to store information. The information can be numbers or text.
There are some rules for naming variables:
- Variable names are case sensitive (teamscore and teamScore are two different variables to JavaScript)
- Variable names must begin with a letter or the underscore character
Declaring variables. (Telling the computer that there will be variables and what their names are.)
Variables are declared by using var and then the name of the variable. For example:
var pet_name;

var totalScore;
You can also assign a value to a variable at the time of declaration (also called initializing a variable). For example:
var pet_name = "Scruffy";

var totalScore=0;
Note: Some of you may remember that when declaring variables in Java programming you had to tell the computer what type of data the variable would hold. For example if we wanted a variable that would contain a whole number we would write int num;. JavaScript does not require that we give the variable a type.
JavaScript Tutorial - Operators
The assignment operator = is used to assign values to JavaScript variables.
For example:
score=500;
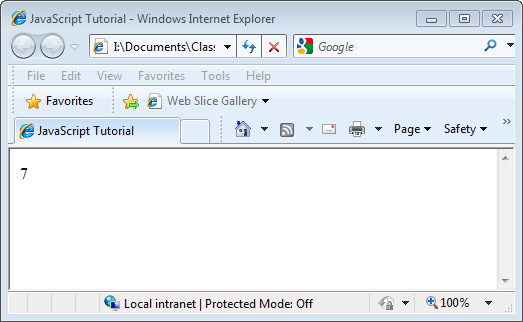
The arithmetic operator + is used to add values together. For example, copy the code below and paste it into the body of index.html. (NOTICE: remove any existing JavaScript from index.html before pasting the new code)
<script type="text/javascript">

firstValue=4;

secondValue=3;

sum=firstValue + secondValue;

document.write(sum);

//The value of sum after the execution of the code is 7

</script>
Preview the output in a browser.
JavaScript Arithmetic Operators
Arithmetic operators are used to perform arithmetic between variables and/or values.
If y is assigned the value 7, the table below explains the arithmetic operators:
| Operator |
Description |
Example |
Result |
| + |
Addition |
x=y+2 |
x=9 |
| - |
Subtraction |
x=y-2 |
x=5 |
| * |
Multiplication |
x=y*2 |
x=14 |
| / |
Division |
x=y/2 |
x=3.5 |
| % |
Modulus (division remainder) |
x=y%2 |
x=1 |
| ++ |
Increment |
x=++y |
x=8 |
| -- |
Decrement |
x=--y |
x=6 |
JavaScript Assignment Operators
Assignment operators are used to assign values to JavaScript variables.
Given that x=12 and y=6, the table below explains the assignment operators:
| Operator |
Example |
Same As |
Result |
| = |
x=y |
|
x=6 |
| += |
x+=y |
x=x+y |
x=18 |
| -= |
x-=y |
x=x-y |
x=6 |
| *= |
x*=y |
x=x*y |
x=72 |
| /= |
x/=y |
x=x/y |
x=2 |
| %= |
x%=y |
x=x%y |
x=0 |
The + Operator Used on Strings
The + operator can also be used to add string variables or text values together.
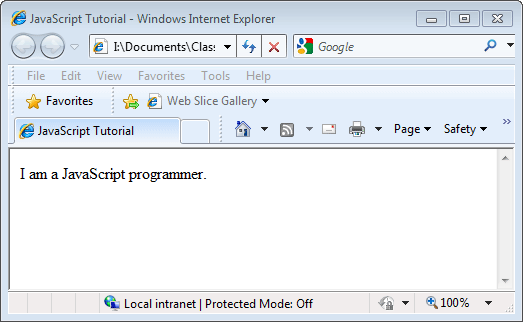
To add two or more string variables together, use the + operator. For example, copy the code below and paste it into the body of index.html. (NOTICE: remove any existing JavaScript from index.html before pasting the new code)
<script type="text/javascript">

text1="I am a";

text2="JavaScript programmer.";

text3=text1+" "+text2;//notice that variables are separated from literals by the + sign.

document.write(text3);// I did this because I wanted to add a space between the two sections of text.

</script>
Preview the code output in a browser.
JavaScript Tutorial - Making Comparisons, Logical & Conditional Operators
Comparison operators and logical operators are used to determine whether something is true or false. For example you could compare the score needed to win a game with the score of a player. If the player has enough points to win then the necessary condition to win has been met and the comparison would be evaluated as true.
Comparison Operators
Comparison operators are used in logical statements (if...then) to determine equality or difference between variables or values.
If x=7, the table below explains the comparison operators:
| Operator |
Description |
Example |
| == |
is equal to |
x==8 is false |
| === |
is exactly equal to (value and type) |
x===7 is true
x==="7" is false |
| != |
is not equal |
x!=9 is true |
| > |
is greater than |
x>4 is false |
| < |
is less than |
x<12 is true |
| >= |
is greater than or equal to |
x>=14 is false |
| <= |
is less than or equal to |
x<=9 is true |
Logical Operators
Logical operators are used to determines whether the logic between variables or values evaluates to true or false.
If x=12 and y=6, the table below explains the logical operators:
| Operator |
Description |
Example |
| && |
and |
(x < 14 && y > 3) is true |
| || |
or |
(x==4 || y==4) is false |
| ! |
not |
!(x==y) is true |
Conditional Operator
JavaScript also has an interesting conditional operator that assigns a value to a variable based on some condition being true or false.
General syntax:
variablename=(condition)?value1:value2
For example
var person="Bob";

position=(person=="Jim")?"You are the king ":"You are a loyal subject to the king";

document.write(position);
If the variable person has the value of "Jim", then the variable position will be assigned the value "You are the king of programming! " else it will be assigned "You are a loyal subject of the programming king.".
|
JavaScript Tutorial - Conditional Statements
Conditional Statements
Often when writing code, you want to execute different actions for different decisions. Conditional statements are used to do this.
JavaScript has the following conditional statements:
- if statement - used to execute a section of code only if a given condition is true
- if...else statement - used to execute a section of code if the given condition is true and another section of code if the given condition is false
- if...else if....else statement - used to select only one of a number of blocks of code to be executed
- switch statement - an alternative to the if statement used to select one of a number of blocks of code to be executed
Using the if Statement
General Syntax:
if (condition)

{

  code to be executed if the given condition is evaluated as true

}
NOTE: if the statement is not true then no code will be executed.
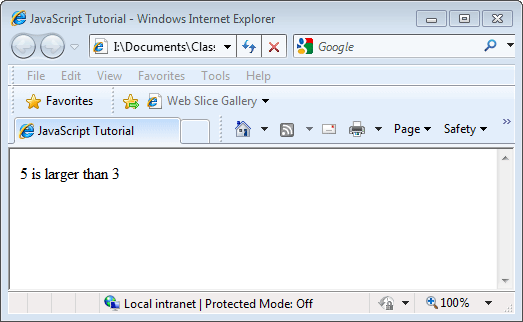
For example copy the code below and paste it into the body of index.html. (Erase any previous JavaScript in index.html)
<script type="text/javascript">

num1=5;

num2=3;

if(num1>num2)

  document.write(num1+" is larger than "+num2);

</script>
Preview the output in a browser.
JavaScript Tutorial - The if...else Statement
Using the if...else Statement
General Syntax:
if (condition)

{

  code to be executed if condition is true

}

else

{

  code to be executed if condition is not true

}
For example copy the code below and paste it into the body of index.html. (Erase any previous JavaScript in index.html)
<script type="text/javascript">

num1=2;

num2=3;

if(num1>num2)

  document.write(num1+" is larger than "+num2);

else

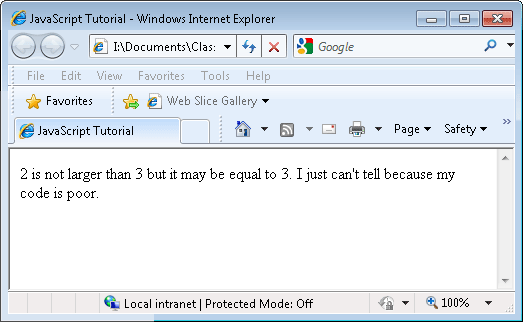
  document.write(num1+" is not larger than "+num2+" but it may be equal to "+num2+". I just can't tell because my code is poor.");

</script>
Preview the output in a browser.
JavaScript Tutorial - the if...else if...else Statement
Using the if..else if..else Statement
General Syntax:
if (condition1)

{

  code to be executed if condition1 is true

}

else if (condition2)

{

  code to be executed if condition2 is true

}

else

{

  code to be executed if condition1 and condition2 are not true

}
For example copy the code below and paste it into the body of index.html. (Erase any previous JavaScript in index.html)
<script type="text/javascript">

num1=2;

num2=3;

if(num1>num2)

  document.write(num1+" is larger than "+num2);

else if(num1<num2)

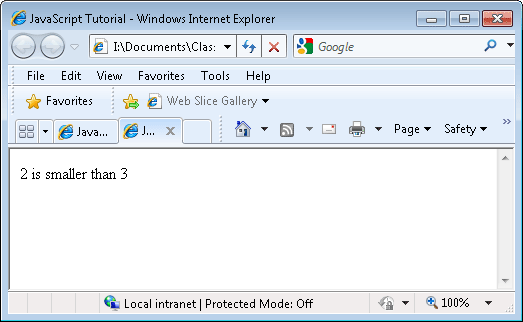
  document.write(num1+" is smaller than "+num2);

else

  document.write(num1+" is equal to "+num2);

</script>
Preview the output in a browser.
JavaScript Tutorial - the switch Statement
Using the switch Statement
General Syntax:
switch(n)

{

case 1:

   execute code block 1

   break;

case 2:

   execute code block 2

   break;

default:

  code to be executed if n is different from case 1 and 2

}
For example copy the code below and paste it into the body of index.html. (Erase any previous JavaScript in index.html)
<script type="text/javascript">

//Sunday=0, Monday=1, Tuesday=2, etc.

var d=new Date(); //Date() function retrieves the current date and time

day=d.getDay(); // getDay() is a method that returns the name of

switch (day)

{

case 1:

  document.write("Today is Monday. I will go to work.");

  break;

case 2:

  document.write("Today is Tuesday. I will go to work.");

  break;

case 3:

  document.write("Today is Wednesday. I will go to work.");

  break;

case 4:

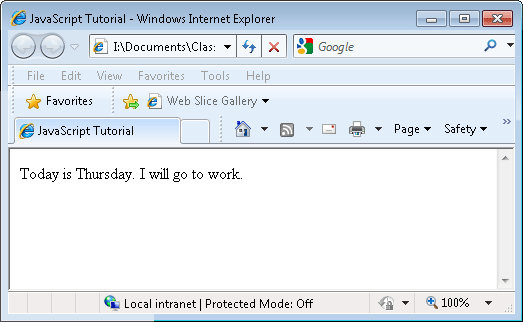
  document.write("Today is Thursday. I will go to work.");

  break;

case 5:

  document.write("Today is Friday. I will go to work.");

  break;

default:

document.write("It is the weekend. I won't be going to work.");

}

</script>
Preview the output in a browser. (output will vary depending on the day the code is executed)
|
|
|
JavaScript Tutorial - Popup Boxes - Alert
Using an Alert Box
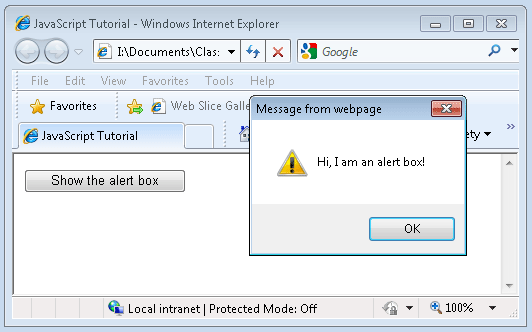
An alert box is used when you have information that must get through to the user. When an alert box pops up the user will have to press an OK button to continue.
General Syntax
alert("The message for the user");
For an example copy the code below and paste it into the head section of index.html. (Erase any previous JavaScript in index.html)
<script type="text/javascript">

function show_alert_box()

  {

   alert("Hi, I am an alert box!");

  }

</script>
Copy the following code and paste it into the body section of index.html.
<input type="button" onclick="show_alert_box()" value="Show the alert box" />
Preview the output in a browser.
JavaScript Tutorial - the Confirm Box
Using a Confirm Box
General Syntax
confirm("The message that needs to be confirmed.");
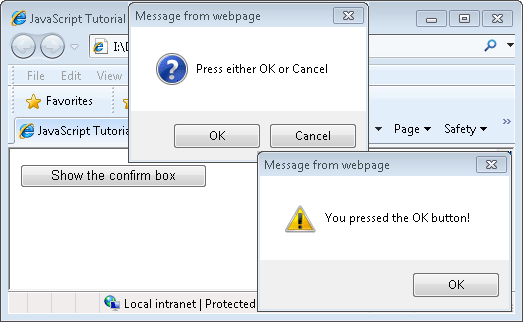
The confirm box is used when you want the user to accept something. When a confirm box pops up the user will have to press either the OK button or the Cancel button to continue.
For an example copy the code below and paste it into the head of index.html. (Erase any previous JavaScript in index.html)
<script type="text/javascript">

function show_confirm_box()

{

  var response;

  response=confirm("Press either OK or Cancel");

  if (response==true)

  {

   alert("You pressed the OK button!");

  }

  else

  {

   alert("You pressed the Cancel button!");

  }

}

</script>
Copy the following code and paste it into the body of index.html.
<input type="button" onclick="show_confirm_box()" value="Show the confirm box" />
Preview the output in a browser.
JavaScript Tutorial - the Prompt Box
Using a Prompt Box
A prompt box is used when you want the user to enter a value. When a prompt box pops up, the user will need to press either the OK button or the Cancel button to continue. If the user presses the OK button then the entered value is returned to the function. If the Cancel button was pressed null (empty, nothing) is returned to the function.
General Syntax
prompt("The message for the user","the default value in the text field of the prompt box");
For an example copy the code below and paste it into the head of index.html. (Erase any previous JavaScript in index.html)
<script type="text/javascript">

function show_prompt_box()

{

  var fav_color;

  fav_color=prompt("Please enter your favorite color","Enter your favorite color here.");

  if (fav_color!=null && fav_color!="")//if the user did not press Cancel and the text field is not empty

  {

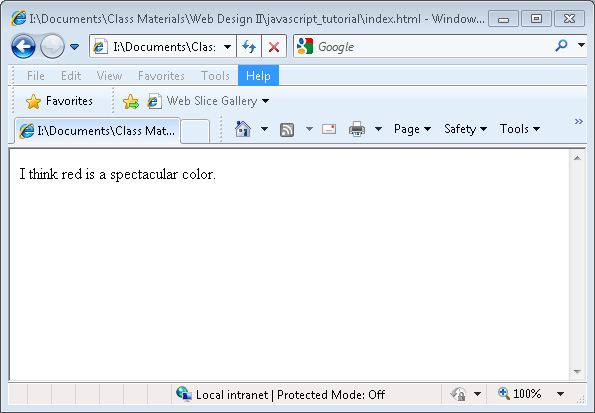
   document.write("I think " + fav_color+ " is a spectacular color.");

  }

}

</script>
Add the following line of code into the body:
<input type="button" onclick="show_prompt_box()" value="Show the prompt box" />
Preview the output in a browser.
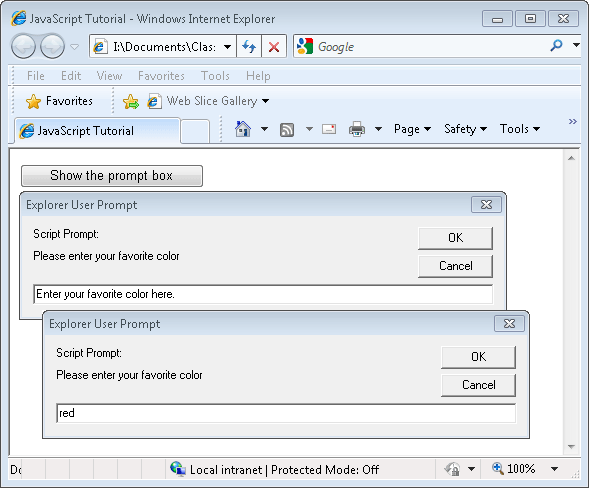
Entering red for the favorite color and then pressing the OK button results in:
|
JavaScript Tutorial - Functions
JavaScript Functions
There are times when you do not want the browser to execute a script when the page loads. Putting the JavaScript code in a function will keep the browser from executing the script when the page loads.
In general functions:
- are executed by an event (ex, a mouse clicks on a button) or by a call to the function.
- can be called from anywhere within a web page.
- can be written both in the <head> and in the <body> section of a document. However, to make sure that a function is loaded by the browser before it is called, it would be best practice to put functions in the <head> section.
General syntax:
function name_of_function(var1,var2,...etc)

{

 code the function will execute

}
Notice var1, var2, in the code above. They are variables or values passed into the function and are called parameters. The left brace { and the right brace } shows the starting point and ending point of the function.
Note: A function without parameters still needs to include the parentheses () after the function name.
For an example copy the code below and paste it into the head of index.html. (Erase any previous JavaScript in index.html)
<script type="text/javascript">

function display_message()

{

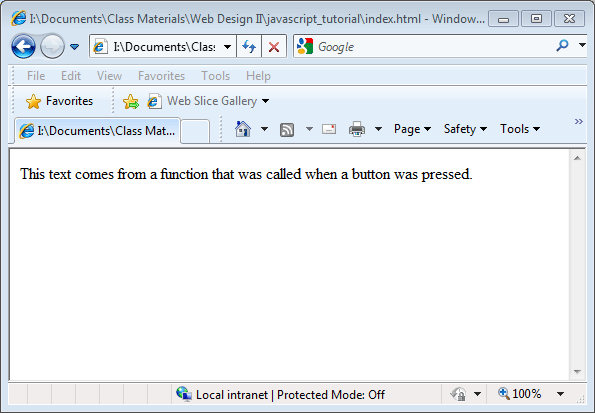
 document.write("This text comes from a function that was called when a button was pressed.");

}

</script>
Paste the following code into the body of index.html:
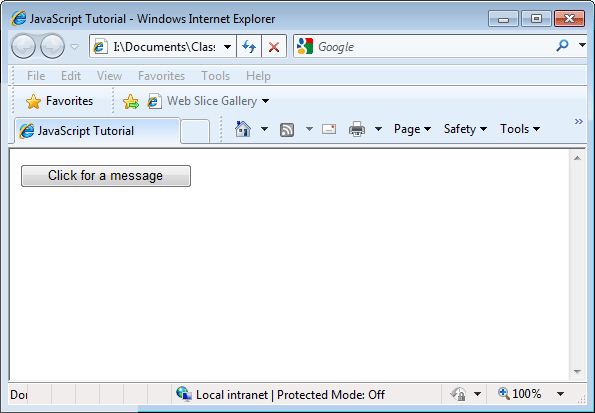
<input type="button" value="Click for a message" onclick="display_message()" />
Preview the output in a browser.
Using the Return Statement in a Function
Sometimes a function is used to calculate a result. It may be a mathematical, Boolean or text result. The data to be evaluated must be passed to the function using parameter variables. After the calculations are finished the result is sent back to wherever the function was called from using the return statement.
For an example copy the code below and paste it into the head of index.html. (Erase any previous JavaScript in index.html)
<script type="text/javascript">

function sum(x,y)

{

 var total;

 total=x+y;

 return total;

}

</script>
Paste the following script into the body of index.html:
<script type="text/javascript">

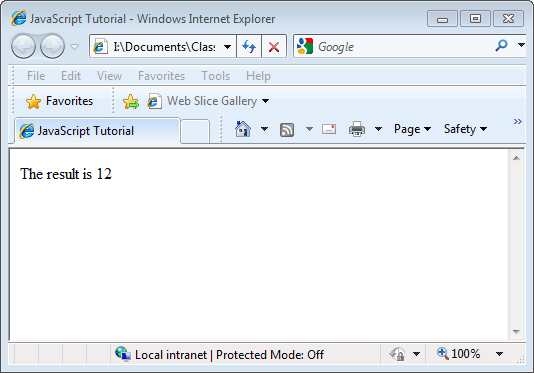
document.write("The result is " + sum(5,7));

</script>
Explanation: sum(5,7) is the call to the function named sum(). It is passing the values 5 and 7 to the function. In function sum(x,y) the x parameter variable accepts the first variable value passed to it, 5. The y parameter variable takes the value of the second number passed to it, 7. In the function sum() the locally declared variable total equals the value of x + y. The line return total sends the value of total back to where the function was called from.
Preview the output in a browser.
NOTICE: You may remember using functions in Java programming. In Java you needed to declare if the function would be void (not going to return a result of some calculation) or either int, double, String, etc if the function would not be void and include a return statement.
|
JavaScript Tutorial - Looping
Often it is necessary to repeat lines of code. Loops are used to accomplish this task. JavaScript includes for loops and while loops.
- for - loops through a section of code a specified number of times
- while - loops through a section of code while a specified condition is true and stops looping when the condition becomes false
- do...while - executes the code to be looped once before checking to see if the condition is true or false
Using The for Loop
A for loop is used when you already know how many times the script should run.
General syntax:
for (var=starting_value;var<=ending_value;var=var+increment_amount)

{

 code to be executed

}
For an example copy the code below and paste it into the body of index.html. (Erase any previous JavaScript in index.html)
<script type="text/javascript">

var i=0;

for (i=0;i<=5;i++)

{

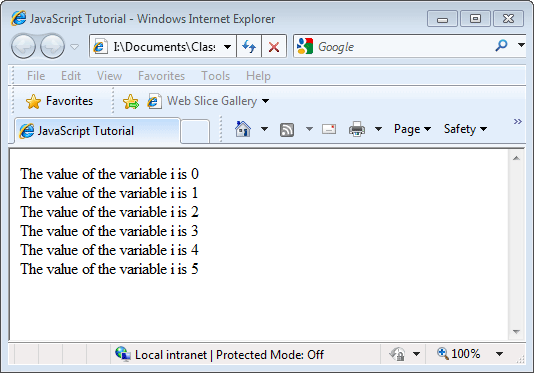
 document.write("The value of the variable i is " + i);

 document.write("<br />");

}

</script>
Preview the output in a browser.
JavaScript Tutorial - the while Loop
Using the While Loop
While loops are used when you do not know how many times the code must be repeated. The while loop will repeat the code while a condition is true. It will end looping when the condition becomes false.
General syntax:
while (var<=ending_value)

{

  code to be executed

}
For an example copy the code below and paste it into the body of index.html. (Erase any previous JavaScript in index.html)
<script type="text/javascript">

var i=0;

while (i<5)

{

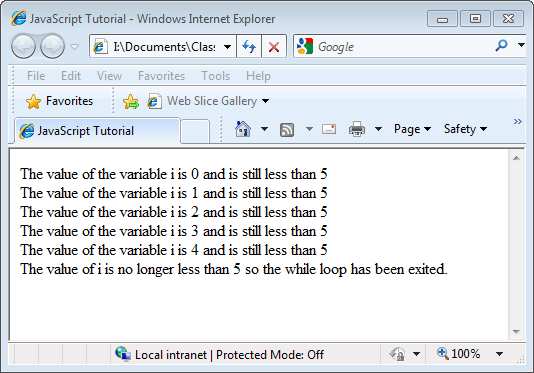
  document.write("The value of the variable i is " + i + " and is still less than 5");

  document.write("<br />");

  i++;

}

document.write("The value of i is no longer less than 5 so the while loop has been exited.");

</script>
Preview the output in a browser.
JavaScript Tutorial - the do...while Loop
Using The do...while Loop
The do...while loop is very similar to the while loop. This loop will execute the looping code once, and then it will repeat the loop as long as the specified condition is true. This is useful when you need to execute the loop at least once. For example, imagine a game where a bet must be placed by the user. A while loop is a good way to prevent cheating because you can force the computer to keep asking for a bet until a legitimate bet is placed. It would look something like: while(the bet is not legitimate) { code that asks for valid bet;} But, if the user previously in the game placed a legitimate bet the regular while loop may not let a new bet to be placed because the condition is already false. The do..while loop would not check for a valid bet until it had asked for a bet first.
General syntax:
do

{

  code to be executed by the do..while loop

}

while (var<=ending_value);
For an example copy the code below and paste it into the body of index.html. (Erase any previous JavaScript in index.html)
<script type="text/javascript">

var bet=5;

do

{

  bet=prompt("Enter a bet from 5 to 10","Place your bet. Do not include a $.");

  if(bet<5 || bet>10)

   alert("That is not a valid bet.");

}

while (bet<5 || bet >10);

document.write("Thank you for entering a valid bet of $"+bet);

</script>
Preview the output in a browser.
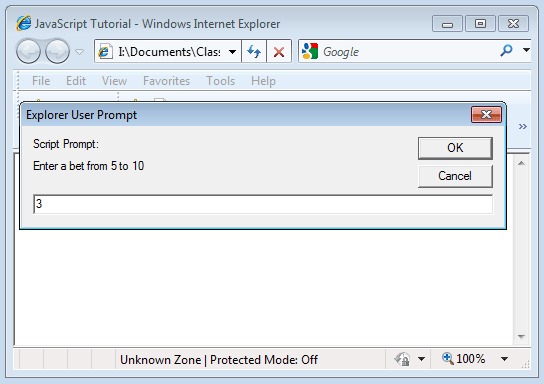
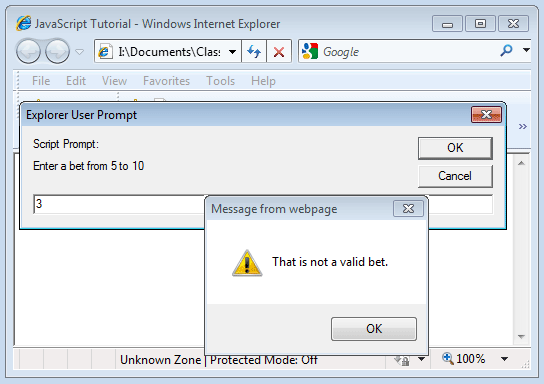
Because 3 is not a valid bet pressing the OK button when entering a value of 3 would result in:
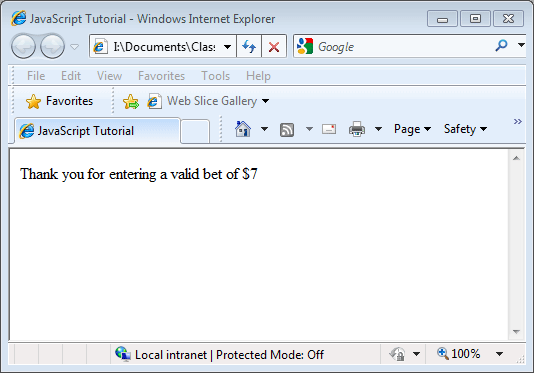
Because 7 is a valid bet pressing the OK button when entering a value of 7 would result in the condition of the loop becoming false. At this point the loop would be exited and the computer would continue executing any remaining code.
JavaScript Tutorial - the break Statement
Using the break Statement
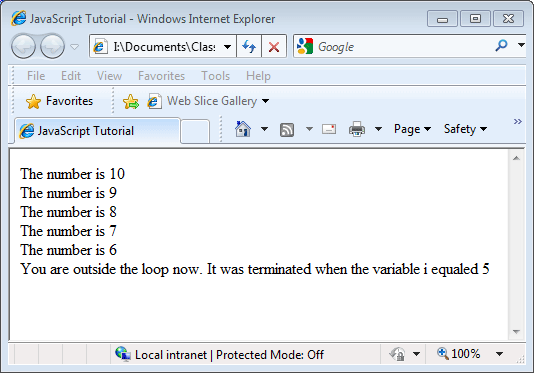
The break statement is used to stop looping before the loop would nornally stop. The break statement will terminate the loop and continue executing any code that exists after the loop.
For an example copy the code below and paste it into the body of index.html. (Erase any previous JavaScript in index.html)
<script type="text/javascript">

var i=0;

for (i=10;i>=1;i--)//normally this loop would count from 10 down to 1

{

  if (i==5)

  {

   break;

  }

  document.write("The number is " + i);

  document.write("<br />");

}

document.write("You are outside the loop now. It was terminated when the variable i equaled 5");

</script>
Preview the output in a browser.
JavaScript Tutorial - the continue Statement
Using the continue Statement
The continue statement is used to break the current loop and continue with the next value.
For an example copy the code below and paste it into the body of index.html. (Erase any previous JavaScript in index.html)
<script type="text/javascript">

var i=0

for (i=0;i<=8;i+=2)

{

  if (i==4)

  {

   continue;

  }

  document.write("The number is " + i);

  document.write("<br />");

}

</script>
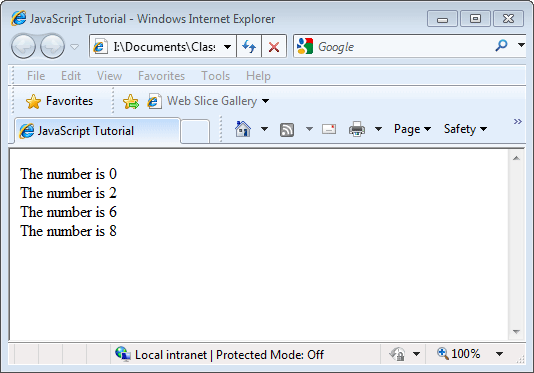
Preview the output in a browser. Notice that the value of 4 is missing because it was skipped.
JavaScript Tutorial - the for...in Statement
Using the for...in Statement
The for...in statement is used to loop through the elements of an array or through the properties of an object. This is useful when you don't know how many items are stored in an array.
General syntax:
for (variable in object)

{

  code to be executed by for..in loop

}
For an example copy the code below and paste it into the body of index.html. (Erase any previous JavaScript in index.html)
<script type="text/javascript">

var i;

var animals = new Array();

animals[0] = "lion";

animals[1] = "muskrat";

animals[2] = "dingo";

for (i in animals)

{

  document.write(animals[i] + "<br />");

}

</script>
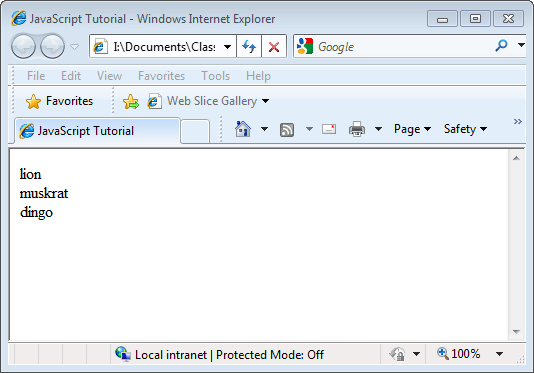
Preview the output in a browser.
|
JavaScript Tutorial - Events
Events
JavaScript can be used to create dynamic (versus static, unchanging) web pages. Events are occurrences that can be detected by JavaScript.
Every element on a web page has particular events that can trigger a JavaScript response. For example, we can use the onClick event of a button element to call a function when a user clicks on the button. Events are defined in HTML tags.
Examples of events:
- A mouse click on a web page
- A web page or an image on a web page loading
- Moving the mousing over a hot spot on the web page
- Selecting an input field of an HTML form
- The Submitting of an HTML form
- Pressing a key on the keyboard
Using Mouse Events
Mouse events are among the most commonly used events. Below is a list of the available mouse events.
| Attribute |
Value |
Description |
| onclick |
script |
Script to be run on a mouse click |
| ondblclick |
script |
Script to be run on a mouse double-click |
| onmousedown |
script |
Script to be run when mouse button is pressed |
| onmousemove |
script |
Script to be run when mouse pointer moves |
| onmouseout |
script |
Script to be run when mouse pointer moves out of an element |
| onmouseover |
script |
Script to be run when mouse pointer moves over an element |
| onmouseup |
script |
Script to be run when mouse button is released |
For an example copy the code below and paste it into the head of index.html. (Erase any previous JavaScript in index.html)
<script language="JavaScript">

//example of onclick event

function changeBGcolor(color)

{

 document.bgColor = color;

}

</script>
Paste the following code into the body of index.html. (notice that onClick is an attribute of the <a> tag)
<p><a href="#" onclick="javascript:changeBGcolor('#91b0d0')">Click for blue background.</a></p>

<p><a href="#" onclick="javascript:changeBGcolor('#f90707')">Click for red background.</a></p>

<p><a href="#" onclick="javascript:changeBGcolor('#1cf905')">Click for green background.</a></p>
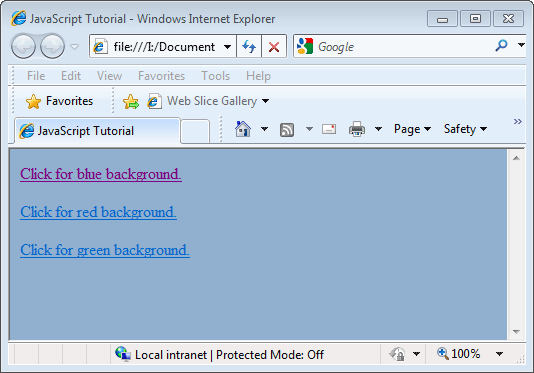
Preview the output in a browser. (in this example the link to blue was clicked)
Test a few of the other mouse events by replacing the onclick attribute with some of the other attributes.
Using Keyboard Events
| Attribute |
Value |
Description |
| onkeydown |
script |
Script to be run when a key is pressed |
| onkeypress |
script |
Script to be run when a key is pressed and released |
| onkeyup |
script |
Script to be run when a key is released |
For an example copy the code below and paste it into the head of index.html. (Erase any previous JavaScript in index.html)
<script language="JavaScript">

function myKeyDownfunction()

{

  msg = 'on' + event.type + ' event fired by ' + '"' + event.srcElement.id + '"';

  alert(msg)

}

</script>
Change the <body> tag in index.html so it appears as:
<body id="pageBody" onkeydown="myKeyDownfunction()">
Add the following code to the body of index.html:
<p>Pressing any key will call the function.</p>
Preview the output in a browser.

Using <body> and <frameset> Events
These two attributes can only be used in <body> or <frameset>:
| Attribute |
Value |
Description |
| onload |
script |
Script to be run when a document load |
| onunload |
script |
Script to be run when a document unload |
For an example copy the code below and paste it into the head of index.html. (Erase any previous JavaScript in index.html)
<script language="JavaScript">

function myOnLoadFunction() {

    alert("This fuction was called by an onload attribute in the body tag.");

}

</script>
Change the <body> tag in index.html so it appears as:
<body onload="myOnLoadFunction()">
Add the following code to the body of index.html:
<p>This page is a demo of an onload event.</p>
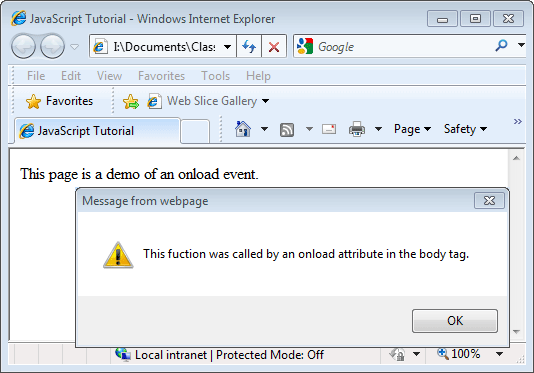
Preview the changes in a browser. (notice that the alert message appears as soon as the page has finished loading)
Using form Events
| Attribute |
Value |
Description |
| onblur |
script |
Script to be run when an element loses focus |
| onchange |
script |
Script to be run when an element change |
| onfocus |
script |
Script to be run when an element gets focus |
| onreset |
script |
Script to be run when a form is reset |
| onselect |
script |
Script to be run when an element is selected |
| onsubmit |
script |
Script to be run when a form is submitted |
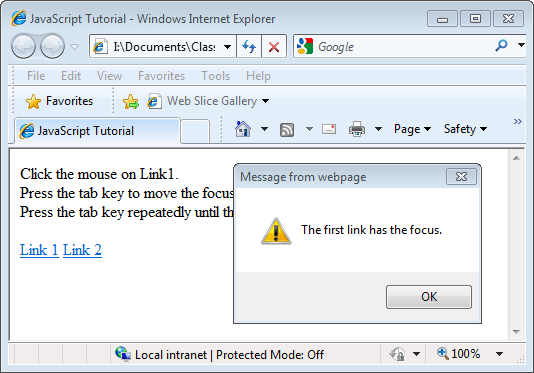
Elements on a web page such as text fields in a form or links in the body can have focus. That means that it is the element that is currently active. The result is that if you pressed the enter key when a link had focus it would behave as if the link had been click by the mouse.
Clicking the mouse on a link gives it the focus. Pressing the tab key causes the focus to jump from element to element on a web browser. The following sample will demonstrate this effect using links.
Copy and paste the following code into the head section of index.html. (remove any existing JavaScript)
<script language="JavaScript">

function focusFunction1()

{

  alert("The first link has the focus.");

}

function focusFunction2()

{

  alert("The second link has the focus.");

}

</script>
Paste the following code into the body of index.html.
<p>Click the mouse on Link1.<br />Press the tab key to move the focus to the next link.<br />

Press the tab key repeatedly until the focus returns to Link1.</p>

<a href="#" onfocus="focusFunction1()">Link 1</a>

<a href="#" onfocus="focusFunction2()">Link 2</a>
Preview the output in a browser.
Let's try an example using form elements.
Copy and paste the following code into the head section of index.html. (remove any existing JavaScript)
<script language="JavaScript">

function first_focus()

{

  document.demoForm.first_name.style.backgroundColor="red";

}


function first_blur()

{

  document.demoForm.first_name.style.backgroundColor="white";

}


function last_focus()

{

  document.demoForm.last_name.style.backgroundColor="red";

}


function last_blur()

{

  document.demoForm.last_name.style.backgroundColor="white";

}

</script>
Paste the following code into the body of index.html.
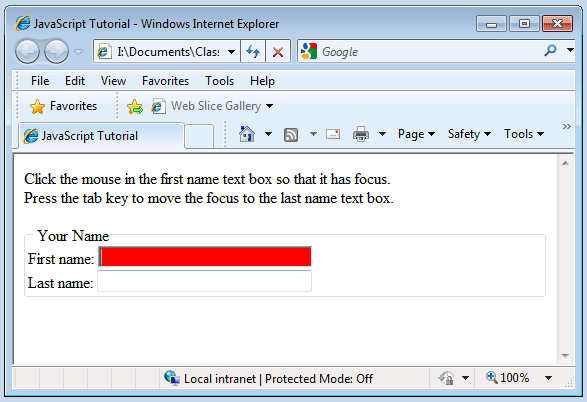
<p>Click the mouse in the first name text box so that it has focus.<br />Press the tab key to move the focus to the last name text box.</p>

<form action="#" id="demoForm" name="demoForm">

<fieldset>

  <legend>Your Name</legend>

  <label for="first_name">

  First name: <input name="first_name" id="first_name" type="text" size="30" onfocus="first_focus()" onblur="first_blur()" />

  <br /></label>

  <label>

  Last name: <input name="last_name" id="last_name" type="text" size="30" onfocus="last_focus()" onblur="last_blur()" />

  <br /></label>

</fieldset>

</form>
Preview the results in a browser. Click the mouse from field to field to see the onBlur() and onFocus() in operation.
JavaScript Tutorial - Escape Characters
Escape Characters
When working with Strings, you'll notice there are some characters break your code. These characters include apostrophes, ampersands, and double quotes among others.
When working with these special characters, you need to use what is called an "escape character". An escape character enables you to output characters you wouldn't normally be able to. Some of these characters allow you to manipulated the output of text by giving you tabs, line breaks and other text formatting options.
In JavaScript, the backslash (\) is an escape character.
For an example copy the code below and paste it into the body of index.html. (Erase any previous JavaScript in index.html)
<script type="text/javascript">

document.write("I want to put quotes around my name "Jim" but I get an error."); //errors exist

</script>
Preview the output (or lack of output in this case) in a browser. The error is caused by the use of double quotes that are normally used by JavaScript to indicate the beginning and ending of the String to be output.
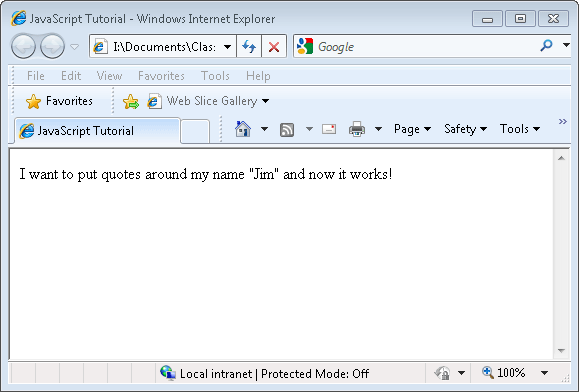
Now we will use the escape character \ to correct the error. Copy the code below and paste it into the body of index.html. (Erase any previous JavaScript in index.html)
<script type="text/javascript">

document.write("I want to put quotes around my name \"Jim\" and now it works!"); //no errors

</script>
Preview the output in a browser.
Let's try another example. Copy the code below and paste it into the body section of index.html. (Erase any previous JavaScript in index.html)
<script type="text/javascript">

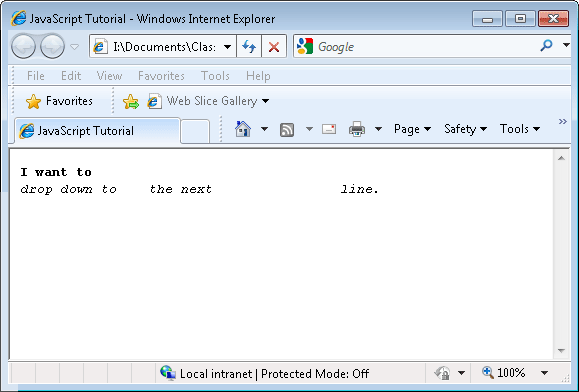
document.write("<pre><strong>I want to</strong> \n<em>drop down to \tthe next \t\tline.<em></pre>");

</script>
Preview the output in a browser. Special note: The <pre> tag stands for preformatted text. Without using the <pre> tag the \n and \t would not work when they are used in a document.write() or document.writeln(). Also, notice that you can include html tags such as <strong> and <em> in the code.
The table below lists special characters that can be placed in a text string using the backslash sign:
| Code |
Outputs |
| \' |
single quote |
| \" |
double quote |
| \& |
ampersand |
| \\ |
backslash |
| \n |
new line |
| \r |
carriage return |
| \t |
tab (horizontal) |
| \v |
tab (vertical) |
| \b |
backspace |
| \f |
form feed (feed next sheet to printer) |
|
JavaScript Tutorial - Objects -Introduction
JavaScript, like the Java you learned in Programming 1 is an Object Oriented Programming (OOP) language. That means that you will be dealing with objects and their methods and properties. Hopefully you will recall some of those concepts from your previous programming classes!
Actually, the JavaScript you have been using all along in this tutorial has been OOP. For example, in document.write("some text here"); the object is document and the method is write(). The "some text here" is the parameter value we are passing to the write() method of the document object.
Let's view some simple examples. Copy the code below and paste it into the body of index.html. (Erase any previous JavaScript in index.html)
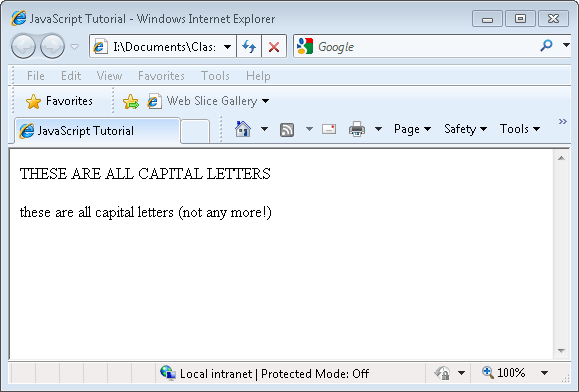
<script type="text/javascript">

var str="THESE ARE ALL CAPITAL LETTERS";

document.write(str + "<pre>\n</pre>"); //used the \n to drop down a line

str=str.toLowerCase(); // str becomes what str is currently and set to lowercase

document.write(str + " (not any more!)");

</script>
Preview the output in a browser. In this example we are using the toLowerCase() method of the String object to change any uppercase letters to lowercase.
Let's view some simple examples. Copy the code below and paste it into the body of index.html. (Erase any previous JavaScript in index.html)
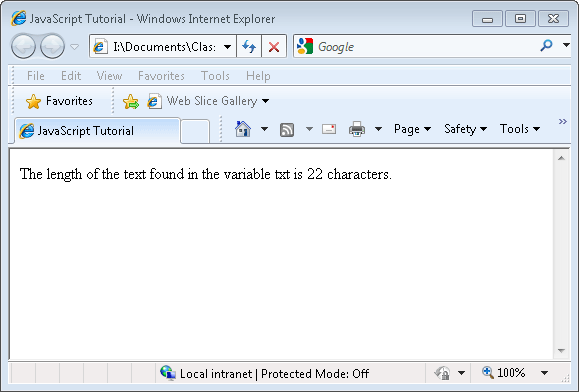
<script type="text/javascript">

var txt="JavaScript is amazing!";

document.write("The length of the text found in the variable txt is " + txt.length + " characters.");

</script>
Preview the output in a browser. In the example we are using the length property of the String object to find the length (number of characters) in the String JavaScript is amazing!.
Some objects are automatically created when a JavaScript program is run. For example, String objects are created when the program starts. You do not need to create a String object yourself. There are times when you will want to use an object in your program that is not an object automatically created when the program starts. For example, you may want to use a Date() object in your program but it is not automatically created. To create an instance (instantiate) of a Date() object you would write this code:
var the_date = new Date(); // Date() is the object class and the_date is the instance of that object.
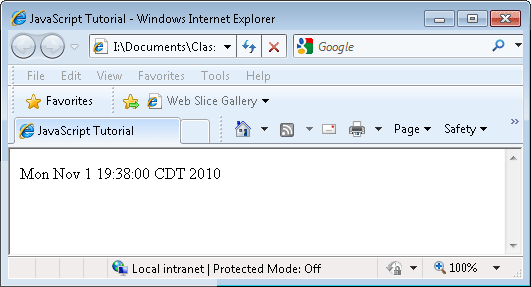
Once you have created an object of the type Date() you can use it in your program. To see an example using a Date() object copy the code below and paste it into the body of index.html. (Erase any previous JavaScript in index.html)
<script type="text/javascript">

var the_date = new Date();

document.write(the_date);

</script>
Preview the output in a browser.
Let's try a method (the getDay() method in this example) available to the Date() objects. Copy the code below and paste it into the body of index.html. (Erase any previous JavaScript in index.html)
<script type="text/javascript">

var today ='';

var the_date=new Date();

var todays_number = the_date.getDay();


if (todays_number == 0)

  today = 'Sunday'; // Notice the use of single quotes. They are interchangeable with double quotes

else if (todays_number == 1)

  today = 'Monday';

else if (todays_number == 2)

  today = 'Tuesday';

else if (todays_number == 3)

  today = 'Wednesday';

else if (todays_number == 4)

  today = 'Thursday';

else if (todays_number == 5)

  today = 'Friday';

else

  today = 'Saturday';


document.write('Today is '+ today + '.');

</script>
Preview the output in a browser.
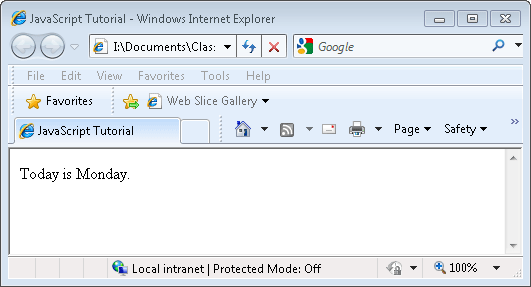
In closing, every object has a set of methods that can be used by your program. Below is a table that shows the methods available for the Date() class of objects.
| Method |
Description |
| getDate() |
Returns the day of the month (from 1-31) |
| getDay() |
Returns the day of the week (from 0-6) |
| getFullYear() |
Returns the year (four digits) |
| getHours() |
Returns the hour (from 0-23) |
| getMilliseconds() |
Returns the milliseconds (from 0-999) |
| getMinutes() |
Returns the minutes (from 0-59) |
| getMonth() |
Returns the month (from 0-11) |
| getSeconds() |
Returns the seconds (from 0-59) |
| getTime() |
Returns the number of milliseconds since midnight Jan 1, 1970 |
| getTimezoneOffset() |
Returns the time difference between GMT and local time, in minutes |
| getUTCDate() |
Returns the day of the month, according to universal time (from 1-31) |
| getUTCDay() |
Returns the day of the week, according to universal time (from 0-6) |
| getUTCFullYear() |
Returns the year, according to universal time (four digits) |
| getUTCHours() |
Returns the hour, according to universal time (from 0-23) |
| getUTCMilliseconds() |
Returns the milliseconds, according to universal time (from 0-999) |
| getUTCMinutes() |
Returns the minutes, according to universal time (from 0-59) |
| getUTCMonth() |
Returns the month, according to universal time (from 0-11) |
| getUTCSeconds() |
Returns the seconds, according to universal time (from 0-59) |
| parse() |
Parses a date string and returns the number of milliseconds since midnight of January 1, 1970 |
| setDate() |
Sets the day of the month (from 1-31) |
| setFullYear() |
Sets the year (four digits) |
| setHours() |
Sets the hour (from 0-23) |
| setMilliseconds() |
Sets the milliseconds (from 0-999) |
| setMinutes() |
Set the minutes (from 0-59) |
| setMonth() |
Sets the month (from 0-11) |
| setSeconds() |
Sets the seconds (from 0-59) |
| setTime() |
Sets a date and time by adding or subtracting a specified number of milliseconds to/from midnight January 1, 1970 |
| setUTCDate() |
Sets the day of the month, according to universal time (from 1-31) |
| setUTCFullYear() |
Sets the year, according to universal time (four digits) |
| setUTCHours() |
Sets the hour, according to universal time (from 0-23) |
| setUTCMilliseconds() |
Sets the milliseconds, according to universal time (from 0-999) |
| setUTCMinutes() |
Set the minutes, according to universal time (from 0-59) |
| setUTCMonth() |
Sets the month, according to universal time (from 0-11) |
| setUTCSeconds() |
Set the seconds, according to universal time (from 0-59) |
| toDateString() |
Converts the date portion of a Date object into a readable string |
| toLocaleDateString() |
Returns the date portion of a Date object as a string, using locale conventions |
| toLocaleTimeString() |
Returns the time portion of a Date object as a string, using locale conventions |
| toLocaleString() |
Converts a Date object to a string, using locale conventions |
| toString() |
Converts a Date object to a string |
| toTimeString() |
Converts the time portion of a Date object to a string |
| toUTCString() |
Converts a Date object to a string, according to universal time |
| UTC() |
Returns the number of milliseconds in a date string since midnight of January 1, 1970, according to universal time |
| valueOf() |
Returns the primitive value of a Date object |
JavaScript Tutorial - Objects - Strings
Programming code often deals with String manipulation. Finding letters or words in a String, finding the length of a String, comparing Strings to other Strings are some examples. There is a very extensive library of String methods that deal with the manipulation of text. Below is set of tables that comprise the properties and methods of the String object.
String Object Properties
A property is some basic information about the object. For example, a string object has a length property which stores the number of characters in the string.
| Property |
Description |
| length |
Returns the length of a string |
String Object Methods
The string's methods are useful for finding out more about your string. For example, the string method split() lets you take a string and chop it into pieces whenever characters that you supply, appear. It is important to note that these functions do not actually change the string itself. Rather, they return new strings that you can store for use elsewhere.
Notice: "[]" surrounding a parameter means the parameter is optional.
| Method |
Description |
| anchor(name) |
Returns the string with the tag <A name="name"> surrounding it. |
| big() |
Returns the string with the tag <BIG> surrounding it. |
| blink() |
Returns the string with the tag <BLINK> surrounding it. |
| bold() |
Returns the string with the tag <B> surrounding it. |
| fixed() |
Returns the string with the tag <TT> surrounding it. |
| fontcolor(color) |
Returns the string with the tag <FONT color="color"> surrounding it. |
| fontsize(size) |
Returns the string with the tag <FONT size="size"> surrounding it. |
| italics() |
Returns the string with the tag <I> surrounding it. |
| link(url) |
Returns the string with the tag <A href="url"> surrounding it. |
| small() |
Returns the string with the tag <SMALL> surrounding it. |
| strike() |
Returns the string with the tag <STRIKE> surrounding it. |
| sub() |
Returns the string with the tag <SUB> surrounding it. |
| sup() |
Returns the string with the tag <SUP> surrounding it. |
| charAt(x) |
Returns the character at the "x" position within the string. |
| charCodeAt(x) |
Returns the Unicode value of the character at position "x" within the string. In IE, this is a method of a String instance only, while in Firefox, it is also an instance of the String object itself (ie: String.charCodeAt("a")).
Example:
<script type="text/javascript">

			var the_text="Web Design Class 2";

			for (var i=0; i<the_text.length; i++)

			  document.write(the_text.charCodeAt(i)+"-");

			</script>
Output:
87-101-98-32-68-101-115-105-103-110-32-67-108-97-115-115-32-50-
|
| concat(v1, v2,...) |
Combines one or more strings (arguments v1, v2 etc) into the existing one and returns the combined string. Original string is not modified. |
| fromCharCode(c1, c2,...) |
Returns a string created by using the specified sequence of Unicode values (arguments c1, c2 etc). Method of String object, not String instance. For example:String.fromCharCode("a"). |
| indexOf(substr, [start]) |
Searches and (if found) returns the index number of the searched character or substring within the string. If not found, -1 is returned. "Start" is an optional argument specifying the position within a string to begin the search. Default is 0. |
| lastIndexOf(substr,[start]) |
Searches and (if found) returns the index number of the searched character or substring within the string. Searches the string from end to beginning. If not found, -1 is returned. "Start" is an optional argument specifying the position within string to begin the search. Default is string.length-1. |
| localeCompare() |
|
| match(regexp) |
Executes a search for a match within a string based on a regular expression. It returns an array of information or null if no match is found. |
| replace( regexp, replacetext) |
Searches and replaces the regular expression portion (match) with the replaced text instead. |
| search(regexp) |
Tests for a match in a string. It returns the index of the match, or -1 if not found. |
| slice(start, [end]) |
Returns a substring of the string based on the "start" and "end" index arguments, NOT including the "end" index itself. "End" is optional, and if none is specified, the slice includes all characters from "start" to end of string. |
| split(delimiter,[limit]) |
Splits a string into many according to the specified delimiter, and returns an array containing each element. The optional "limit" is an integer that lets you specify the maximum number of elements to return. |
| substr(start, [length]) |
Returns the characters in a string beginning at "start" and through the specified number of characters, "length". "Length" is optional, and if omitted, up to the end of the string is assumed. |
| substring(from, [to]) |
Returns the characters in a string between "from" and "to" indexes, NOT including "to" inself. "To" is optional, and if omitted, up to the end of the string is assumed. |
| toLowerCase() |
Returns the string with all of its characters converted to lowercase. |
| toUpperCase() |
Returns the string with all of its characters converted to uppercase. |
| trim()
Not supported in IE as of IE8
|
Trims a string on both sides for any spaces and returns the result. The original string is unmodified:
Example:
<script type="text/javascript">

			var theText=" Hello World!   "; //does not work as of IE8

			alert(theText.trim()); //alerts "Hello World!". Variable is not changed.

			</script>
Since trim() is not yet supported in all browsers (most notably IE), it should be coupled with a fall back method for achieving the same result in those lesser browsers, such as via regular expressions. The following example uses trim() in capable browsers, and regular expressions instead in non capable to trim a string:
Cross Browser Example:
Copy and paste the following code into the head section of a web page:
<script type="text/javascript">

			function trim_string(incoming_str)

			{

			 if (incoming_str.trim)// if it is true there is a trim method

			  return incoming_str.trim();

			 else //if the bowser does not support the trim method

			  return incoming_str.replace(/(^\s*)|(\s*$)/g, ""); //find and remove spaces from the left and right hand side of the string

			}

			</script>
Copy and paste the following line of code into the body section of a web page:
<script type="text/javascript">

			document.write(trim_string(" Hello World!   "));

			</script>
|
Let's try some examples:
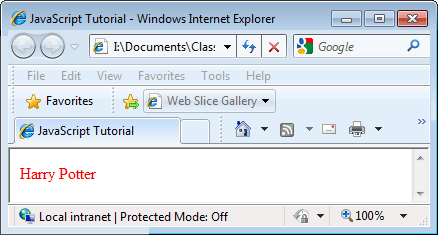
fontcolor(color)
<script type="text/javascript">

var myname="Harry Potter"

document.write(myname.fontcolor("red")) //writes out "Harry Potter" in red

</script>
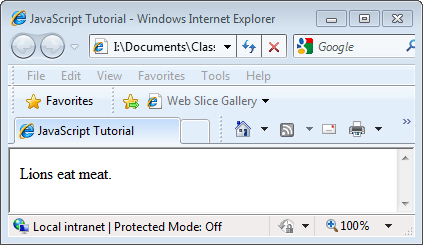
concat(v1, v2,...)
<script type="text/javascript">

var animal="Lions"

var food="meat"

var final=animal.concat(" eat " + food +".") // "Lions eat meat."

document.write(final);

</script>
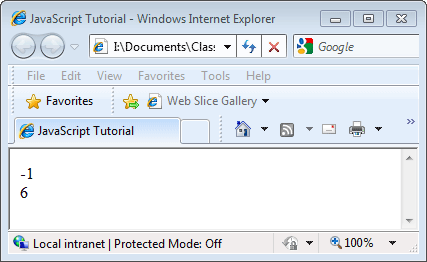
indexOf(substr, [start])
<script type="text/javascript">

var word="banana";

document.write(word.indexOf("d")); //returns -1, because "d" isn't in  the string

document.write("<br />");

var the_name="Harry Potter";

document.write(the_name.indexOf("Potter")); //returns 6, the starting index of "Potter"

</script>
split(delimiter, [limit])
<script type="text/javascript">

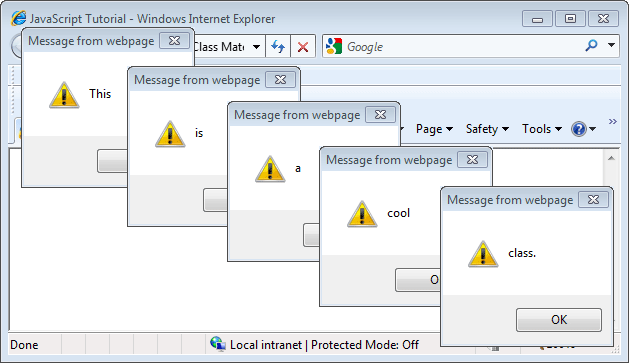
var the_text="This is a cool class.";

var word=the_text.split(" "); //split using the blank space as the delimiter

for (i=0; i<word.length; i++)

alert(word[i]); //alerts "This", "is", "a", "cool" and "class."

</script>
substr(start, [length])
<script type="text/javascript">

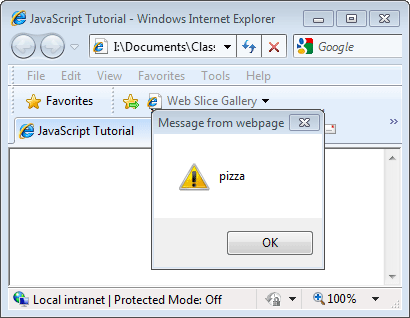
var the_text="Pepperoni pizza is delicious."

alert(the_text.substr(10, 5)) //alerts "pizza"

</script>
substring(from, [to])
<script type="text/javascript">

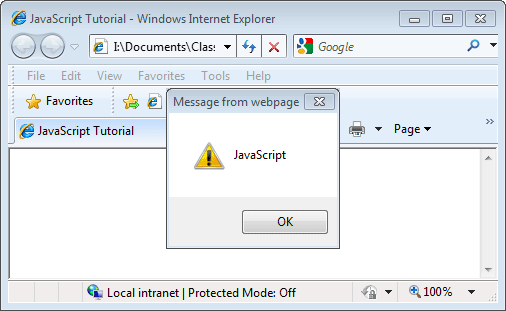
var the_text="JavaScript programming rules!"

alert(the_text.substring(0, 9)) //alerts "JavaScript"

</script>
JavaScript Tutorial - Objects - Math
Math() Objects
Math() Objects are used to perform mathematical calculations. There are methods, properties and constants that are available to be used with Math() objects.
A common mathematical task in programming is the generation of randomly selected numbers.
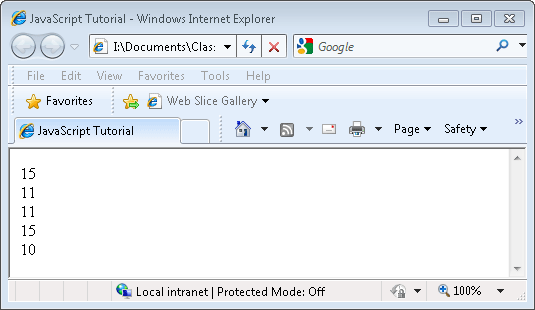
<script type="text/javascript">

var rndmNum;

for(i=1; i<=5; i++)

{

  rndmNum = Math.random()*6 + 10; //choose a number from 10 to 15 with a lot of decimal places

  rndmNum = Math.floor(rndmNum); //round down to the nearest integer to remove the decimal places

  document.write(rndmNum);

  document.write('<br />');

}

</script>
Preview the output in a browser. Output will vary but the numbers will all range from 10 to 15. Remember that the lowest number to be chosen is the last number you place in the code (10 in this example) and the total possible choices is the number placed first (6 in this example) in the code. The number of choices is calculated as highest number possible - lowest number possible + 1 (15-10+1=6 in this example)
Math Object Methods
| Method |
Description |
| abs(x) |
Returns the absolute value of x |
| acos(x) |
Returns the arccosine of x, in radians |
| asin(x) |
Returns the arcsine of x, in radians |
| atan(x) |
Returns the arctangent of x as a numeric value between -PI/2 and PI/2 radians |
| atan2(y,x) |
Returns the arctangent of the quotient of its arguments |
| ceil(x) |
Returns x, rounded upwards to the nearest integer |
| cos(x) |
Returns the cosine of x (x is in radians) |
| exp(x) |
Returns the value of Ex |
| floor(x) |
Returns x, rounded downwards to the nearest integer |
| log(x) |
Returns the natural logarithm (base E) of x |
| max(x,y,z,...,n) |
Returns the number with the highest value |
| min(x,y,z,...,n) |
Returns the number with the lowest value |
| pow(x,y) |
Returns the value of x to the power of y |
| random() |
Returns a random number between 0 and 1 |
| round(x) |
Rounds x to the nearest integer |
| sin(x) |
Returns the sine of x (x is in radians) |
| sqrt(x) |
Returns the square root of x |
| tan(x) |
Returns the tangent of an angle |
JavaScript Tutorial - Objects - RegExp
RegExp (Regular Expression) Object
Regular expressions objects are a tool for determining pattern matches in Strings. What once required lengthy procedures can now be done with just a few lines of code.
General Syntax:
var RegularExpression = /pattern/
Sometimes web pages include forms to be filled out by the user. The information the user puts in the form should be validated (checked for accuracy) before being submitted to the web server. Regular expressions are very useful in validating form entries.
Let's imagine that we have a web form asking for the user's 5-digit zip code. To validate the entry we would need to make sure the length is 5 and that all of the characters are numeric. It is possible to do that using String methods but it would require more code than RegExp would.
To see an example of this copy and paste the code below into the head section of index.html.
<script type="text/javascript">

function check_zip(){

var zip=/^\d{5}$/ //regular expression defining a 5 digit number

if (document.zip_form.zip_input.value.search(zip)==-1) //if match failed

  alert("You must enter a 5 digit number.")

}

</script>
Copy and paste the following code into the body of index.html.
<form name="zip_form">

<label>Enter your zip: <input type="text" name="zip_input" size=15></label>

<input type="button" onClick="check_zip()" value="check">

</form>
Preview the output in a browser.
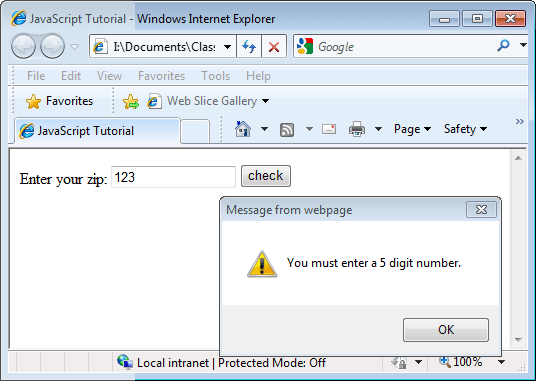
Let's examine the regular expression used, which checks that a string contains only a 5-digit number:
var zip=/^\d{5}$/
^ indicates the beginning of the string. Using a ^ metacharacter requires that the match start at the beginning.
\d indicates a digit character and the {5} following it means that there must be 5 consecutive digit characters.
$ indicates the end of the string. Using a $ metacharacter requires that the match end at the end of the string.
In English, this pattern says: "Starting from the beginning of the string there must be nothing other than 5 digits. There must also be nothing after those 5 digits."
Categories of Pattern Matching Characters
Position Matching - You wish to match a substring that occurs at a specific location within the larger string. For example, a substring that occurs at the very beginning or end of string.
| Symbol |
Description |
Example |
| ^ |
Only matches the beginning of a string. |
/^The/ matches "The" in "The night" but not "In The Night" |
| $ |
Only matches the end of a string. |
/and$/ matches "and" in "Land" but not "landing" |
| \b |
Matches any word boundary (test characters must exist at the beginning or end of a word within the string) |
/ly\b/ matches "ly" in "This is really cool." |
| \B |
Matches any non-word boundary. |
/\Bor/ matches “or” in "normal" but not "origami." |
Special Literal Character Matching - All alphabetic and numeric characters by default match themselves literally in regular expressions. However, if you wish to match say a newline in Regular Expressions, a special syntax is needed, specifically, a backslash (\) followed by a designated character. For example, to match a newline, the syntax "\n" is used, while "\r" matches a carriage return.
| Symbol |
Description |
| Alphanumeric |
All alphabetical and numerical characters match themselves literally. So /2 days/ will match "2 days" inside a string. |
| \n |
Matches a new line character |
| \f |
Matches a form feed character |
| \r |
Matches carriage return character |
| \t |
Matches a horizontal tab character |
| \v |
Matches a vertical tab character |
| \xxx |
Matches the ASCII character expressed by the octal number xxx.
"\50" matches left parentheses character "(" |
| \xdd |
Matches the ASCII character expressed by the hex number dd.
"\x28" matches left parentheses character "(" |
| \uxxxx |
Matches the ASCII character expressed by the UNICODE xxxx.
"\u00A3" matches "£". |
The backslash (\) is also used when you wish to match a special character literally. For example, if you wish to match the symbol "$" literally instead of have it signal the end of the string, backslash it: /\$/
Character Classes Matching - Individual characters can be combined into character classes to form more complex matches, by placing them in designated containers such as a square bracket. For example, /[abc]/ matches "a", "b", or "c", while /[a-zA-Z0-9]/ matches all alphanumeric characters.
| Symbol |
Description |
Example |
| [xyz] |
Match any one character enclosed in the character set. You may use a hyphen to denote range. For example. /[a-z]/ matches any letter in the alphabet, /[0-9]/ any single digit. |
/[AN]BC/ matches "ABC" and "NBC" but not "BBC" since the leading “B” is not in the set. |
| [^xyz] |
Match any one character not enclosed in the character set. The caret indicates that none of the characters
NOTE: the caret used within a character class is not to be confused with the caret that denotes the beginning of a string. Negation is only performed within the square brackets.
|
/[^AN]BC/ matches "BBC" but not "ABC" or "NBC". |
| . |
(Dot). Match any character except newline or another Unicode line terminator. |
/b.t/ matches "bat", "bit", "bet" and so on. |
| \w |
Match any alphanumeric character including the underscore. Equivalent to [a-zA-Z0-9_]. |
/\w/ matches "200" in "200%" |
| \W |
Match any single non-word character. Equivalent to [^a-zA-Z0-9_]. |
/\W/ matches "%" in "200%" |
| \d |
Match any single digit. Equivalent to [0-9]. |
|
| \D |
Match any non-digit. Equivalent to [^0-9]. |
/\D/ matches "No" in "No 342222" |
| \s |
Match any single space character. Equivalent to [\t\r\n\v\f]. |
|
| \S |
Match any single non-space character. Equivalent to [^ \t\r\n\v\f]. |
|
Repetition Matching - You wish to match character(s) that occurs in certain repetition. For example, to match "555", the easy way is to use /5{3}/
| Symbol |
Description |
Example |
| {x} |
Match exactly x occurrences of a regular expression. |
/\d{5}/ matches 5 digits. |
| {x,} |
Match x or more occurrences of a regular expression. |
/\s{2,}/ matches at least 2 whitespace characters. |
| {x,y} |
Matches x to y number of occurrences of a regular expression. |
/\d{2,4}/ matches at least 2 but no more than 4 digits. |
| ? |
Match zero or one occurrences. Equivalent to {0,1}. |
/a\s?b/ matches "ab" or "a b". |
| * |
Match zero or more occurrences. Equivalent to {0,}. |
/we*/ matches "w" in "why" and "wee" in "between", but nothing in "bad" |
| + |
Match one or more occurrences. Equivalent to {1,}. |
/fe+d/ matches both "fed" and "feed" |
Alternation and Grouping Matching - You wish to group characters to be considered as a single entity or add an "OR" logic to your pattern matching.
| Symbol |
Description |
Example |
| ( ) |
Grouping characters together to create a clause. May be nested. |
/(abc)+(def)/ matches one or more occurrences of "abc" followed by one occurrence of "def". |
| | |
Alternation combines clauses into one regular expression and then matches any of the individual clauses. Similar to "OR" statement. |
/(ab)|(cd)|(ef)/ matches "ab" or "cd" or "ef". |
Back Reference Matching - You wish to refer back to a subexpression in the same regular expression to perform matches where one match is based on the result of an earlier match.
| Symbol |
Description |
Example |
| ( )\n |
Matches a parenthesized clause in the pattern string. n is the number of the clause to the left of the backreference. |
(\w+)\s+\1 matches any word that occurs twice in a row, such as "hubba hubba." The \1 denotes that the first word after the space must match the portion of the string that matched the pattern in the last set of parentheses. If there were more than one set of parentheses in the pattern string you would use \2 or \3 to match the appropriate grouping to the left of the backreference. Up to 9 backreferences can be used in a pattern string. |
Pattern Switches
In addition to the pattern-matching characters, you can use switches to make the match global or case- insensitive or both: Switches are added to the very end of a regular expression.
| Property |
Description |
Example |
| i |
Ignore the case of characters. |
/The/i matches "the" and "The" and "tHe" |
| g |
Global search for all occurrences of a pattern |
/ain/g matches both "ain"s in "No pain no gain", instead of just the first. |
| gi |
Global search, ignore case. |
/it/gi matches all "it"s in "It is our IT department" |
String and Regular Expression Methods
The String object has four methods that take regular expressions as arguments. These are your workhorse methods that allow you to match, search, and replace a string using the flexibility of regular expressions:
| Method |
Description |
| match( regular expression ) |
Executes a search for a match within a string based on a regular expression. It returns an array of information or null if no match are found.
Note: Also updates the $1…$9 properties in the RegExp object.
|
| replace( regular expression, replacement text ) |
Searches and replaces the regular expression portion (match) with the replaced text instead.
Note: Also supports the replacement of regular expression with the specified RegExp $1…$9 properties.
|
| split ( string literal or regular expression ) |
Breaks up a string into an array of substrings based on a regular expression or fixed string. |
| search( regular expression ) |
Tests for a match in a string. It returns the index of the match, or -1 if not found. Does NOT support global searches (ie: "g" flag not supported). |
Here are a few examples:
var string1="Peter has 8 dollars and Jane has 15"

parsestring1=string1.match(/\d+/g) //returns the array [8,15]
var string2="(304)434-5454"

parsestring2=string2.replace(/[\(\)-]/g, "") //Returns "3044345454" (removes "(", ")", and "-")
var string3="1,2, 3, 4, 5"

parsestring3=string3.split(/\s*,\s*/) //Returns the array ["1","2","3","4","5"]
Delving deeper, you can actually use the replace() method to modify- and not simply replace- a substring. This is accomplished by using the $1…$9 properties of the RegExp object. These properties are populated with the contents of the portions of the searched string that matched the portions of the search pattern contained within parentheses. The following example illustrates how to use the replace method to swap the order of first and last names and insert a comma and a space in between them:
<SCRIPT language="JavaScript1.2">

var objRegExp = /(\w+)\s(\w+)/;

var strFullName = "Jane Doe";

var strReverseName = strFullName.replace(objRegExp, "$2, $1");

alert(strReverseName) //alerts "Doe, John"

</SCRIPT>
The output of this code will be “Doe, Jane”. How this works is that the pattern in the first parentheses matches “Jane” and this string is placed in the RegExp.$1 property. The \s (space) character match is not saved to the RegExp object because it is not in parentheses. The pattern in the second set of parentheses matches “Doe” and is saved to the RegExp.$2 property. The String replace() method takes the Regular Expression object as its first argument and the replacement text as the second argument. The $2 and $1 in the replacement text are substitution variables that will substitute the contents of RegExp.$2 and RegExp.$1 in the result string.
You can also use replace() method to strip unwanted characters from a string before testing the string for validity or before saving the string to a database. It can be used to add formatting characters for the display of a string as well.
RegExp Methods and Properties
You just saw several regular expression related string methods; in most situations, they are all you need for your string manipulation needs. However, true to the versatility of regular expressions, the Regular Expression (RegExp) object itself also supports two methods that mimic the functions of their string counterparts, the difference being these two methods take strings as parameters, while with String functions, they take a RegExp instead. The following describes the methods and properties of the regular expression object.
| Method |
Description |
| test(string) |
Tests a string for pattern matches. This method returns a Boolean that indicates whether or not the specified pattern exists within the searched string. This is the most commonly used method for validation. It updates some of the properties of the parent RegExp object following a successful search. |
| exec(string) |
Executes a search for a pattern within a string. If the pattern is not found, exec() returns a null value. If it finds one or more matches it returns an array of the match results. It also updates some of the properties of the parent RegExp object. |
Here is a simple example that uses test() to see if a regular expression matches against a certain string:
var pattern=/php/i

pattern.test("PHP is your friend") //returns true
RegExp Instance Properties
Whenever you define an instance of the regular expression (whether using the literal or constructor syntax), additional properties are exposed to this instance which you can use:
| Property |
Description |
| $n |
n represents a number from 1 to 9
Stores the nine most recently memorized portions of a parenthesized match pattern. For example, if the pattern used by a regular expression for the last match was /(Hello)(\s+)(world)/ and the string being searched was “Hello world” the contents of RegExp.$2 would be all of the space characters between “Hello” and “world”. |
| source |
Stores a copy of the regular expression pattern. |
| global |
Read-only Boolean property indicating whether the regular expression has a "g" flag. |
| ignoreCase |
Read-only Boolean property indicating whether the regular expression has a "i" flag. |
| lastIndex |
Stores the beginning character position of the last successful match found in the searched string. If no match was found, the lastIndex property is set to –1. |
This simple example shows how to determine whether a regular expression has the "g" flag added:
var pattern=/php/g

alert(pattern.global) //alerts true
JavaScript Tutorial - Objects - RegExp Form Validation
Further information and resources:
Now that you’ve had an introduction to regular expressions and their patterns, we will look at a few samples of common validation and formatting techniques.
Checking for a Valid Number Entry
A valid number entry would contain only digits with the possibility of a minus sign and/or a decimal followed by some more digits. A regular expression that would accomplish that validation would look like this:
var num_entered=/(^-*\d+$)|(^-*\d+\.\d+$)/
Let's break this expression down into its parts. Notice the pattern contains two sets of parenthesis with an | in between. This is so you can compare the entry to two patterns, one with a decimal and one without.
^ -* |
there can be a minus sign at the beginning and match zero or more occurrences |
\d+ |
next there must next be 1 or more digits... |
$ |
...at the end of the entry (the entry must end with digits) |
| |
|
| or... |
|
| |
|
^ -* |
if there is a minus sign it must be at the beginning and match zero or more occurrences |
\d+ |
next there must next be 1 or more digits |
\. |
next look for a match with a single dot (decimal point, period) |
\d+ |
next look for one or more digits... |
$ |
...at the end of the entry (the entry must end with digits) |
ALERT: There is a web site where you can test your RegExp patterns to make sure they work. To test the expression above copy everything between / and / and then click on the link below. Paste the expression pattern into the RegExp text field. Enter a number in the Subject string text field and then press the Test Match button. If you type in a value that matches the expression pattern, you will get a message stating that a successful match has been made.
Use this link to test your RegExp: http://www.regular-expressions.info/javascriptexample.html
Checking for a Valid Date Format Entry
For a date entry to be valid it would consist of a 2-digit month, a date separator (/ ,-, or .), a 2-digit day, another date separator, and a 4-digit year. an example of this would look like: 10/12/2010. You will want to make sure that the user uses the same date separator each time one is entered. The example below uses backreferencing to make sure all date separators are the same in a given date entry. The function will return either true or false depending on whether the user's entry matched the date format of the RegExp pattern.
function check_date(user_entry)

{

var date_format = /^\d{1,2}(\-|\/|\.)\d{1,2}\1\d{4}$/

return date_format.test(user_entry) //returns true or false depending on the user's entry

}
Let's break this expression down into its parts.
^\d{1,2 } |
the entry must start with digits and there can be either one or two digits |
(\-|\/|\.) |
next there must be either a minus sign (-) or a forward slash (/) or a period (.) |
\d{1,2} |
next there must be either one or digits digits |
\1 |
next use the same clause found in the first set of parenthesis (this is an example of back referencing) |
\d{4}$ |
next there must be 4 digits at the end of the entry |
Replacing HTML tags (< and >) with their HTML entities
For security reasons user entries should be examined (parse is the common term for examining something one piece at a time) to make sure malicious code is not being injected. Also, if users are allowed to enter html tags it could break the format of the web page. Generally you will want to remove any html tag brackets and replace them with their equivalent entities. The function shown below will accomplish this task. It replaces "<" with "<" and ">" with ">".
function html_2_entity(user_entry)
{
var checked_entry=user_entry.replace(/(<)|(>)/g,function(matched){if(matched=="<")return "<";else return ">"})
}
Let's break this expression down into its parts.
(<) | (>) |
look for a match with either a less than sign "<" or a greater than sign ">" |
g |
look globally to find all occurrences of the pattern to match |
Notice how we are using the String replace() method in our html_2_entity function. The String replace() method uses two parameters. The first parameter, highlighted in yellow, is the item to be matched and replaced in the String. The second parameter, highlighted in gray, is the replacement item. In our example above the first parameter is the RegExp pattern looking for either a < or a > sign. The second parameter is a function (that's right, you can place an entire function in the parameter list area of a method!) that will check to see if a < sign or > sign was found and whether to return "<" or ">" . When you use a function as a parameter, the parameter (in this case matched) of the function will contain the substring that was matched.
|
JavaScript Tutorial - Cookies
Simply put, a cookie is a variable or property of the document object. It looks document.cookie when you set it being used in JavaScript code. The variable can store only a String. But, a String can be a date, name, password, or even the contents of a shopping cart. What makes this type of variable different from other JavaScript variables is that it is stored on the user's computer and does not expire until a date specified in the cookie. Whenever a user, on the same computer, visits the same page it will check to see if there is a valid cookie.
NOTICE: Web users can disable cookies in the browser settings.
General Syntax:
document.cookie = "name=value; expires=date";
For example:
document.cookie="username=Jose; expires=Mon, 07 Nov 2011 02:06:16 GMT";
The "userName" is the cookie name. "Jose" is the value of the cookie name. The "expires" property defines when the cookie will expire. If you do not include an expiration value it will expire when the web page is closed.
Formal Syntax:
document.cookie = "name=value; expires=date; path=path; domain=domain; secure";
Formally there are actually three more properties. The path property is optional - it specifies a path within the site to which the cookie applies. Only documents that are in this path will be able to retrieve the cookie. The domain property is also optional - Only web sites that are in this domain will be able to retrieve the cookie. The secure property is an optional flag that indicates that the browser should use SSL (secure socket layer) when sending the cookie to the server. Took keep things simple we will not use it in this tutorial.
Sample Web Page Code
ERASE ALL OF THE CODE IN INDEX.HTML. Copy the following HTML AND JAVASCRIPT code and paste it into index.html.
<!DOCTYPE html PUBLIC "-//W3C//DTD XHTML 1.0 Strict//EN" "http://www.w3.org/TR/xhtml1/DTD/xhtml1-strict.dtd">

<html xmlns="http://www.w3.org/1999/xhtml">


<head>

<script type="text/javascript">

<!--


/*

************************************************************

Example - Working with Cookies

************************************************************

*/


function getCookie(cookie_name)

{

if (document.cookie.length>0)

  {

  cookie_start=document.cookie.indexOf(cookie_name + "=");

  if (cookie_start!=-1)

    {

    cookie_start=cookie_start + cookie_name.length+1;

    cookie_end=document.cookie.indexOf(";",cookie_start);

    if (cookie_end==-1) cookie_end=document.cookie.length;

    return unescape(document.cookie.substring(cookie_start,cookie_end));

    }

  }

else

return "";

}


function setCookie(c_name,value,daysToExpire)

{

var exdate=new Date();

exdate.setDate(exdate.getDate()+daysToExpire);

document.cookie=c_name+ "=" +escape(value)+((daysToExpire==null)?"":";expires="+exdate.toUTCString());

}


function deleteMyCookie (cookieName)

{

var cookie_date = new Date();

cookie_date.setTime(cookie_date.getTime() - 1);

document.cookie = cookieName += "=; expires=" + cookie_date.toUTCString();

alert("The cookie has been set to expire. If you reload this page it will find that there is no cookie \nnamed \'username\' and then give you a prompt box in which to enter the value for a new cookie.");

}

</script>

</head>


<body>

<h2>An Amazing Cookie Tutorial</h2>

<script type="text/javascript">

theUserName=getCookie('username');

if (theUserName!=null && theUserName!="")

{

  document.write('Nice to see you again '+theUserName+'!<br />');

}

else

{

  theUserName=prompt('There must not be a cookie named \'username\' set for this page. \nIf you enter your name below a cookie named \'username\' will be set. \nIf you leave it blank there will not be a cookie named \'username\' set.\n\nPlease enter your name:',"");

  if (theUserName!=null && theUserName!="")

  {

   setCookie('username',theUserName,365);

  }

}

</script>

<p>Press the button to delete the cookie.</p>

<form name="myDeleteForm" action="">

<input type="button" value="Eat the cookie." name="cookieDeleteBtn" id="cookieDeleteBtn" onClick="deleteMyCookie('username')">

</form>

</body>

</html>
Preview the output in a browser. Because there is not a cookie set the code causes the web page to display a prompt box asking for the user to enter a name.
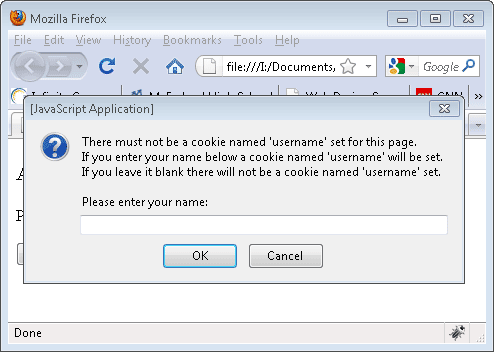
Enter a name in the prompt box. Reload the web page. Because there is a cookie set the output is as shown below.
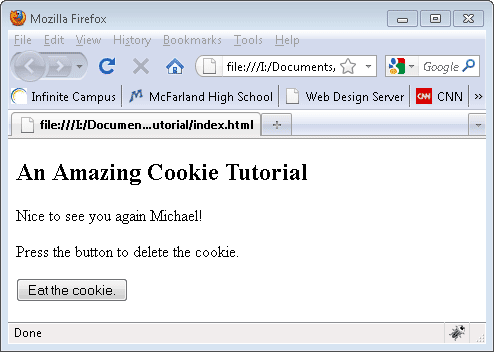
Press the Eat the Cookie button to delete the cookie.
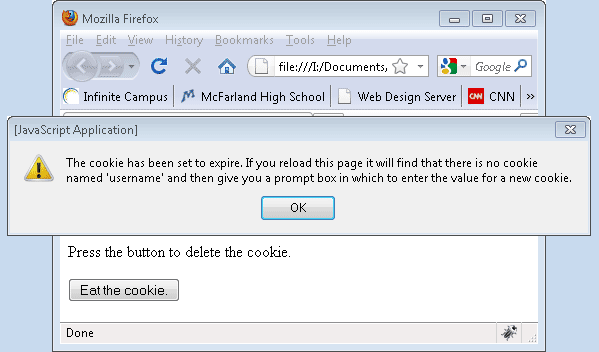
How to Save (set) Cookie
In the example code below we have written a function named setCookie to create a cookie and save a value to that cookie. You will need to pass it three things: name, value and the number of days until it expires.
<script type="text/javascript">

function setCookie(c_name,value,daysToExpire)

{

var exdate=new Date();

exdate.setDate(exdate.getDate()+daysToExpire);

document.cookie=c_name+ "=" +escape(value)+((daysToExpire==null)?"":";expires="+exdate.toUTCString());

}

</script>
Let's examine the code in detail.
Create a Date() object named expire_date
var expire_date=new Date();
Determine an expiration date. Take the expire_date object and do the setDate() method to set the date to what day it is today (found using the getDate() method) plus the number of days passed to it from whatever called the function.
expire_date.setDate(expire_date.getDate()+ daysToExpire);
Finally set the cookie using the information provided where: (assuming today is November 6, 2010, username is the name of the cookie, Sarah is the value, and 365 is the number passed)
document.cookie = c_name+ "=" +escape(value) + ((daysToExpire==null)?"":" expires="+expire_date.toUTCString());
Which would look like: (notice the date is 1 year after the cookie is set because 365 was the number passed)
document.cookie="username=Sarah; expires=Mon, 07 Nov 2011 02:06:16 GMT";
Whoa!: There are a couple of things going in the document.cookie= code that bear further explanation.
Notice the use of escape(value). Cookies don’t like spaces, semicolons, or commas so the escape() function encodes (turns them to code) special characters in Strings. For example a space becomes %20, and the question mark, ?, becomes %3F. This function makes a String portable, so that it can be transmitted across any network to any computer that supports ASCII characters.
Notice the use of the conditional operator. It acts like an if statement but without the word if. In general form it appears like: (condition)?this_code:that_code; where the computer executes this_code if the condition is true and that_code if it is false. In the cookie code we see ((daysToExpire==null)?"":" expires="+expire_date.toUTCString()). So, if daysToExpire is null then the code to execute is to write "", or nothing in other words. If daysToExpire is not null then the code will write the expire_date with the toUTCString() method applied. The UTCString() method converts a Date() object to a String, according to universal time.
How to Delete a Cookie
We will write a function that when called sets the expiry time of the cookie to a time before now. Because the time is before now the cookie expires.
<script type=text/javascript">

function deleteMyCookie (cookieName)

{

var cookie_date = new Date();

cookie_date.setTime(cookie_date.getTime() - 1);

document.cookie = cookieName += "=; expires=" + cookie_date.toUTCString();

alert("The cookie has been set to expire. If you reload this page it will find that there is no cookie \nnamed \'username\' and then give you a prompt box in which to enter the value for a new cookie.");

}

</script>
Let's examine the code in detail.
Create a Date() object named cookie_date
var cookie_date=new Date();
Determine an expiration date/time that is 1 millisecond before the cookie is set. Take the cookie_date object and do the setTime() method to set the date and time to the current time (using getTime() method) minus 1 millisecond.
cookie_date.setTime(cookie_date.getTime() - 1);
The getTime() method returns the number of milliseconds since midnight of January 1, 1970 and a specified date.
The setTime() method sets a date and time by adding or subtracting a specified number of milliseconds to/from midnight January 1, 1970.
Set the cookie using the supplied information. In this case the supplied information is the name of the cookie which is 'username' in our example.
document.cookie = cookieName += "=; expires=" + cookie_date.toUTCString();
Which would look like:
document.cookie="username=; expires=Sun, 07 Nov 2010 02:50:27 GMT";
How to Get a Cookie
We will write a function that will check to see if the web page (actually the cookies property of the document object) has any cookies stored on the computer. If there are cookies we will check to see if our cookie named "username" is one of the cookies. If it is not one of the cookies then the function will return an empty String. If our cookie is one of the cookies then we will return the value stored in the cookie.
<script type="text/javascript">

function getCookie(cookie_name)

{

if (document.cookie.length>0)

  {

  cookie_start=document.cookie.indexOf(cookie_name + "=");

  if (cookie_start!=-1)

    {

    cookie_start=cookie_start + cookie_name.length+1;

    cookie_end=document.cookie.indexOf(";",cookie_start);

    if (cookie_end==-1) cookie_end=document.cookie.length;

    return unescape(document.cookie.substring(cookie_start,cookie_end));

    }

  }

else

  return "";

}

</script>
Let's examine the code in detail.
Check the length property of the cookie to see if it is greater than zero. If it is that means there is at least one cookie.
if (document.cookie.length>0)
Else, if the length property of the cookie was not greater than zero then return an empty String to whatever called the function.
else

  return "";
Use the indexOf() method to examine the String in document.cookie to see if our cookie name exists. If not, a -1 will be returned. If it is found the position of the first letter of our cookie name will be returned.
cookie_start=document.cookie.indexOf(cookie_name + "=");
If the value returned was not -1 when searching for our cookie name in the document.cookie String
if (cookie_start!=-1)
Determine the starting position of the value contained in our cookie. The starting point of the value can be calculated by looking at where the cookie name started then going up by the length of the cookie name +1 more step to account for the equal sign that follows the cookie name.
cookie_start=cookie_start + cookie_name.length+1;
Determine the ending position of our cookie value. Use the indexOf() method to look for a semicolon along with the optional position to start looking from set to the starting point of our cookie name. In other words, look for the first ; that comes after the place where our cookie name started.
cookie_end=document.cookie.indexOf(";",cookie_start);
If cookie_end is -1 then that means there was not a semicolon found after the start of our cookie name. That would mean that our cookie value was the last item stored in the String and so it did not have a semicolon. Therefore the cookie_end is at the end of the cookie String. So the last position in the cookie String or documnet.cookie.length is also the end of our cookie value.
if (cookie_end==-1) cookie_end=document.cookie.length;
Finally, use the substring() method, with starting and ending position parameters, to find the part of the String that is the value of our cookie. Use the unescape() method to return any encoded characters back to their unencoded form. Return the results to whatever called the function.
return unescape(document.cookie.substring(cookie_start,cookie_end));
For any of our code above to work we will need to write some code in the body of index.html that makes use of our cookies. Copy the code below and paste it into the body of index.html.
<h2>An Amazing Cookie Tutorial</h2>

<script type="text/javascript">

theUserName=getCookie('username');

if (theUserName!=null && theUserName!="")

{

  document.write('Nice to see you again '+theUserName+'!<br />');

}

else

{

  theUserName=prompt('There must not be a cookie named \'username\' set for this page. \nIf you enter your name below a cookie named \'username\' will be set. \nIf you leave it blank there will not be a cookie named \'username\' set.\n\nPlease enter your name:',"");

  if (theUserName!=null && theUserName!="")

  {

   setCookie('username',theUserName,365);

  }

}

</script>

<p>Press the button to delete the cookie.</p>

<form name="myDeleteForm" action="">

<input type="button" value="Eat the cookie." name="cookieDeleteBtn" id="cookieDeleteBtn" onClick="deleteMyCookie('username')">

</form>
Let's examine the JavaScript code in detail.
Get the value stored in a cookie named username and place it in a variable named theUserName
theUserName=getCookie('username');
If theUserName is not null because the Cancel button was pressed and theUserName is not an empty String because the OK button was pressed with no text entered
if (theUserName!=null && theUserName!="")
Write "Nice to see you again " followed by the value stored in theUserName
document.write('Nice to see you again '+theUserName+'!<br />');
else if there was not a value found in the variable theUserName send a prompt to get the name of the user
else

{

  theUserName=prompt('There must not be a cookie named \'username\' set for this page. \nIf you enter your name below a cookie named \'username\' will be set. \nIf you leave it blank there will not be a cookie named \'username\' set.\n\nPlease enter your name:',"");
If theUserName is not null because the Cancel button was pressed and theUserName is not an empty String because the OK button was pressed with no text entered
if (theUserName!=null && theUserName!="")
then call the setCookie() function passing the name of the cookie, and the value of what is in the theUserName variable and a number of 365.
setCookie('username',theUserName,365);
Most of what remains in the body of index.html is standard html and does not need to be explained. The one piece of code that does bear some explanation is code of the button.
<input type="button" value="Eat the cookie." name="cookieDeleteBtn" id="cookieDeleteBtn" onClick="deleteMyCookie('username')">
When the button is clicked it calls the deleteMyCookie() function sending 'username' as the name of the button to be deleted.
|
JavaScript Tutorial - The Document Object Model (DOM) -Introduction
The HTML Document Object Model (DOM)
The HTML DOM defines the objects and properties of all HTML elements, and the methods to access them. It is a standard set of rules for how to get, change, add, or delete HTML elements.
The HTML DOM is platform-neutral and language-neutral. That means it works on all types of computers Apple, Microsoft, etc., and all types of programming languages, JavaScript, PHP, etc. It allows programs and scripts to dynamically access and update the content, structure and style of web documents.
HTML DOM Example: Copy the code below and paste it into index.html. (delete the entire contents of index.html before pasting)
<html>

<head>

<script type="text/javascript">

function changeBGColor()

{

document.body.bgColor="red"

}

</script>

</head>

<body onclick="changeBGColor()">

Click on this web page document.

</body>

</html>
Preview the output in a browser. Notice what happens when you click the mouse on the page.
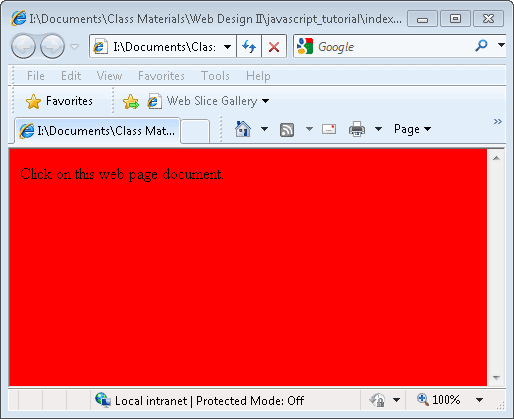
Document Objects (remember, objects have methods and properties we can use to affect the objects)
The HTML DOM defines HTML documents (web pages) as a collection of objects. These objects can be changed using their methods and properties.
Object Properties
HTML document objects can have properties (called as attributes).
- The document.body.bgColor property defines the background color of the body object.
- The statement document.body.bgColor="red" in the example above, set the background color of the HTML document to red.
Object Events
HTML document objects can also respond to events.
- The onclick="changeBGColor()" attribute of the <body> element in the example above, defines an action to take place when the user clicks on the document.
Functions
The changeBGColor() function in the above example , is a JavaScript function.
In this example the function will be executed when the user clicks on the HTML document.
The HTML DOM also defines a set of rules for changing the styles, not the attributes (properties) of the HTML objects as demonstrated previously.
Copy the code below and paste it into index.html. (delete the entire contents of index.html before pasting)
<html>

<head>

<script type="text/javascript">

function changeBGColor()

{

document.body.style.background="red"

}

</script>

</head>

<body onclick="changeBGColor()">

Click on this web page document.

</body>

</html>
Preview the output in a browser. Notice that the effect is the same as the first example. But, we did it by changing the style of the body object, not the attribute of the body object.

JavaScript Tutorial - The Document Object Model (DOM) - Nodes
The HTML DOM sees a HTML document as a node-tree. Everything in an HTML document is a node. All the nodes in the tree have relationships to each other. The image below shows a simple node tree.
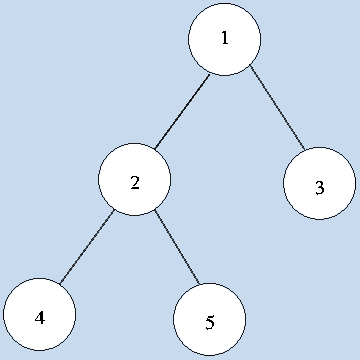
DOM Tree Example: Copy the code below and paste into index.html. (Delete all existing code before pasting)
<html>

<head>

<title>DOM Tree</title>

</head>

<body>

<h1 onmouseover="this.style.color='green'"

onmouseout="this.style.color='black'">Amazing!</h1>

<p>Welcome to <i>JavaScript and the HTML DOM</i>...</p>

</body>

</html>
Preview the code in a browser. Notice that the text Amazing turns green on mouseover and black on mouseout.

Now let's look at what the DOM Tree would look like for the code above.
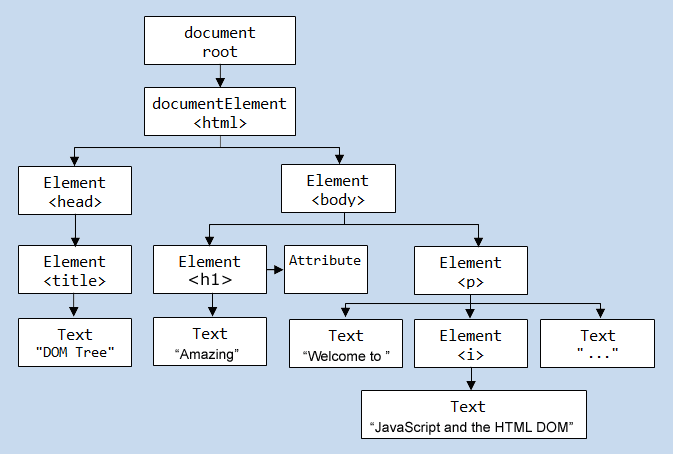
All nodes except the document node will have exactly one parent node.
In the sample above the html node is the parent for the body node and the head node.
The body node is a child node of the html node.
The head node is the first child of the html node while the body node is the last child of the html node.
The head node and the body node are siblings (brothers and sisters)
All text on a web page is contained in text nodes, not the element node such as a p node. In the example above the text Welcome to is not in the p node but in the text node that is a child node of the p node.
JavaScript Tutorial - The Document Object Model (DOM) - Properties & Methods
Properties are often referred to as something that is (i.e. the name of a node, the value of a node).
Methods are often referred to as something that is done (i.e. add a node, delete a node, change the value in a node).
HTML DOM Properties
Some of the more common DOM properties include:
- innerHTML - the text value of an HTML element
- nodeName - the name of an HTML element
- nodeValue - the value of an HTML element
- parentNode - the parent node of an HTML element
- childNodes - the child nodes of an HTML element
- attributes - the attributes nodes of an HTML element
HTML DOM Methods
Some of the more common DOM methods include:
- getElementById(id) - get the element with a specified id
- getElementsByTagName(name) - get all elements with a specified tag name
- appendChild(node) - insert a child node to an HTML element
- removeChild(node) - remove a child node from an HTML element
Using the innerHTML Property
The easiest way to get or modify the content of an element is by using the innerHTML property.
The innerHTML property is useful for returning or replacing the content of HTML elements (including <html> and <body>).
Example using the HTML DOM getElementsByTagName() Method and the innerHTML Property:
Copy the code below and paste into index.html. (Remove all existing code before pasting)
<html>

<head>

<title>DOM Properties Example</title>

</head>

<body>

<p>This page will use unordered lists.</p>

<p>These are types of juice:</p>

<ul>

<li>apple</li>

<li>orange</li>

<li>lemon</li>

</ul>

<p>These are types of birds:</p>

<ul>

<li>Robin</li>

<li>Bluejay</li>

<li>Sparrow</li>

</ul>

<hr />

<script type="text/javascript">

theTitle=document.getElementsByTagName("title");

document.write("<p>The text from the page title is: <strong>"+ theTitle[0].innerHTML + "</strong></p>");

theTxt=document.getElementsByTagName("p");

document.write("<p>The text from the first paragraph is: <strong>"+ theTxt[0].innerHTML + "</strong></p>");

document.write("<p>The text from the third paragraph is: <strong>"+ theTxt[2].innerHTML + "</strong></p>");

items=document.getElementsByTagName('li');

document.write("<p>The text from the first list item is: <strong>"+ items[0].innerHTML + "</strong></p>");

document.write("<p>The text from the fifth list item is: <strong>"+ items[4].innerHTML + "</strong></p>");

</script>

</body>

</html>
Preview the output in a browser.
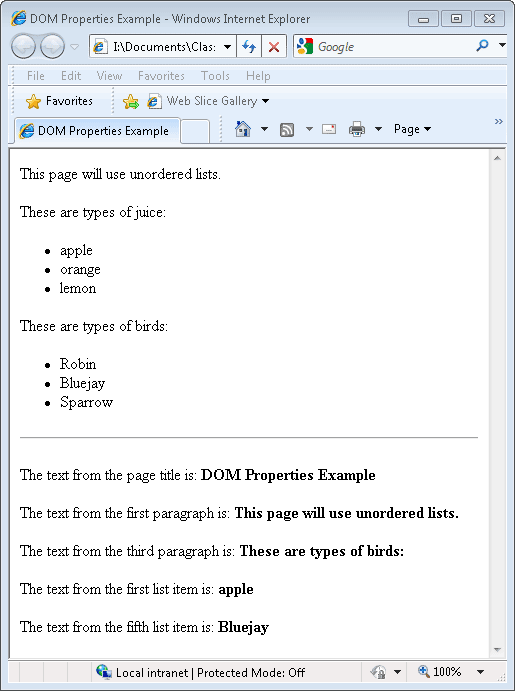
Important Notice: When a web page loads, all of the elements are placed in arrays according to their type. For example, all of the paragraph, <p>, elements would be stored in an array. When you use the getElementsByTagName() method you are accessing the elements from the array. That is why you used index numbers (theTxt[0]) to identify each element in the above code.
Example using the HTML DOM getElementById() Method and the innerHTML Property:
Copy the code below and paste into index.html. (Remove all existing code before pasting)
<html>

<head>

<title>DOM Properties Example</title>

</head>

<body>

<p id="first">This is the text in the paragraph with an id of "first".</p>

<hr />

<script type="text/javascript">

the1stpara=document.getElementById("first");

document.write("<p>The text from the targeted paragraph is: <strong>"+ the1stpara.innerHTML + "</strong></p>");

</script>

</body>

</html>
Preview the output in a browser;
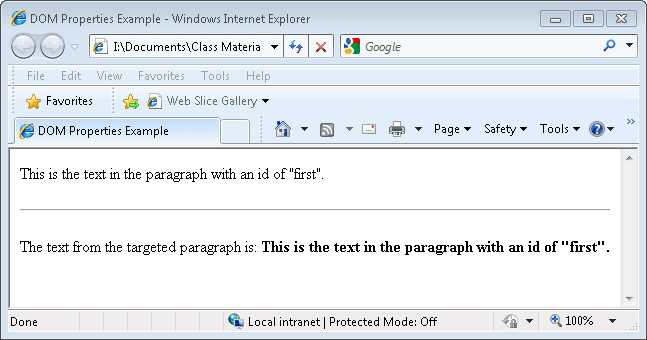
Example using the HTML DOM getElementById() Method and the lastChild, firstChild, parentNode, nodeName and nodeValue Properties:
Copy the code below and paste into index.html. (Remove all existing code before pasting)
<html>

<head>

<title>HTML DOM</title>

</head>

<body>

<div id="main">

<p id="first">I am the first child of the "main" div.</p>

<p>I am the middle child of the "main" div.</p>

<h5>I am the last child of the "main" div.</h5>

</div>

<hr />

<script type="text/javascript">

theValue=document.getElementById("main");

document.write("<p>The <em>name</em> of the last child node of the main div is: <strong>"+ theValue.lastChild.nodeName+ "</strong></p>");

document.write("<p>The <em>name</em> of the first child node of the main div is: <strong>"+ theValue.firstChild.nodeName+ "</strong></p>");

theText=document.getElementById("first");

document.write("<p>The <em>value</em> of the first child node of the paragraph with an id of \"first\" is: <strong>"+ theText.firstChild.nodeValue+ "</strong></p>");

document.write("<p>The <em>name</em> of the parent of the paragraph with an id of \"first\" is: <strong>"+ theText.parentNode.nodeName+ "</strong></p>");

document.write("<p>The <em>attribute</em> of the parent of the paragraph with an id of \"first\" is: <strong>"+ theText.parentNode.getAttribute("id")+ "</strong></p>");

</script>

</body>

</html>
Preview the output in a browser.
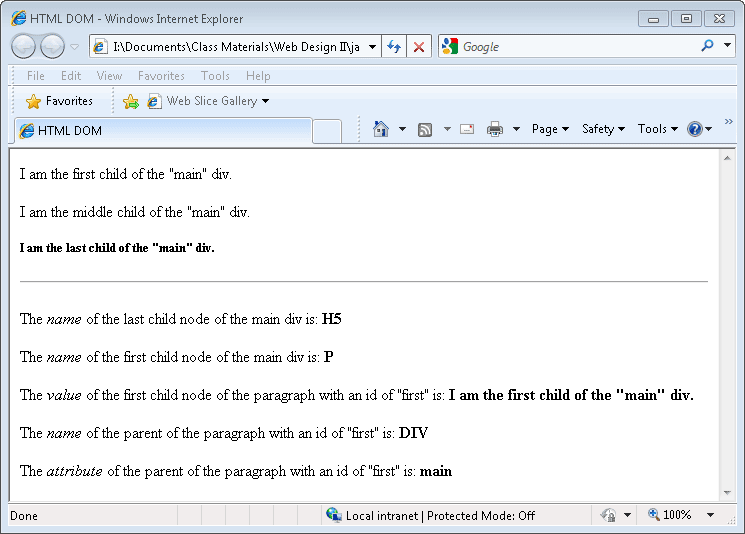
|
JavaScript Tutorial - Form Validation
In this exercise you will apply some of the things you've learned about JavaScript to validate web form entries.
- In Dreamweaver create a new PHP (HTML will not work for this exercise because the server does not allow posting data to static page types) file named congrats.php. This is a page that we will be using later in the lesson.
- Delete the existing code in congrats.php and replace it with the following:
<!DOCTYPE html PUBLIC "-//W3C//DTD XHTML 1.0 Strict//EN" "http://www.w3.org/TR/xhtml1/DTD/xhtml1-strict.dtd">

	<html xmlns="http://www.w3.org/1999/xhtml">

	<head>

	<meta http-equiv="Content-Type" content="text/html; charset=utf-8" />

	<title>Congratulations</title>

	</head>

	<body>

	<h1>Congratulations! You filled out the form correctly.</h1>

	</body>

	</html>
- Save the changes to congrats.php.
- In Dreamweaver create a new HTML file (use XHTML 1.0 Strict for the DocType) named form_validation.html.
- To add a web form for this exercise copy the following code and paste it into the body (between <body> and </body>) of form_validation.html.
<h2>Form Validation Exercise</h2>
<form method="post" action="congrats.php" name="form">
<p><label>First name: <input id="firstName" name="firstName" type="text" value="" maxlength="15" size="16" tabindex="1" /></label></p>
<p><label>Last name: <input id="lastName" name="lastName" type="text" value="" maxlength="20" size="21" tabindex="2" /></label></p>
<p><label>Plans: <select id="plan" name="plan" tabindex="3" >
<option value="" selected="selected">Select a Plan</option>
<option value="P1">Plan 1</option>
<option value="P2">Plan 2</option>
<option value="P3">Plan 3</option>
</select></label><br /></p>
<p>Gender:<br />
<label>
<input type="radio" name="gender" value="m" id="gender_0" tabindex="4" />
Male</label>
<br />
<label>
<input type="radio" name="gender" value="f" id="gender_1 " tabindex="5" />
Female</label>
<br />
</p>
<p><label><input name="terms" type="checkbox" value="" tabindex="6" />Yes, I have read the fine print and agree to all your terms.</label><br /><br /></p>
<input type="submit" value="Submit the Form" tabindex="7" /> <input name="reset" type="reset" value="Reset the Form" tabindex="8">
</form>
- Save the changes to form_validation.html and then preview it a browser. Confirm that the form appears as shown below.
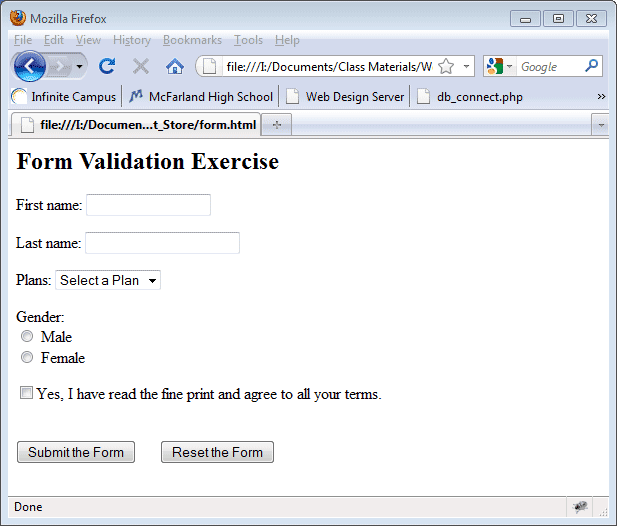
- Now its time for the validation code to be added to the page. You will need to add some javascript code for the validation so in the head section (between <head> and </head>) add the following script tags:
<script type="text/javascript">


	</script>
- In the script tags added previously we will write a javascript function named validate. Add the following code between the script tags created previously:
function validate(form)

	{


	}
The form in (form) is a parameter variable. It will contain the form data sent by a call from the <form> tag as described later.
- In order for the function validate to work it needs to be executed when the web user clicks on the submit button of the form. Add the following attribute into the <form> tag before the > symbol.
onSubmit="return validate(this);"
so the form tag now appears like:
<form method="post" action="congrats.php" name="form" onSubmit="return validate(this);">This added code instructs the browser to return true if the form validates correctly or false if it does not by calling for validate() to be executed. The word this refers to the web form. If false is returned by validate() then the form will not be posted.
- Use RegExp (regular expressions) we will add the code that will provide the validation for our firstName text field. Because a first name can be almost anything we will have fairly loose validation rules. We'll use the following:
- must start with 2 to 15 characters that are A-Z, a-z or 0-9
- cannot have leading or trailing spaces
- Add the following line of code as the first line of code in the validate() function:
var ck_first_name = /^[A-Za-z0-9]{2,15}$/;This code sets a var named ck_first_name to the regexp for the rules stated previously.
- Into the function validate() add another line of code. Copy the following code and place it after the previously added line:
var first_name = form.firstName.value;This line of code sets a variable named first_name to the value stored in the form element named firstName. The value is whatever the web user entered into the firstName text field.
- Now that we have a RegExp rule stored and the value submitted by the user we can compare them to make see if they agree. Add the following code below the previous line of code.
if (ck_first_name.test(first_name)==false) {

	alert("The first name entered is not valid.");

	return false;

	}

	else

	return true;
In this code we are using the test() method of javascript to determine whether ck_first_name, our RegExp rule, agrees with the value in first_name. If there is agreement then the value true will be returned and the data will be posted. If not, then an alert box will give a warning and false will be returned resulting in the data not being posted.
- Preview form_validation.html in a browser. Enter invalid data into the first name text field. Press the Submit button. Confirm that an alert box appears.
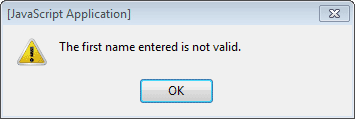
- Enter a valid name into the first name text field. Press the Submit button. Confirm that the browser posts the data and goes to the page named congrats.php.
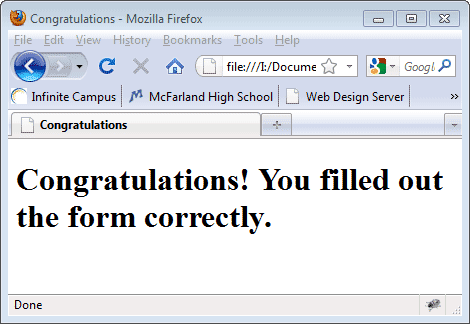
- Now let's add some code for validating the last name text field. The RegExp for the last name is a little more complicated than the first name because we would want to be able to include last names that are hyphenated. Add the following code to the validate() function just after the opening brace, {:
var ck_last_name = /^[A-Za-z0-9]{2,10}-?[A-Za-z0-9]{2,10}$/;This regexp says the last name must start with 2-10 letters that are from A-Z, a-z or 0-9. Then there is allowed 0 or 1 hyphens, then 2-10 characters that are from A-Z, a-z or 0-9.
- Now that we have a RegExp rule stored in a variable and the last name value submitted by the user we can compare them to see if they agree. Add the following code below the previous line of code.
if (ck_last_name.test(last_name)==false) {

	  alert("The last name entered is not valid.");

	  //document.form.firstName.style.backgroundColor="red";

	  return false;

	 }

	 else

	 return true;
- Save the changes to form_validation.html and preview it in a browser. Confirm that SOMETHING IS NOT WORKING! If the first name is valid then the form posts without even looking at the last name field. If the first name is valid then the page posts without looking at the last name field.
- The reason for the problem is that you may only once return either true or false. Once a return true; or a return false; occurs the function is complete and the browser either posts or does not post. The code needs to be changed so that return true; only occurs after all form elements have been determined to be valid. The return false; statement should only occur after all of the form elements have been evaluated and then only if one or more elements were not valid.
- Let's change the validation code so that we can eliminate our return issue. What we'll do is create a variable named errors that counts the number of invalid entries and then returns false when the number of errors is greater than 0. If the number of errors is 0 then all is well and true will be returned. To avoid multiple alert boxes we will change the code so that error messages are stored in a variable and displayed in one alert box after all the elements of the form have been evaluated.
- Erase the validate() function and replace it with the following version:
function validate(form){

	var ck_first_name = /^[A-Za-z0-9]{2,15}$/;

	var first_name = form.firstName.value;

	var ck_last_name = /^[A-Za-z0-9]{2,10}-?[A-Za-z0-9]{2,10}$/;

	var last_name = form.lastName.value;


	var errors = 0;

	var msg="The following has occured...\\n\\n";


	if (ck_first_name.test(first_name)==false) {

	msg+="The first name entered is not valid. \\n";

	errors++;

	}


	if (ck_last_name.test(last_name)==false) {

	msg+="The last name entered is not valid. \\n";

	errors++;

	}


	if(errors > 0){

	alert(msg);

	return false;

	}

	else

	return true;

	}
- Save the changes to form_validation.html and preview it in a browser. Confirm that the validation is now working correctly. the image below shows what the alert message would look like if both fields were invalid.
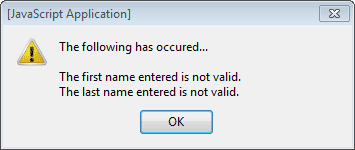
- Now we are ready to add some code to validate the Plans select element. Because the choices are limited to what we have listed as options we there will not need to be any RegExp comparisons. What we will need to do is to confirm that a choice was made by the user. We will use the selectedIndex property to determine what item is currently selected. Add the following code to the validate() function.
var plan = form.plan.selectedIndex; // index 0 would indicate no option selected by the userIf the user selects an item from a select list the index number of the item is recorded. The first item is 0, the second item is 1 and so on.
- Now that we know the index number of the selected item we can check to see if it is still 0, meaning that a selection was not made by the user. Add the following code to the validate() function.
if(plan==0){

	msg+="You must select a plan. \\n";

	errors++;

	}
- Save the changes to form_validation.html and then preview it in a browser. Confirm that the Plan select element is working correctly.
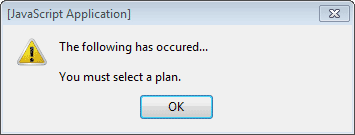
- Next we'll tackle the Gender option element. Again, there will be no complicated RegExp to work with because the user isn't entering any data. In this case we'll use the option button's checked property to determine if it was selected. Add the following code to the validate() function:
var male = form.gender[0].checked; // will return true if selected or false if not selected

var female = form.gender[1].checked; // will return true if selected or false if not selectedAll option buttons are stored in an array and are numbered beginning at 0. In our case the male option button is first so it has 0 for and index while the female option button has an index of 1.
- Now that we know if any option button was checked we can add the code that checks for validation. Add the following code into the validate() function:
if(male==false & female==false){

	msg+="You must select a gender. \\n";

	errors++;

	}
If both male and female are false then the user did not select a gender option button.
- Save the changes to form_validation.html and then preview it in a browser. Confirm that the Gender option element is working correctly.
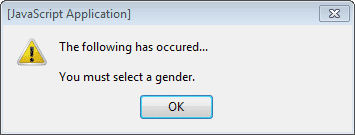
- Next we need to make sure that the user has checked the terms checkbox. Since the user is not entering any data we will not need to concoct any RegExp for validation. Like option buttons, ckeckboxes have a checked property that we can use for validation. Paste the following code into the validate() function:
var terms = form.terms.checked; // will return true if checked or false if not checked
- Now that we know if the terms checkbox was checked or not we can add code to check for validation. Add the following code to the validate() function:
if(terms==false){

	msg+="You must agree to our terms. \\n";

	errors++;

	}
- Save the changes to form_validation.html and then preview it in a browser. Confirm that the Terms element is working correctly.
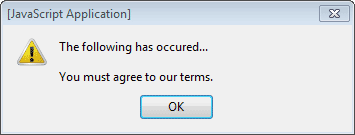
- Now that we have managed to validate the web form we will add one last feature to the validation. We will add some red color to those elements that have an error. First we will work on the first name and last name text fields. In the validate() function find this code:
if(ck_first_name.test(first_name)==false){

	msg+="The first name entered is not valid. \\n";

	errors++;

	}
and add this code:
document.form.firstName.style.backgroundColor="red";
so it appears as:
if(ck_first_name.test(first_name)==false){

	msg+="The first name entered is not valid. \\n";

	document.form.firstName.style.backgroundColor="red";

	errors++;

	}
- Save the changes to form_validation.html and then preview it in a browser. Confirm that the background color of the first name field becomes red when invalid data is entered and then the Submit button is pressed.
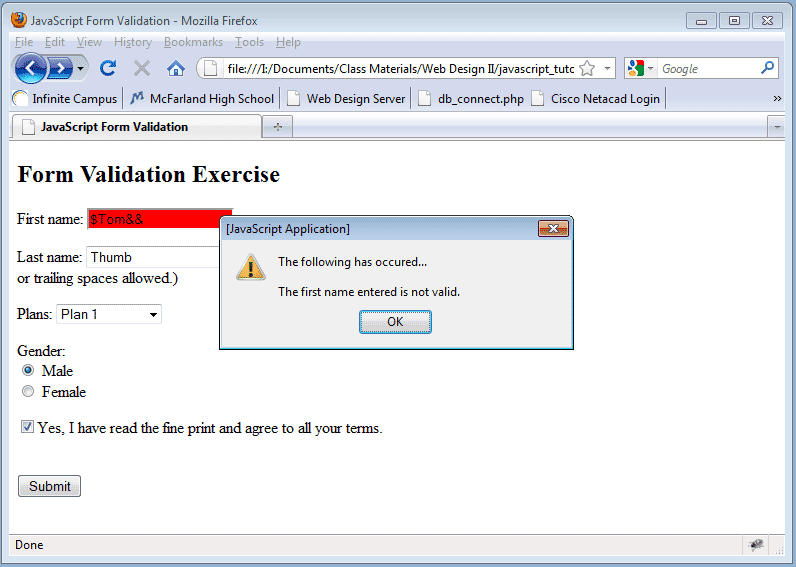
- The last name field should also turn red when invalid data is entered. In the validate() function find this code:
if(ck_last_name.test(last_name)==false){

	msg+="The last name entered is not valid. \\n";

	errors++;

	}
and add this code:
document.form.lastName.style.backgroundColor="red";
so it appears as:
if(ck_last_name.test(last_name)==false){

	msg+="The last name entered is not valid. \\n";

	document.form.lastName.style.backgroundColor="red";

	errors++;

	}
- Save the changes to form_validation.html and then preview it in a browser. Confirm that the background color of the last name field becomes red when invalid data is entered and then the Submit button is pressed.
- The Plan select element will also need to have a red background if the user does not make a selection. In the validate() function find this code:
if(plan==0){

	msg+="You must select a plan. \\n";

	errors++;

	}
and add this code:
document.form.plan.style.backgroundColor="red";
so it appears as:
if(plan==0){

	msg+="You must select a plan. \\n";

	document.form.plan.style.backgroundColor="red";

	errors++;

	}
- Save the changes to form_validation.html and then preview it in a browser. Confirm that the background color of the Plan select list becomes red when no plan is selected before the Submit button is pressed.
- The rest of the elements on the form, Gender option buttons and a Terms checkbox do not have background colors that we can alter. Instead we will alter the labels so that their text color becomes red. In these cases we will use the selectElementById() method. To do that we must first give the labels an id value. In the body of form_validation.html find this block of code:
<p>Gender:<br />

	  <label>

	  <input type="radio" name="gender" value="m" id="gender_0"  />

	    Male</label>

	  <br />

	  <label>

	  <input type="radio" name="gender" value="f" id="gender_1 "  />

	    Female</label>

	  <br />

	</p>
then replace it with this code:
<p>Gender:<br />

	  <label id="lblmale">

	  <input type="radio" name="gender" value="m" id="gender_0" onclick="changeGenderColor()" />

	    Male</label>

	  <br />

	  <label id="lblfemale">

	  <input type="radio" name="gender" value="f" id="gender_1 " onclick="changeGenderColor()" />

	    Female</label>

	  <br />

	</p>
Note that all we have done is give an id value to each label.
- In the validate() function find the following code:
if(male==false & female==false){

	msg+="You must select a gender. \\n";

	errors++;

	}
and change it to:
if(male==false & female==false){

	msg+="You must select a gender. \\n";

	document.getElementById('lblmale').style.color="red";

	document.getElementById('lblfemale').style.color="red";

	errors++;

	}
- Save the changes to form_validation.html and then preview it in a browser. Confirm that the color of the Gender labels become red when no gender is selected before the Submit button is pressed.
- The last element to work with is the Terms checkbox. Again, we will need to use the label color for our validation. in the <body> of form_validation.html find the following line of code:
<label><input name="terms" type="checkbox" value="" />
and add
id="lblterms"
so that it appears as:
<label id="lblterms"><input name="terms" type="checkbox" value="" />
- In the validate() function find the following code:
if(terms==false){

	msg+="You must agree to our terms. \\n";

	errors++;

	}
and replace it with:
if(terms==false){

	msg+="You must agree to our terms. \\n";

	document.getElementById('lblterms').style.color="red";

	errors++;

	}
- Save the changes to form_validation.html and then preview it in a browser. Confirm that the color of the Terms label becomes red when the terms checkbox is not selected before the Submit button is pressed.
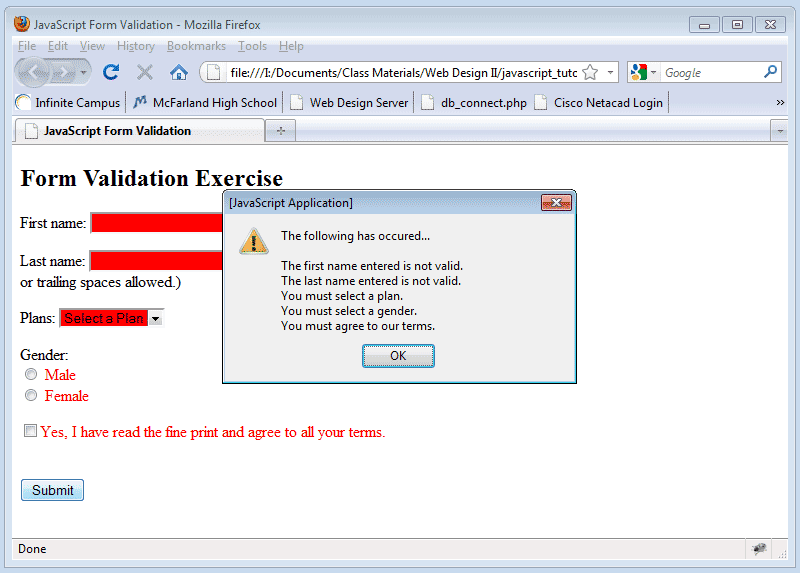
- Sooo, we're done now right? Not quite. The elements that are red should lose the red color when they are selected by the user. Right now they stay red while the user enters new data. First will fix the text fields for first name and last name. Find the <input> tag for the firstName element. Add the following attribute code inside the <input> tag:
onfocus="this.style.backgroundColor='#ffffff'"
so it appears as:
<input id="firstName" name="firstName" type="text" value="" onfocus="this.style.backgroundColor='#ffffff'" maxlength="255" tabindex="1" />
- Add the same code added above into the <input> tag for the lastName element and the <select> tag of the plans element.
- Save the changes to form_validation.html and then preview it in a browser. Confirm that the red color goes back to white when the elements are clicked on by the user.
- To revert the labels for the Gender element back to white we will need to create a new function. Copy the code below and paste it in the <head> section, in the <script> tags, after the validate() function:
function changeGenderColor(){

	 document.getElementById('lblmale').style.color="black";

	 document.getElementById('lblfemale').style.color="black";

	}
- In the <body> of form_validation.html find the <input> tag for the male option button:
<input type="radio" name="gender" value="m" id="gender_0" />
and add the following attribute code:
onclick="changeGenderColor()"
so that it appears as:
<input type="radio" name="gender" value="m" id="gender_0" onclick="changeGenderColor()" />
Also change the female option button to appear as:
<input type="radio" name="gender" value="f" id="gender_1 " onclick="changeGenderColor()" />
- Save the changes to form_validation.html and then preview it in a browser. Confirm that the red color goes back to white when the elements are clicked on by the user.
- To revert the label for the terms element back to white we will need to create a new function. Copy the code below and paste it in the <head> section, in the <script> tags, after the validate() function:
function changeTermsColor(){

	 document.getElementById('lblterms').style.color="black";

	}
- In the <body> of form_validation.html find the <input> tag for the terms checkbox:
<input name="terms" type="checkbox" value="" />
and add the following attribute code:
onclick="changeTermsColor()"
so that it appears as:
<input name="terms" type="checkbox" value="" onclick="changeTermsColor()" />
- Save the changes to form_validation.html and then preview it in a browser. Confirm that the red color goes back to white when the elements are clicked on by the user.
- One item that has not been covered in this exercise is the Reset the Form button. A reset button will automatically clear the contents and selections made on a form. It will not automatically change any styles that have been changed due to our javascript. In other words, the red color on items with errors will not reset when the reset button is pressed. We will need to add a function that changes the items back to their original colors when the Reset the Form button is pressed.
In the <input> tag of the reset button add the following attribute code that calls a function we'll name resetColors:
onclick="resetColors()"
so it appears as:
<input name="reset" type="reset" value="Reset the Form" tabindex="8" onclick="resetColors()">
- Next we will need to add a function named resetColors() to the javascript in the <head> of the page. Add the following function into the <script> tags in the <head> area (right after the changeTermsColor function would be a good place):
function resetColors(){

	document.form.firstName.style.backgroundColor="white";

	document.form.lastName.style.backgroundColor="white";

	document.form.plan.style.backgroundColor="white";

	document.getElementById('lblmale').style.color="black";

	document.getElementById('lblfemale').style.color="black";

	document.getElementById('lblterms').style.color="black";

	}
If after going through this rather long lesson your code is not functioning correctly you can copy the entire code for form_validation.html below:
<!DOCTYPE html PUBLIC "-//W3C//DTD XHTML 1.0 Strict//EN" "http://www.w3.org/TR/xhtml1/DTD/xhtml1-strict.dtd">
<html xmlns="http://www.w3.org/1999/xhtml">
<head>
<meta http-equiv="Content-Type" content="text/html; charset=utf-8" />
<title>JavaScript Form Validation</title>
<script type="text/javascript">
function validate(form){
var ck_first_name = /^[A-Za-z0-9]{2,15}$/;
var first_name = form.firstName.value;
var ck_last_name = /^[A-Za-z0-9]{2,10}-?[A-Za-z0-9]{2,10}$/;
var last_name = form.lastName.value;
var plan = form.plan.selectedIndex; // index 0 would indicate no option selected by the user
var male = form.gender[0].checked; // will return true if selected or false if not selected
var female = form.gender[1].checked; // will return true if selected or false if not selected
var terms = form.terms.checked; // will return true if checked or false if not checked
var errors = 0;
var msg="The following has occured...\\n\\n";
if(ck_first_name.test(first_name)==false){
msg+="The first name entered is not valid. \\n";
document.form.firstName.style.backgroundColor="red";
errors++;
}
if(ck_last_name.test(last_name)==false){
msg+="The last name entered is not valid. \\n";
document.form.lastName.style.backgroundColor="red";
errors++;
}
if(plan==0){
msg+="You must select a plan. \\n";
document.form.plan.style.backgroundColor="red";
errors++;
}
if(male==false & female==false){
msg+="You must select a gender. \\n";
document.getElementById('lblmale').style.color="red";
document.getElementById('lblfemale').style.color="red";
errors++;
}
if(terms==false){
msg+="You must agree to our terms. \\n";
document.getElementById('lblterms').style.color="red";
errors++;
}
if(errors > 0){
alert(msg);
return false;
}
else
return true;
}
function changeGenderColor(){
document.getElementById('lblmale').style.color="black";
document.getElementById('lblfemale').style.color="black";
}
function changeTermsColor(){
document.getElementById('lblterms').style.color="black";
}
function resetColors(){
document.form.firstName.style.backgroundColor="white";
document.form.lastName.style.backgroundColor="white";
document.form.plan.style.backgroundColor="white";
document.getElementById('lblmale').style.color="black";
document.getElementById('lblfemale').style.color="black";
document.getElementById('lblterms').style.color="black";
}
</script>
</head>
<body>
<h2>Form Validation Exercise</h2>
<form method="post" action="congrats.php" name="form" onSubmit="return validate(this);">
<p><label>First name: <input id="firstName" name="firstName" type="text" value="" onfocus="this.style.backgroundColor='#ffffff'" maxlength="15" tabindex="1" /></label><br /></p>
<p><label>Last name: <input id="lastName" name="lastName" type="text" value="" onfocus="this.style.backgroundColor='#ffffff'" maxlength="20" tabindex="2" /></label><br /></p>
<p><label>Plans: <select id="plan" name="plan" onfocus="this.style.backgroundColor='#ffffff'" >
<option value="" selected="selected">Select a Plan</option>
<option value="P1">Plan 1</option>
<option value="P2">Plan 2</option>
<option value="P3">Plan 3</option>
</select></label><br /></p>
<p>Gender:<br />
<label id="lblmale">
<input type="radio" name="gender" value="m" id="gender_0" onclick="changeGenderColor()" />
Male</label>
<br />
<label id="lblfemale">
<input type="radio" name="gender" value="f" id="gender_1 " onclick="changeGenderColor()" />
Female</label>
<br />
</p>
<p><label id="lblterms"><input name="terms" type="checkbox" value="" onclick="changeTermsColor()" />Yes, I have read the fine print and agree to all your terms.</label><br /><br /></p>
<input type="submit" value="Submit the Form" tabindex="7" /> <input name="reset" type="reset" value="Reset the Form" tabindex="8" onclick="resetColors()">
</form>
</body>
</html>
JavaScript Tutorial - Using Online Source Code
NOTICE: Not all JavaScript scripts work with all browsers. For the purpose of this exercise I have used scripts that work in most, if not all, browsers.
- In Dreamweaver create a new page named js_calculator.html.
- We will make use a web site named The JavaScript Source. In a browser go to http://www.javascriptsource.com/.
- Notice the links to categories near the top of the page. Select the link Math Related.
- Scroll down the page and click the link to the Advanced Calculator. Try the calculator to make sure it is functional.
- Locate the brightly colored yellow box. Read the directions detailing how to incorporate the calculator on a web page. In this instance there is only one step. That step simply says that the code should be copied and then pasted into the body of your web page.
- Press the Highlight All button. Right-click on the selected code and choose Copy.
- Paste the copied code in the body of calculator.html.
- Save the changes to calculator.html and preview it in a browser. Confirm that the calculator is functional.
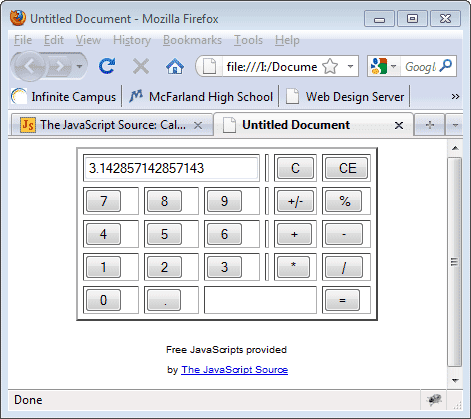
- If you were really going to use a calculator on a web page it would be wise to place the code in an external file and then link your page to the file. It would be distracting to have the lengthy JavaScript code in your web page code.
- In Dreamweaver create a new page named ball_drop.html.
- In a browser navigate to http://www.javascriptsource.com/image-effects/ball-drop.html.
- Notice that the JavaScript source code in this example is a two step process. There is code for the head and code for the body of your web page.
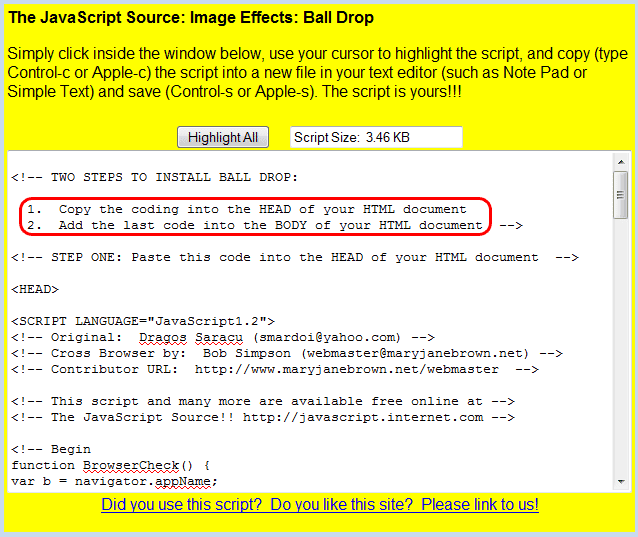
- Copy the code found between the <head></head> tags. Paste the code into the head section of ball_drop.html.
- Copy the code for the <body> of the web page. Paste the code into the body section of ball_drop.html.
- Save the changes to ball_drop.html and then preview it in a browser. Notice that the ball does not drop! To fix the ball drop error return to the code of ball_drop.html and remove the !DOCTYPE (the first line) code. Save the changes and preview in a browser. Confirm that the ball now drops as intended.
- It is important to note here that this ball drop effect uses an image named ball.gif. The image is located at the JavaScript Source web site and the code in the javascript links to it. It would be better if the ball.gif image was located in your own site. So, let's download the image and place it in our site. Then, we'll change the javascript code to reference the images new location.
- In a browser navigate to http://www.javascriptsource.com/img/ball-drop/ball.gif. Right-click on the image and save it in the images folder of your site.
- View the javascript code in ball_drop.html. Look for the following code:
<img src="http://www.javascriptsource.com/img/ball-drop/ball.gif" height=30 width=30 alt="Static ball">
and change the image source so the new code appears as:
<img src="images/ball.gif" height=30 width=30 alt="Static ball">
- Save the changes to ball_drop.html and then preview in a browser. Confirm that the ball still functions correctly.
|
|
|


