|
Forms are used to allow web users to fill in information and submit it. For example, when you log in to a web site, your name and password are entered into a simple form.
The form has two text fields, one for your username and one for your password.
There is also a submit button usually titled Login and in the sample to the right there is a Cancel button.
- If your tutorial project is not open then go to Dreamweaver and open it.
- Open form.html and view the code. Remove any code currently in the content box.
- Place the cursor inside of the content box (between <div id="content"> and </div>)
<div id="content">


	</div>
 From the toolbar near the top of the screen in Dreamweaver select the Forms tab. From the toolbar near the top of the screen in Dreamweaver select the Forms tab.
 All form elements (text fields, check boxes, etc...) must be within a form tag. In other words, they must be between <form> and </form>. All form elements (text fields, check boxes, etc...) must be within a form tag. In other words, they must be between <form> and </form>.
To add form tags to your form.html page press the Form button located on the Forms toolbar.
Note: We could just enter the code ourselves but in this example we are taking advantage of the web-design-for-dummies part of Dreamweaver.
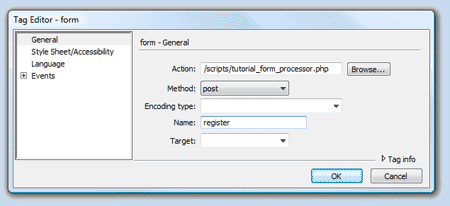 In the form Tag Editor window enter /scripts/tutorial_form_processor.php for the Action field. In the form Tag Editor window enter /scripts/tutorial_form_processor.php for the Action field.
This action tells the browser that when the Submit button is pressed it should look for a file named tutorial_form_processor.php in the scripts folder on the web server. That file is a file that has been specifically written by Mr. Lawless to handle the information entered on form.html.
Choose Post for the Method.
Enter 'register' for the Name.
Press the OK button.
- In form.html place the cursor between the opening and closing form tags. Press Enter twice so the code appears as:
<form action="/scripts/tutorial_form_processor.php" method="post" name="register">


	</form>
- Web forms often have different sections. For example there may be a section for users to enter personal information such as name and address. There may be another section where users enter information about the products they wish to purchase from the site. Each of these sections can be placed into a web element known as a fieldset. In form.html place the cursor between the form tags. From the Insert menu select Form and then Fieldset. Enter Personal Information for the legend. Press the OK button. Make sure that you view the code Dreamweaver added to form.html. It should appear as;
<form action="/scripts/tutorial_form_processor.php" method="post" name="register">

	<fieldset><legend>Personal Information</legend></fieldset>

	</form>
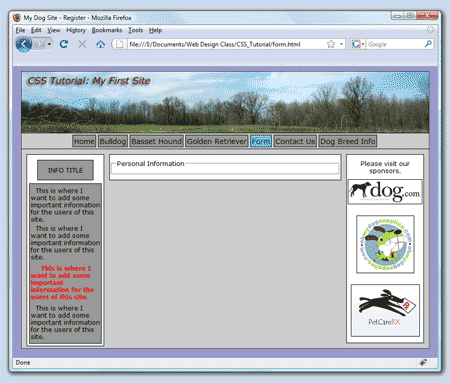 Preview the changes in a browser. Preview the changes in a browser.
Notice there is an empty box with a 1 pixel black border and a title of Personal Information.
Later in this tutorial we will add styles to the fieldset and legend tags to improve their appearance.
- In form.html use the Enter key to change the code of the fieldset so it appears as:
<fieldset>

	<legend>Personal Information</legend>


	</fieldset>
- In form.html place the cursor in the blank line after the legend tags. From the Insert menu choose Form then Label. Between the label tags enter the text First Name: . (notice there is a space after the colon)
<fieldset>

	<legend>Personal Information</legend>

	<label>First Name: </label>

	</fieldset>
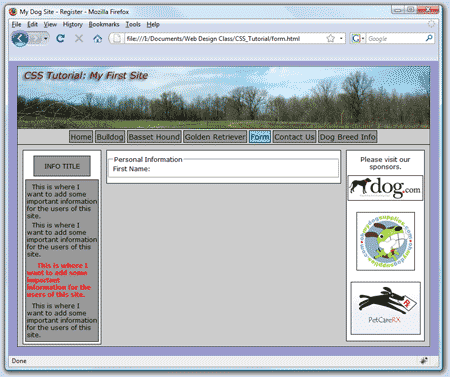 Preview the changes in a browser. Preview the changes in a browser.
There is now a label in the fieldset.
 Next we will add a text field to the form. A text field is a form element that allows a web user to enter information on the web form. In form.html place the cursor after the text entered for the label and before the closing label tag, </label>. From the toolbar press the Text Field button. Next we will add a text field to the form. A text field is a form element that allows a web user to enter information on the web form. In form.html place the cursor after the text entered for the label and before the closing label tag, </label>. From the toolbar press the Text Field button.
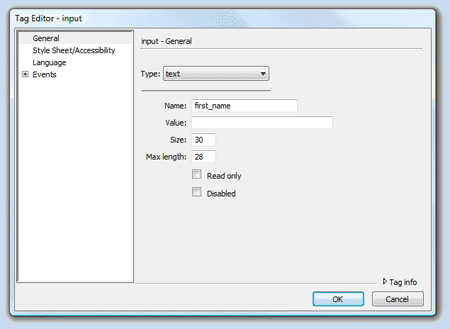 Enter first_name for Name. This is the name for the text field that the computer will use when the form is processed. Enter first_name for Name. This is the name for the text field that the computer will use when the form is processed.
Enter 30 for the Size. This determines the width of the text field.
Enter 28 for the Max length. This determines how many characters a web user can enter into the text field.
When finished the code will appear as:
<label>First Name: <input name="first_name" type="text" size="30" maxlength="28" /></label>
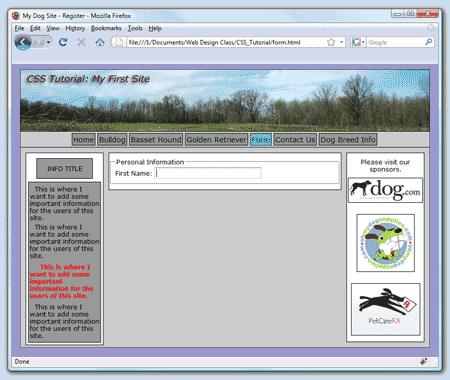 Preview the changes in a browser. Preview the changes in a browser.
Notice there is an area where text can be entered. Test the field to confirm that you are allowed to enter a maximum of 28 characters.
Also notice that when you click the mouse on the label First Name it places the blinking cursor in the text field. This occurs because the text field is between the opening and closing label tags.
- Enter the code for another text field used to enter the user's last name. Name the text field last_name. Use a Size of 50 and a maximum number of characters of 48. The label should be 'Last Name:'.
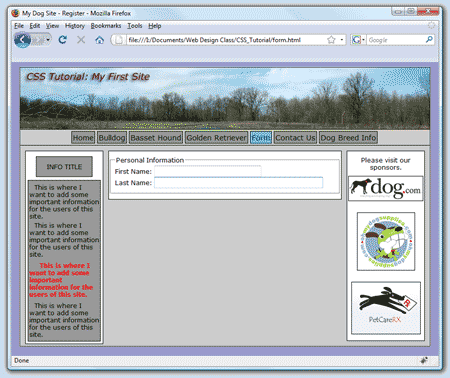 Preview the changes in a browser. Preview the changes in a browser.
Notice that the layout is inline, not block so the new items are not dropped down to the next line.
Add a break tag, <br />, between the two form elements.
- The two elements are now on separate lines. But the vertical separation is not enough. Add another break tag after the previous break tag.
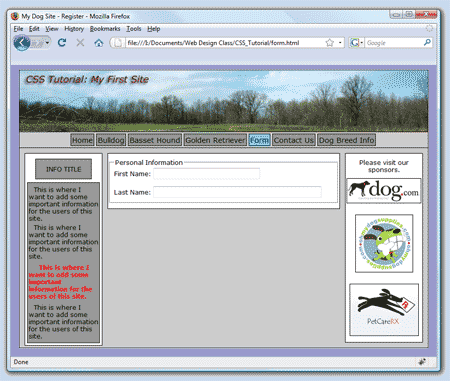 Preview the changes in a browser. Preview the changes in a browser.
Now there is a more adequate separation. But, using break tags in this way will not pass validation tests.
One way to control the spacing would be to use a table. Each form element could be placed in a table cell and then we could control the height of the row using CSS styles..
- Remove the break, <br /> , tags added previously. Remove the code for the two labels and text fields. Replace the code with the following code:
<table>

	<tr>

	  <td>

	   <label>First Name: <input name="first_name" type="text" size="30" maxlength="28" /></label>

	  </td>

	</tr>

	<tr>

	  <td>

	   <label>Last Name: <input name="last_name" type="text" size="50" maxlength="48" /></label>

	  </td>

	</tr>

	</table>
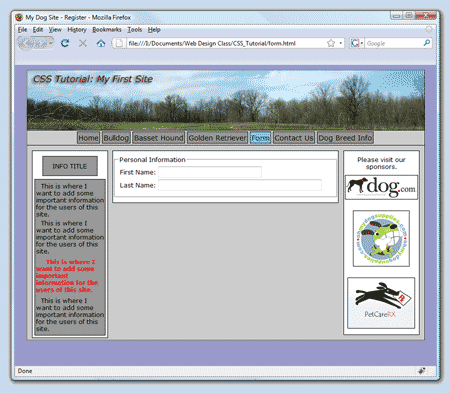 Preview the changes in a browser. Preview the changes in a browser.
- In form.html add another row and cell to the table. In the new table cell add a label and text field for the user to enter a street address. Enter the text 'Street: ' for the label. Name the text field 'street'. Enter 50 for the size and set the Max to 75. The new code will appear like the code highlighted below in yellow.
<table>

	<tr>

	  <td>

	   <label>First Name: <input name="first_name" type="text" size="30" maxlength="28" /></label>

	  </td>

	</tr>

	<tr>

	  <td>

	   <label>Last Name: <input name="last_name" type="text" size="50" maxlength="48" /></label>

	  </td>

	</tr>

	<tr>

	  <td>

	   <label>Street: <input name="street" type="text" size="50" maxlength="75" /></label>

	  </td>

	</tr>

	</table>
- (Note: Code not shown in this step to allow you to demonstrate that you can do it on your own.) In form.html add another row and cell to the table after the last row. In the new table cell add a label and text field for the user to enter a city name. Enter the text 'City: ' for the label. Name the text field 'city'. Enter 50 for the size and set the Max to 48.
- In form.html add another row and cell to the table after the last row. Add <label>State: </label> in the table cell.
<tr>

	<td>

	  <label>State: </label>

	</td>

	</tr>
 Place the cursor just after the colon between <label> and </label>. Place the cursor just after the colon between <label> and </label>.
For the user to enter the state information we will use a select list form element. From the toolbar press the List/Menu button.
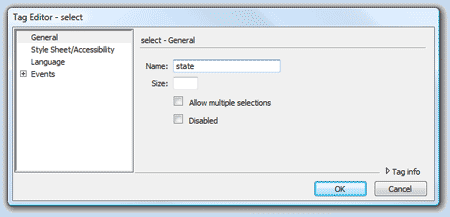 Enter state for the name of the select element. Press the OK button. Enter state for the name of the select element. Press the OK button.
The code will appear like:
<tr>

	 <td>

	  <label>State: <select name="state"></select>

	  </label>

	</td>

	</tr>
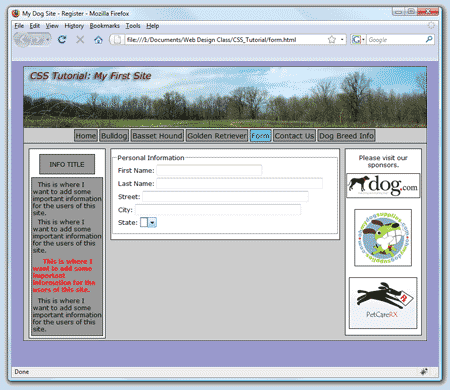 Preview the changes in a browser. Preview the changes in a browser.
Notice the state select element does not have any states that can be selected.
- In form.html place the cursor within the select tag and press Enter so the code appears as:
<tr>

	 <td>

	  <label>State: <select name="state">


	   </select>

	  </label>

	</td>

	</tr>
- Add the following code within the select tags. The value is what will be sent to the web site when the user selects the text. So, if the user selects Alabama, the two letter abbreviation AL is sent to where the information is processed.
<option value="no state selected">---</option>

	<option value="AL">Alabama</option>

	<option value="AK">Alaska</option>
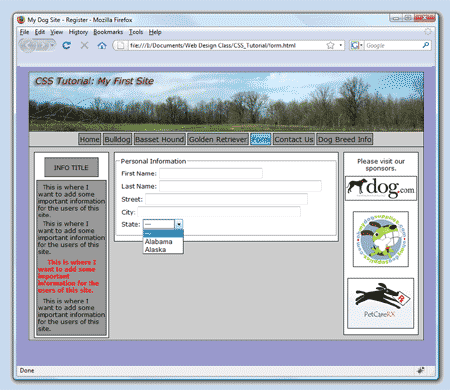 Preview the changes in a browser. Preview the changes in a browser.
Notice the the default choice is ---.
Web sites often make the first choice in a select list something other than a state so that you would not automatically have Alabama selected when you forget to choose a state.
- Add the rest of the states to your select element. (hint: go to http://www.devdaily.com/blog/post/jsp/states-for-html-select-option-tag-drop-down-list/ scroll down to the second list and copy the rest of the states so you can just paste the code)
- In form.html add a new row and cell to the table. In the new cell add a label and text field for the user to enter a ZIP code. Enter the text 'Zip: ' for the label. Name the text field zip. Because there are only 5 digits (technically there are 10 but we won't use that for this tutorial) in a ZIP code enter 5 for the Size and set the Max to 5.
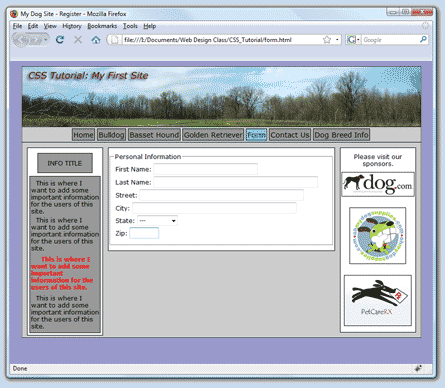 Preview the changes in a browser. Preview the changes in a browser.
- The form would look nicer if the ZIP code field was on the same line as the state select item. In order to place the state select item and the ZIP item on the same line we could place both of them in the same table cell. In form.html remove the last two table rows and replace them with the following code so that it appears as:
NOTICE: I did not include all of the states in the code below because it would take too much room on this tutorial page. Make sure you copy all of the states from your existing select list.
<tr>
<td>
<label>State: <select name="state">
<option value="no state selected">---</option>
<option value="AL">Alabama</option>
<option value="AK">Alaska</option>
</select>
</label>
<label> Zip: <input name="zip" type="text" size="5" maxlength="5" />
</label>
</td>
</tr>
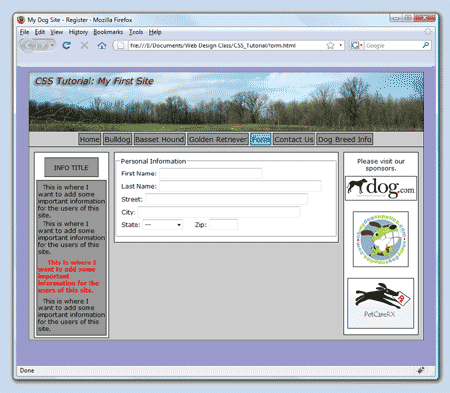 Preview the changes in a browser. Preview the changes in a browser.
Notice that the code uses (called a non-breaking space) multiple times to force the ZIP label and text field over from the state items.
Caution: This is not a very good method for spacing the elements. There are better methods but this is a cheap easy method where exact spacing is not critical.
- In order to demonstrate the use of other available form elements we will add another section to our web form. In form.html below the first fieldset add another fieldset and legend set of tags. Insert the text 'Other Form Elements' between the legend tags.
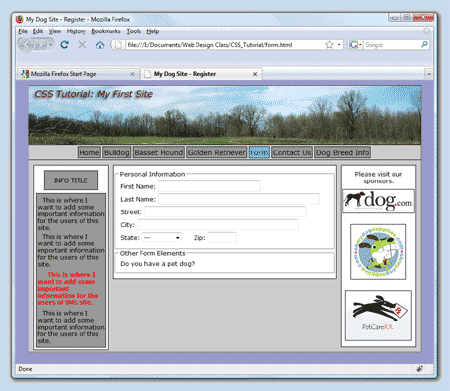 Inside the fieldset, enter code to create a table with one row and one cell . Inside the fieldset, enter code to create a table with one row and one cell .
In the new table cell enter the text 'Do you have a pet dog?' followed by three non-breaking spaces ( )
Preview the changes in a browser.
The code will appear like:
<table>
<tr><td>
Do you have a pet dog?
</td></tr>
</table>
- The two fieldset elements are too close together. In main.css add the following code so that fieldset elements have bottom margin:
fieldset{margin-bottom:20px;}
- Preview the changes in a browser to confirm that the fieldsets have a margin on the bottom of 20px that causes some separation.
- Immediately after the three non-breaking spaces add an opening and closing set of label tags. Inside the label tags enter the text 'Yes'.
<table>
<tr><td>
Do you have a pet dog? <label>Yes</label>
</td></tr>
</table>
 In form.html place the cursor immediately before the text Yes. In the toolbar press the Radio Button button. In form.html place the cursor immediately before the text Yes. In the toolbar press the Radio Button button.
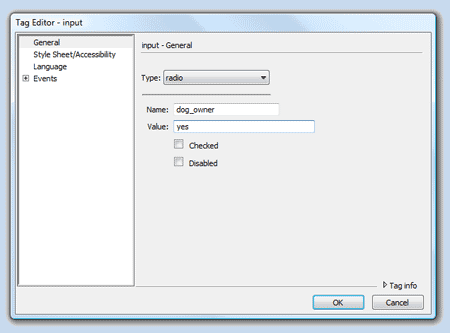 Give the button the name dog_owner and a value of yes. Press the OK button. Give the button the name dog_owner and a value of yes. Press the OK button.
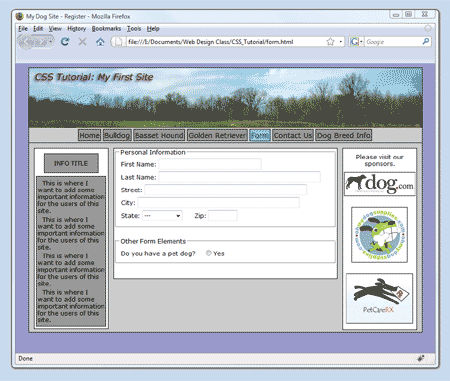 Preview the changes in a browser. Preview the changes in a browser.
- In form.html add another label and radio button after the first radio button. Give the radio button the name dog_owner and a value of no. Place three non-breaking spaces within the label tag but before the radio button. The code will appear as:
<table>
<tr><td>
Do you have a pet dog?
<label><input name="dog_owner" type="radio" value="yes" />Yes</label>
<label> <input name="dog_owner" type="radio" value="no" />No</label>
</td></tr>
</table>
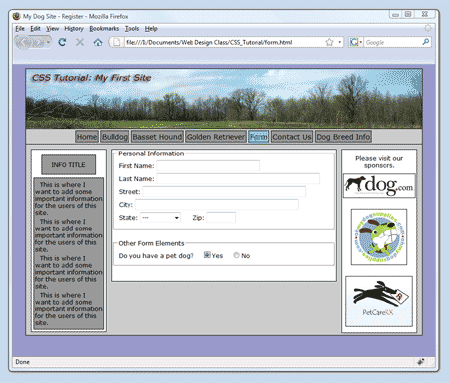 Preview the changes in a browser. Preview the changes in a browser.
Click on a radio button. Notice that you may select only one radio button.
The default setting for radio buttons is designed to let a user select only one option from a group of radio buttons.
Notice that both radio buttons have the name dog_owner. Having the same name places them in a group wherein you may select only one button from that group.
- Let's add another set of radio buttons to the form to see how placing radio buttons in groups lets us select one option from each group. In form.html place the following code after the closing tag of the first row in the table.
<tr><td>
If yes, how many?
<label><input name="num_dogs" type="radio" value="1" />One</label>
<label> <input name="num_dogs" type="radio" value="2" />Two</label>
<label> <input name="num_dogs" type="radio" value=">2" />More than two</label>
</td></tr>
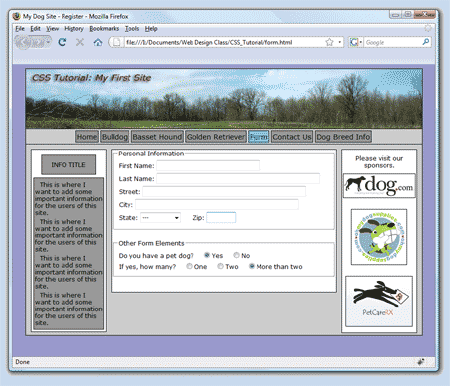 Preview the changes in a browser. Preview the changes in a browser.
Notice that you may select one option from each group of radio buttons.
- Next, we will use check boxes. Unlike radio buttons check boxes are used in a situation where the user may select more than one option. In form.html add another row and cell to the current table. Enter the text 'What breed of dog have you had as a pet? (check all that apply)'.
The code will appear as:
<tr><td>

	  What breed of dog have you had as a pet? (check all that apply)

	</td></tr>
 In the same cell add a label with the text 'Bulldog'. Bulldog. In the same cell add a label with the text 'Bulldog'. Bulldog.
The code will appear as:
<tr><td>

	  What breed of dog have you had as a pet? (check all that apply)

	  <label>Bulldog</label>

	</td></tr>
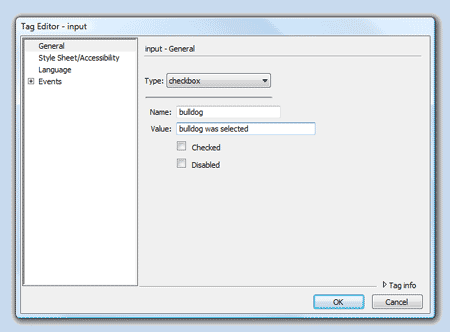 Place the cursor immediately before the text Place the cursor immediately before the text
In the toolbar press the Checkbox button. Name the check box bulldog. Give the check box a value of 'bulldog was selected'.
The code will appear as:
<tr><td>

	  What breed of dog have you had as a pet? (check all that apply)

	  <label><input name="bulldog" type="checkbox" value="bulldog was selected" />Bulldog</label>

	</td></tr>
- Enter the following code below after the line of code for the bulldog check box.
<label> <input name="basset_hound" type="checkbox" value="basset hound was selected" />Basset Hound</label>
<label> <input name="golden_retriever" type="checkbox" value="golden retriever was selected" />Golden Retriever</label>
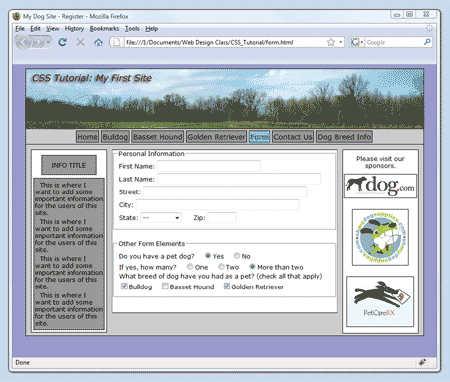 Preview the changes in a browser. Preview the changes in a browser.
Notice that you may select more than one option.
Also, notice that unlike radio buttons each check box has a unique name. You may have noticed that the rows of text in the form are too close together.
We will solve that issue in a later section of this exercise.
- In form.html add another row and cell to the existing table.
 We will add a text area for users to enter a comment regarding their favorite pet dog. We will add a text area for users to enter a comment regarding their favorite pet dog.
In the cell of the new row add a label tag with the text 'Tell us about your favorite dog:.'
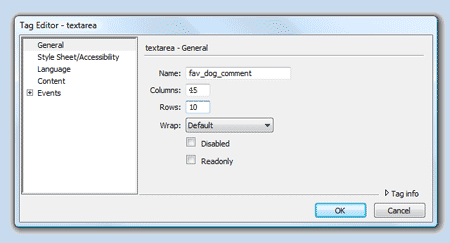 Place the cursor after the text but inside the label tag. Enter a break tag, <br />. Next, on the toolbar press the Textarea button. Give the text area the name 'fav_dog_comment'. Enter 45 for Columns (sets the width of the text area) and 10 for Rows (sets the height of the text area). Place the cursor after the text but inside the label tag. Enter a break tag, <br />. Next, on the toolbar press the Textarea button. Give the text area the name 'fav_dog_comment'. Enter 45 for Columns (sets the width of the text area) and 10 for Rows (sets the height of the text area).
The code appears as:
<tr><td>

	  <label>Tell us about your favorite dog:<br /><textarea name="fav_dog_comment" cols="45" rows="10"></textarea></label>

	</td></tr>
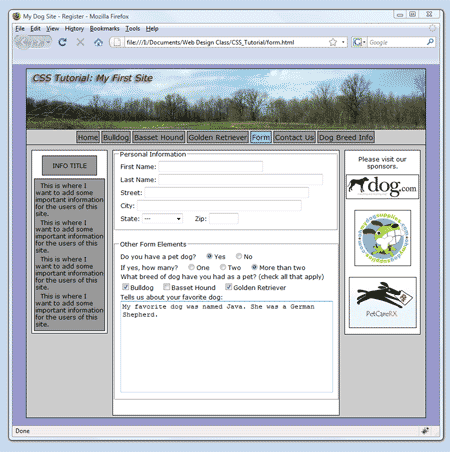 Preview the changes in a browser. Preview the changes in a browser.
- The last elements that the web form needs are Submit and Reset buttons. We will add the two buttons in a table that has one row and three cells. In form.html below the last fieldset add a new table with one row and three cells. The code will appear as:
<table>

	<tr>

	<td></td>

	<td></td>

	<td></td>

	</tr>

	</table>
- Place the cursor in the first cell of the new row.
 From the toolbar select the Button button. From the toolbar select the Button button.
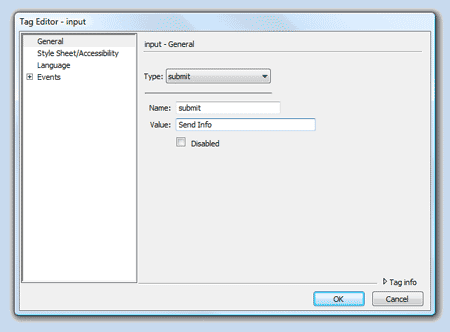 Select the Type: submit, Select the Type: submit,
Name the button submit and give it a value of Send Info.
Press the OK button.
- Place the cursor in the third cell of the new row. From the toolbar select the Button button. Select the Type: reset, name the button reset and give it a value of Clear Info. Press the OK button.
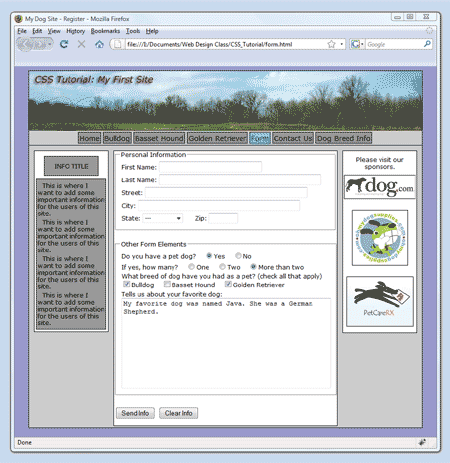 Preview the changes in a browser. Preview the changes in a browser.
- Fill in some of the fields on the form. Press the Clear Info button. Notice that the form is reset. Fill in the form fields. Press the Send Info button. Nothing happens. This is because a web form cannot be submitted unless it is on a web page that is on a web sever. We have a web server set up just for this class. To send your tutorial to our web server follow the directions found on this MHS Web Design Class web site at: Class lessons/Dreamweaver 'FTP'ing to the server. Return here to complete this section after you have finished the uploading of your files to the web server.
- Now with the css_tutorial site uploaded to the web server you can preview the site in a browser by entering the address of the site in the address bar. For example, hs-web-class/lawlesj/css_tutorial/form.html would take me to the form page of my site if I uploaded it correctly.
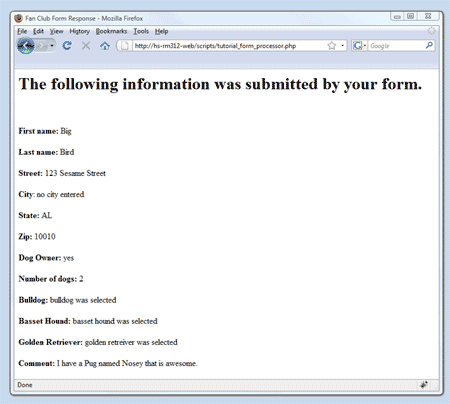 After navigating to your form page on the server enter information into each of the fields and select the buttons of your choice. After navigating to your form page on the server enter information into each of the fields and select the buttons of your choice.
Press the Send Info button. The resulting page shows whether you have correctly built the form.
It displays each of the items that are sent when the submit button of the form was pressed.
- Finally, we should make the form have a better appearance. We can add some separation between the rows of the tables by using padding-top in the table cells. The padding will cause the table cells to grow taller. In main.css add the following code:
table td{padding-top:10px;}
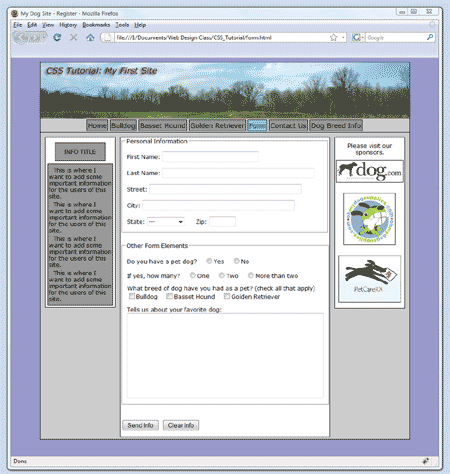 Preview the changes in a browser. Preview the changes in a browser.
Notice that the rows of the table have more separation.
- There is a table at the bottom of the page that contains the Send Info and Clear Info buttons. We will center the table and make the middle cell wider so that the button's layout is more appealing. In main.css add the following code:
table#buttons{margin-left:auto; margin-right:auto;}
In form.html, in the <table> tag for the table holding the buttons add the following:
id="buttons"
so the code now appears as:
<table id="buttons">
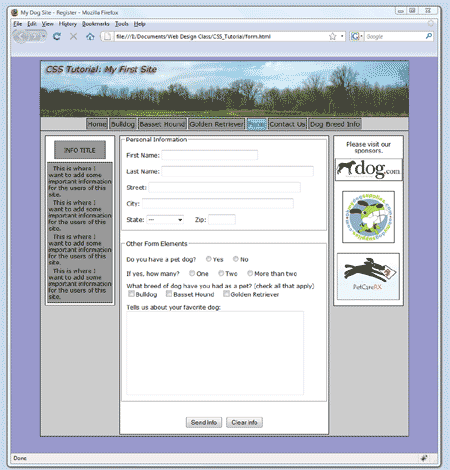 Preview the changes in a browser. Preview the changes in a browser.
Notice that the table with the buttons is centered.
- To move the buttons apart from each other we will add some code that will set the width of the middle cell. We will also add a non-breaking space to the cell because some browsers will not display a cell that is empty. In form.html in the middle cell of the table holding the buttons change the code so that it appears as:
<td width="60"> </td>
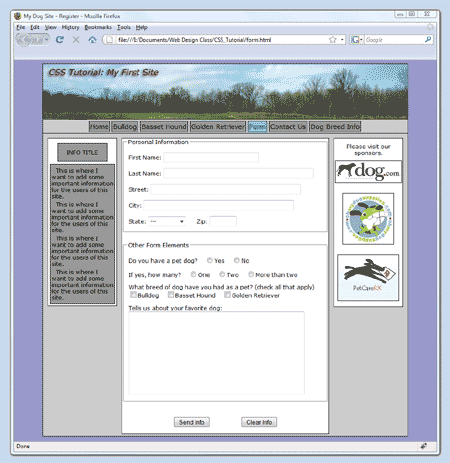 Preview the changes in a browser. Preview the changes in a browser.
Notice that the buttons are farther apart.
- We will want to add some styles to the fieldsets and legends to improve their appearance. In main.css add the following styles: (note that the fieldset style was started previously and that we are just adding background coloring)
fieldset{margin-bottom:20px;background-color:#CCCC66;}
legend{border:1px solid #000000; background-color:#CCCCFF; line-height:20px;}
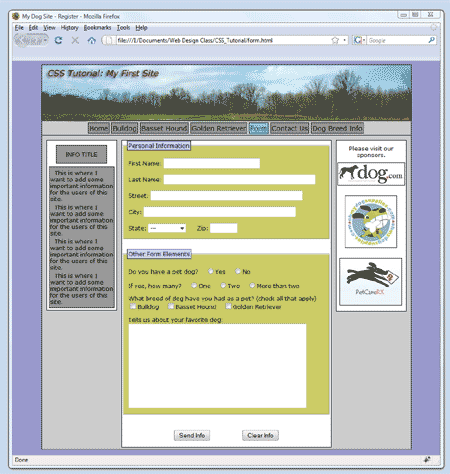 Preview the changes in a browser. Preview the changes in a browser.
Notice the background of the fieldsets are colored.
Notice that the legends have a border, a background color and are larger than they were.
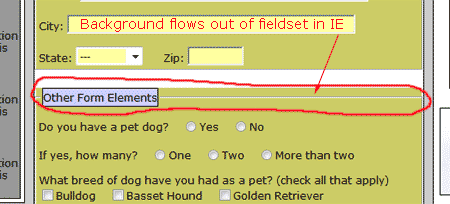 Unfortunately, Internet Explorer has an odd behavior when a fieldset has a background color (see the image on the right). Unfortunately, Internet Explorer has an odd behavior when a fieldset has a background color (see the image on the right).
Preview form.html in Internet Explorer and you will see that the background color fills over the top of the fieldset.
- To get around this odd Internet Explorer behavior change the code in main.css for the fielset and legend to appear as:
fieldset{margin-bottom:20px;background-color:#CCCC66;position:relative;}
legend{border:1px solid #000000;background-color:#CCCCFF;line-height:20px;position:absolute;top:-10px;}
- Preview the changes in Firefox and Internet Explorer. Notice that the background color problem in IE has been solved. But, because the first legend is so near the top of the main box it has poked itself above the top border. We can remedy the problem by adding some content before the form starts or by adding top margin to the fieldsets.
On form.html add the text 'Please fill out the form completely.' before the first fieldset. Place the text within <h1> tags. The code should appear as: <h1>Please fill out the form completely.</h1>
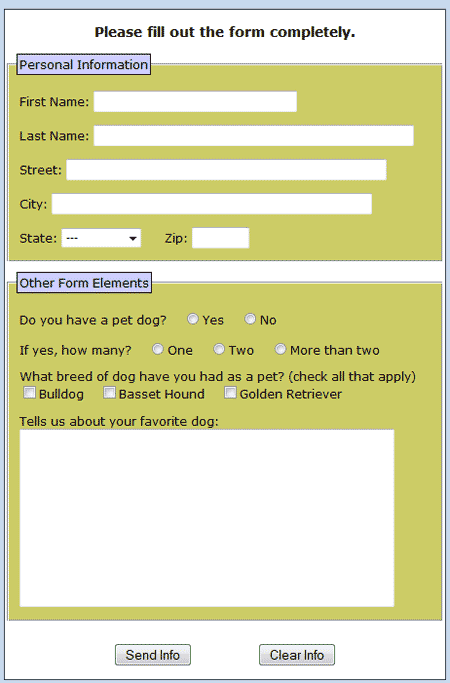
- Please change the second fieldset legend from Other Form Elements to Pet Information.
- Congratulations! You have completed the CSS Tutorial. You will now need to turn in the project by transferring a copy of the site to the hs-web-class web server. To learn how to transfer your files go to 'FTP'ing to the Server.
- Place a note on the teacher's desk indicating that the site is ready to be graded.
|
|
|