|
NetBeans - Creating a GUI Program
- Open the program named NetBeans.
- If you have not done so already create a folder in your I: drive named Programming 2
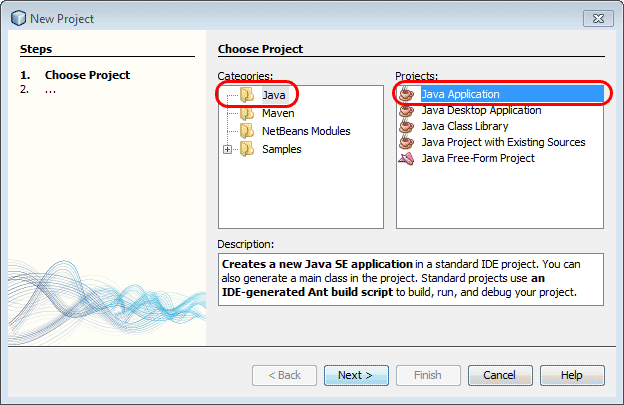
- From the File menu choose New Project. Select Java from the Categories list and Java Application from the Projects list. Press the Next button.
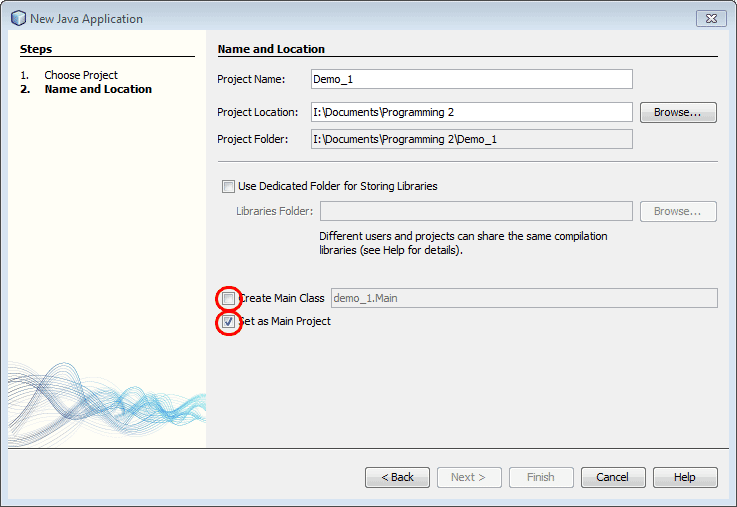
- Enter a project name. Browse to your I: drive Programming 2 folder. (Note: the computer will create a folder using the project name within the Programming 2 folder) Deselect the "Create Main Class” check box and finally press the Finish button.
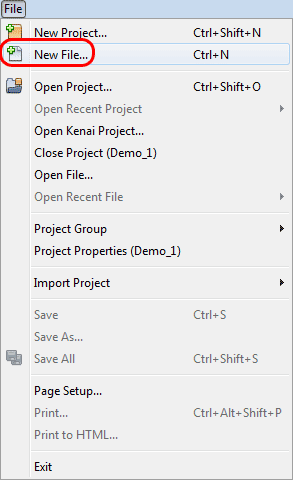
- In the NetBeans program choose New File from the File menu.
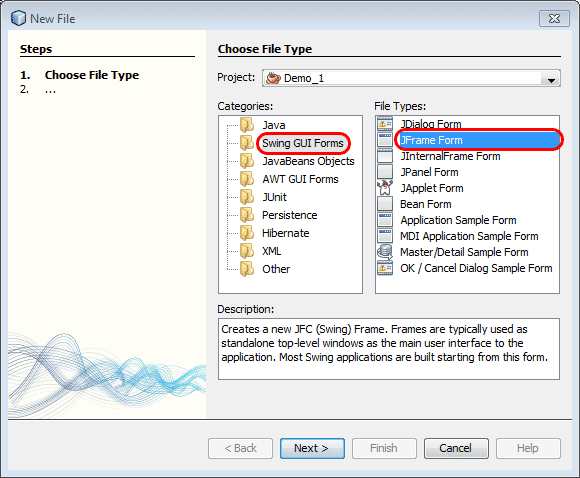
- In the New File window select Swing GUI Forms for the Category and JFrame Form for the File Type. Press the Next button. Press the Finish button.
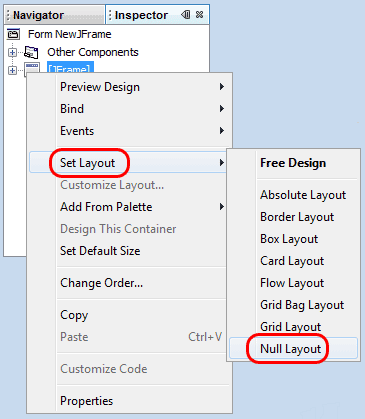
- In the Inspector panel (lower left corner of window) select JFrame, Right-click to select Set Layout and then Null Layout.
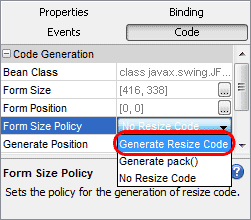
- Again, in the Inspector panel select the JFrame. In the [JFrame] - Properties palette (lower right corner of window) select the Code button. (NOTICE: the Code button may not be visible until you select the Properties button once) Set the Form Size Policy to Generate Resize Code. Doing this allows you to make the window for your application any size.
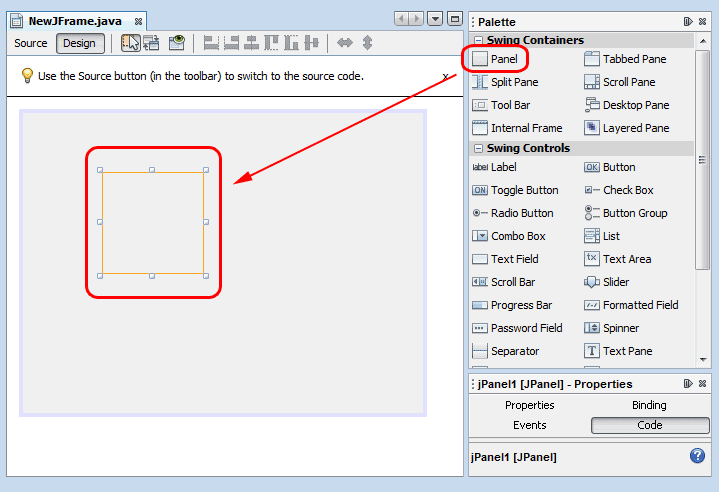
- From the Swing Containers palette drag a Panel to the JFrame of the project.
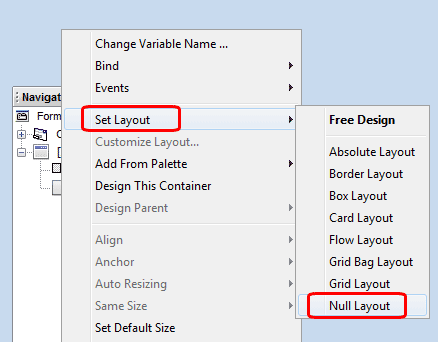
- In the Inspector palette right-click on the JPanel object jPanel1. Select Set Layout, Null Layout.
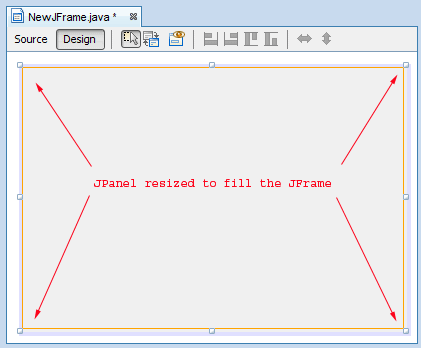
- Grab the corner handles and resize the JPanel to fill the entire JFrame.
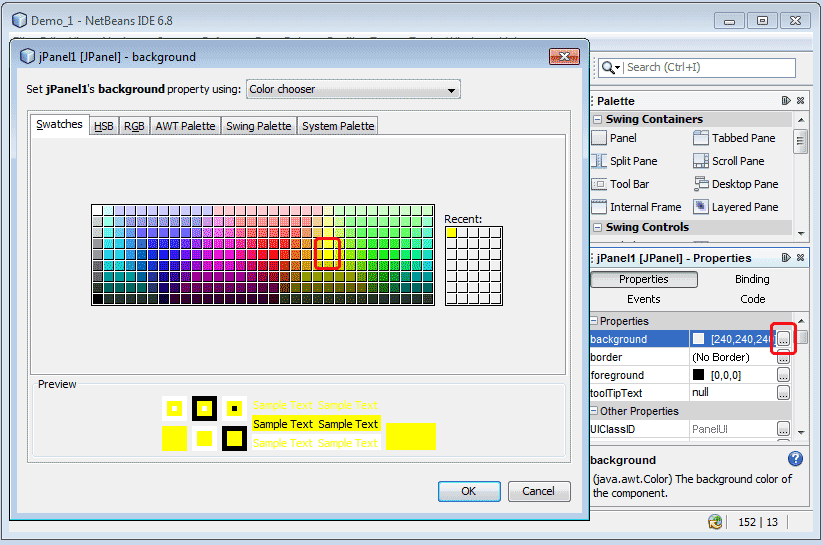
- Select the JPanel. In the jPanel1 [JPanel] - Properties palette. select the background property and select a yellow color. Press the OK button.
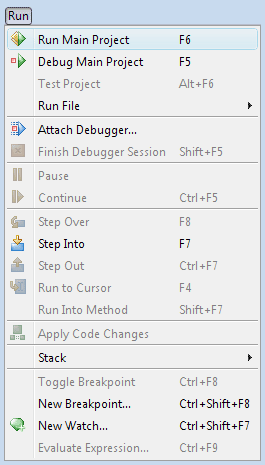
- From the Run menu select Run Main Project. Press the OK button when asked to select the main class. Close the application after you are done viewing it.
 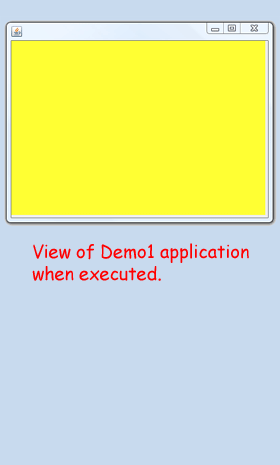
- In the Inspector select the JFrame. In the Properties palette enter a title.
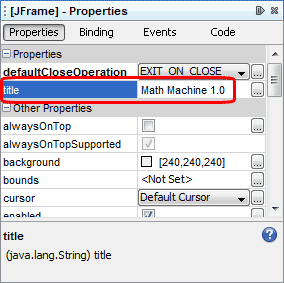
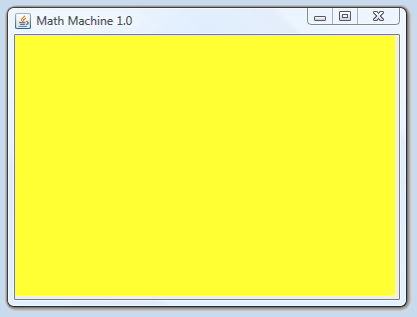
- Run the project again and notice that the window has a title. Close the application.
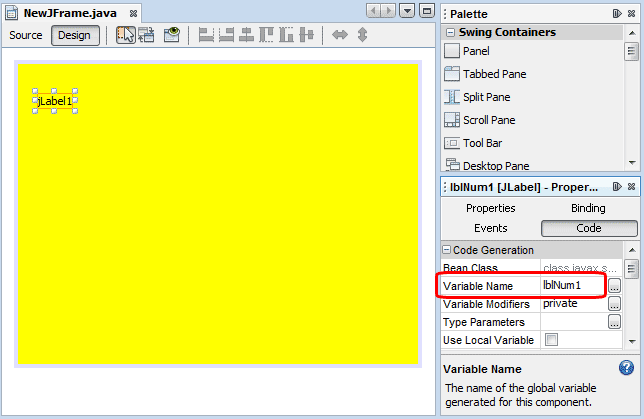
- Next we will add a label. Labels are used to display text. Drag a Label from the Swing Controls palette onto the Panel of the project. In the Properties palette select the Code button. Change the Variable Name from the default value of jLabel1 to lblNum1. The variable name is the instance name used when coding in Java.
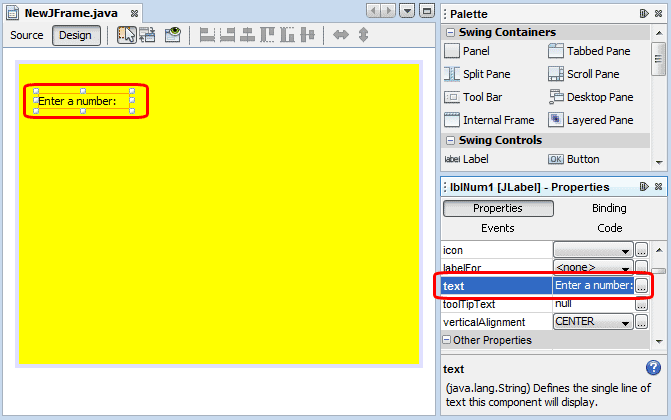
- The label currently displays the default text, JLabel1. To change the text select the text property in the Properties palette and enter the text Enter a number: . On the JPanel drag the resize handles so that all of the text is visible.
- From the Swing Controls palette drag a Text Field object onto the project. In the Properties palette clear the default text. In the Code area of the Properties palette change the Variable Name to txtNum1.
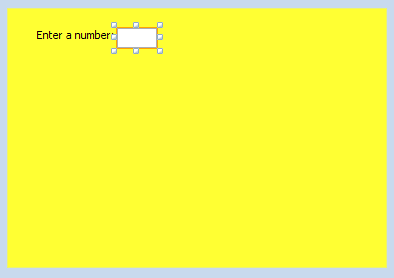
- Add another Label. Give it a Variable Name of lblNum2 and a text value of Enter another number: .
Add another Text Field to the form. Give it a Variable Name of txtNum2 and clear the text so that it is empty.
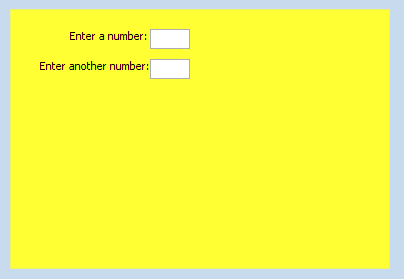
- Add another Label. Give it a Variable Name of lblChooseFunction and a text value of Select a math function: .
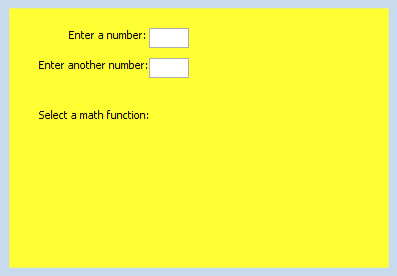
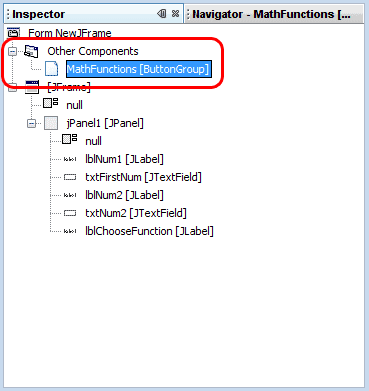
- Drag a Button Group object from the Swing Controls palette onto the form. Although nothing visibly changed on the form you can see in the Inspector palette that a Button Group object named buttonGroup1 was added. In the Inspector click on the Button Group object so that it is selected. In the Properties palette, code area, change the Variable Name to MathFunctions.
- Drag a Radio Button object from the Swing Controls palette onto the form. Change the text property to Add. Select the buttonGroup MathFunctions. Change the background property to the same yellow color as the JPanel. Change the Variable Name to optAdd.
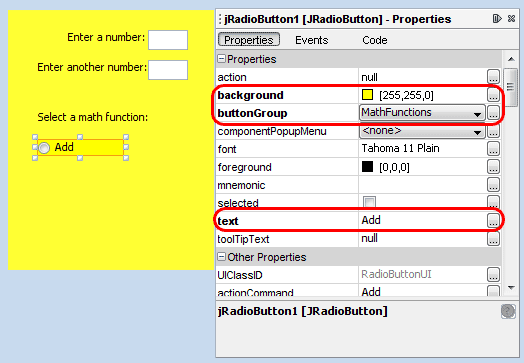
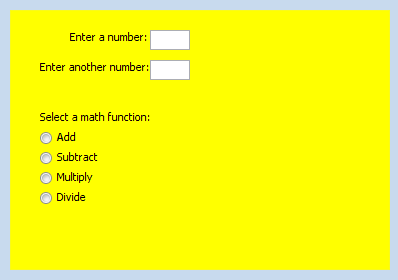
- Add three more Radio Buttons to the form. Change their background to yellow.
Add all of them to the MathFunctions buttonGroup.
Change the text to Subtract, Multiply and Divide for the three buttons.
Use the Variable Names optSubtract, optMultiply and optDivide.
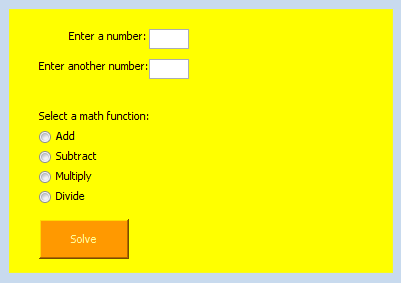
- Drag a Button from the Swing Controls palette onto the form.
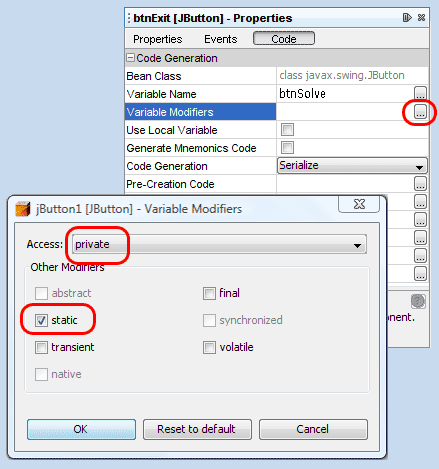
- In the Code area of the Properties palette change the Variable Name to btnSolve.
- Select private static for the Variable Modifiers property (if you don't do this the color will not appear when the code is executed).
- In the Properties palette change the text to Solve.
- Select the ContentAreaFilled property.
- Deselect the focusPainted property.
- Select the Opaque property.
- Change the background property to give the button some color.
- Change the foreground property to change the color of the text of the button.
- Change the border property to Bevel Border.
- Add another Button to the form.
- In the Code area of the Properties palette change the Variable Name to btnExit.
- Select private static for the Variable Modifiers property
- In the Properties palette change the text to Exit.
- Select the ContentAreaFilled property.
- Deselect the focusPainted property.
- Select the Opaque property.
- Change the background property to give the button some color.
- Change the foreground property to change the color of the text of the button.
- Change the border property to Bevel Border.
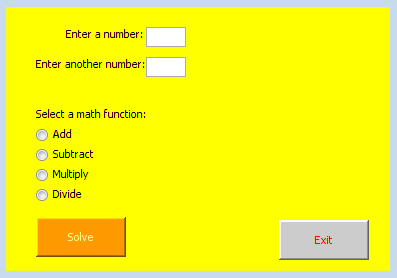
- Add a Label to the form.
- In the Properties palette delete the default text from the text property.
- In the Code area of the Properties palette change the Variable Name to lblResults.
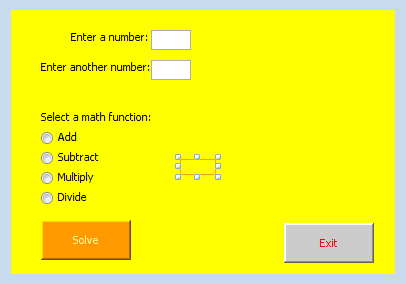
- Now that the form is complete we will execute the program to make sure that the appearance is OK. Press the Run Main Project button.
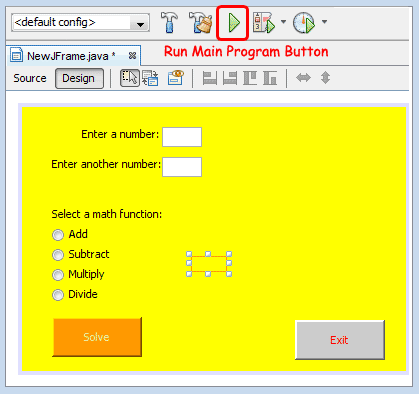
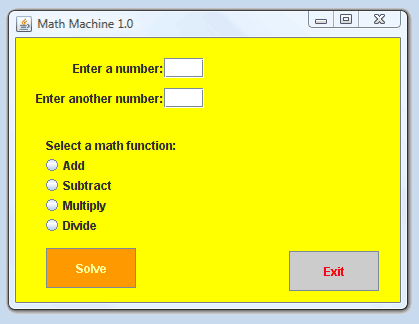
- Notice that the labels all appear as bold text. This causes the text to increase in size which causes the text to no longer fit in the space assigned. (Notice: before continuing with this step you can avoid this entire issue by following the directions on how to resolve the 'Look and Feel" issue found at the bottom of this page.)
If you have not corrected the Look and Feel issue as described at the end of this tutorial then on the form, increase the size of each element so that when executed the text is displayed correctly. You may have to make several attempts to get the correct appearance. (Note: The lblResults JLabel is transparent. It too needs to be adjusted. To select lblResults select it in the Inspector palette so that it appears selected on the form.)
- Now it is time to add the Java code so that program actually does something useful. The first thing we will do is add code to the btnExit element. Right-click on the cmdExit button. Select Events, Mouse, mouseClicked.
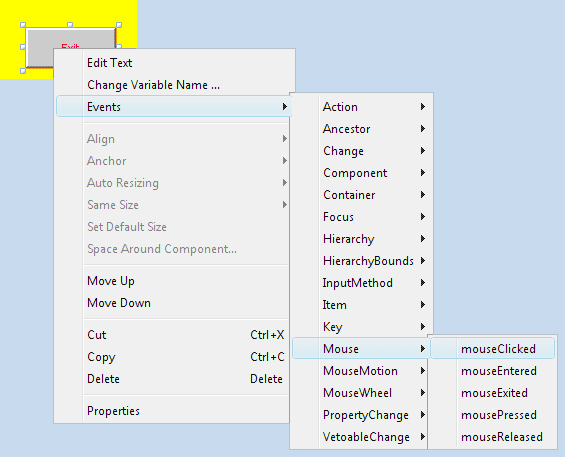
- The computer has now left the Design view and entered the Source view. If you scroll through the code you will find that all of the necessary code has been written to display your project. The computer is now waiting for you to write the code for the btnExit button. The computer has already entered:
private void btnExitMouseClicked(java.awt.event.MouseEvent evt) {

	// TODO add your handling code here:

	    }
In order to make the program terminate change the code to:
private void btnExitMouseClicked(java.awt.event.MouseEvent evt)     {

	  System.exit(0);

	}
Run the program to confirm that the btnExit button works.
- Next we will add code to the btnSolve button. Right-click on the btnSolve button. Select Events, Mouse, mouseClicked. Add the following code:
        String enteredNum1,enteredNum2;

	        int num1=0,num2=0,result=0,remainder=0;

	        enteredNum1=txtNum1.getText();

	        enteredNum2=txtNum2.getText();

	        num1=Integer.parseInt(enteredNum1);

	        num2=Integer.parseInt(enteredNum2);

	        if(optAdd.isSelected()==true)

	        {

	            result=num1+num2;

	            lblResults.setText("The answer is "+result);

	        }

	        else if (optSubtract.isSelected()==true)

	        {

	            result=num1-num2;

	            lblResults.setText("The answer is "+result);

	        }

	        else if (optMultiply.isSelected()==true)

	        {

	            result=num1*num2;

	            lblResults.setText("The answer is "+result);

	        }

	        else if (optDivide.isSelected()==true)

	        {

	            result=num1/num2;

	            remainder=num1%num2;

	            lblResults.setText("The answer is "+result+" with a remainder of "+remainder);

	        }

	        else

	        {

	            lblResults.setText("You have not chosen a math function.");

	        }
- Run the completed program to make sure that it functions correctly.
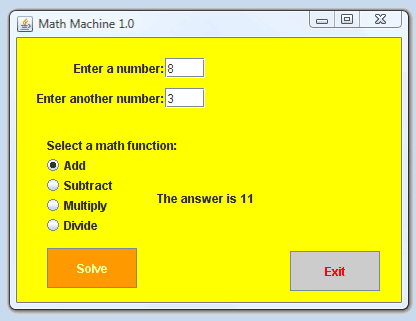
Directions to fix the Look and Feel issue:
To stop the font size error you will need to add the code shown below to the main method. Press the Source button to view the code for your project. Find the main method. Copy the code below and then paste just after the line public static void main(String args[]) {
// this code assumes the form is named NewJFrame which is the default name generally
try {

      UIManager.setLookAndFeel(UIManager.getSystemLookAndFeelClassName());

    } catch (Exception ex) {

      Logger.getLogger(NewJFrame.class.getName()).log(Level.SEVERE, "Error setting LaF", ex);}
After adding the above code you need to add the following two lines of code at the very top of the source code window:
import javax.swing.*;

import java.util.logging.*;
Run your program to verify that the output view is the same as the design view in NetBeans.
|