|
In this exercise you will learn how to use BlueJ Follow the steps below to learn the basic skills needed to use BlueJ. - Open BlueJ.
- From the Project menu select New Project?.
- Navigate into the Programming 1 folder in your student folder on the I: drive.
- Give the file an appropriate name. For example, myFirstBlueJ.
- Press Create.
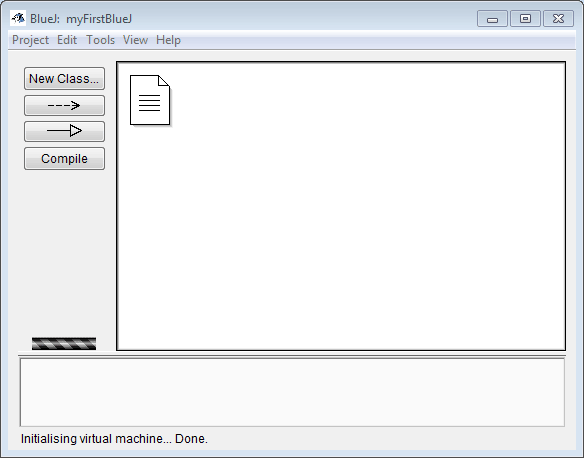
- Press the New Class? button.
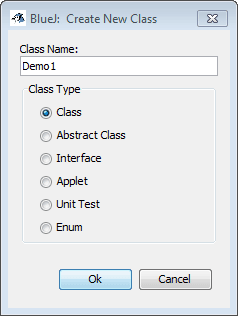
- Give the class an appropriate name such as Demo1 for example. (NOTICE: When naming classes no spaces or punctuation marks are allowed. Also, the name can?t begin with a number) Select the Class option for Class Type and then press OK.
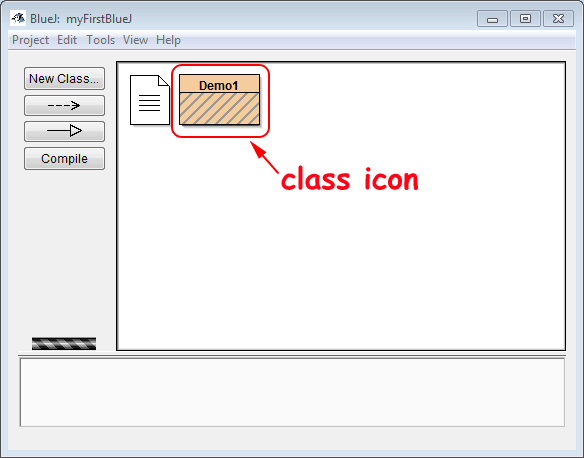
- Double-click the class icon to open the code window.
- The code window contains the default code from the stdclass.tmpl that you added in a previous exercise. It is in the code window that you will write your Java code.
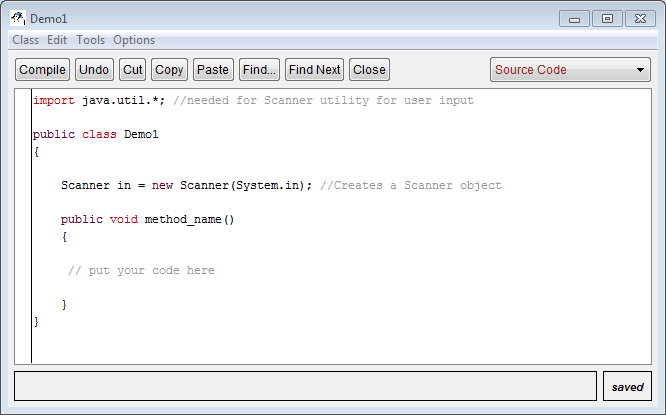
- Let's look at the code in detail.
//needed for Scanner utility for user input the two slashes makes this code a comment. A comment is not code that will be executed. It is a note that is written to anyone who is reading the code. I often use the comments to explain to you what the code does.
import java.util.*;Java has libraries full of code that can be used for different situations. In Programming 1 we often need to make use of the utility (util) library because it contains some code that allows us to create something called a Scanner object. The Scanner is used to allow the user of a program to enter information from the keyboard when prompted. For example, a program might ask the user to enter his or her name. The Scanner allows the user to enter a name and then press the Enter key.
public class Demo1every Java program begins with a line that starts with public class followed by the name of the class.
{There is always an opening brace after the name of the class. It defines where the class code begins. Every opening brace will have a closing brace it is associated with.
public void method_name()After the opening brace for the class there will be a line of code that defines a method. A method will be a section (block) of code that performs a specific task. There can be many methods in a class. In Programming 1 there will usually be only one method.
The method declaration will begin with public void (you will learn why if you take Programming 2) and is followed by the name of the method. The name should reflect the function of the method. For example, if the code of the method will ask a user for his or her name then the name of the method could be getUserName or perhaps getName. Traditionally when naming a method you should use a lowercase letter for the first letter and then an uppercase letter for the first letter of each word in the name.
There is always a pair of parenthesis, (), after the method name. The reason for this is not evident at this point but will become clear at a later time.
{There will always be an opening brace after the name of the method. It defines where the method code begins. Every opening brace has a closing brace associated with it.
Scanner in = new Scanner(System.in);The above line of code creates a Scanner object. It allows a user to enter information from the keyboard while the program is running. Only programs that ask the user for input need scanner objects. Because so many of our programs will need the scanner object I have included the code in the default stdclass.tmpl file.
}This brace is the closing brace for the method. It defines where the code of the method ends.
}This brace is the closing brace for the class. It defines where the code of the class ends.
- You may have noticed that the programming language Java is written in English. Computers do not understand English. Before Java code can be executed by a computer the English must be converted into a form that the computer understands. Pressing the Compile button found at the top of the code view window will cause the computer to translate the English into computer language.
Press the Compile button (in either the project window or the code window). If there are no errors in the code then the compiling will be successful as indicated by the class icon losing its diagonal stripes.

- Let's add some code to the method so you can see how this all works.
- Replace the default name of the method, method_name() with sayHello()
- Replace the comment // put your code here with
System.out.println("Hello world!"); - The entire code should appear like:
import java.util.*; //needed for Scanner utility for user input

public class Demo1
{

    Scanner in = new Scanner(System.in); //Creates a Scanner object

    public void sayHello()
    {

     System.out.println("Hello world!");

    }
}
- Press the Compile button.
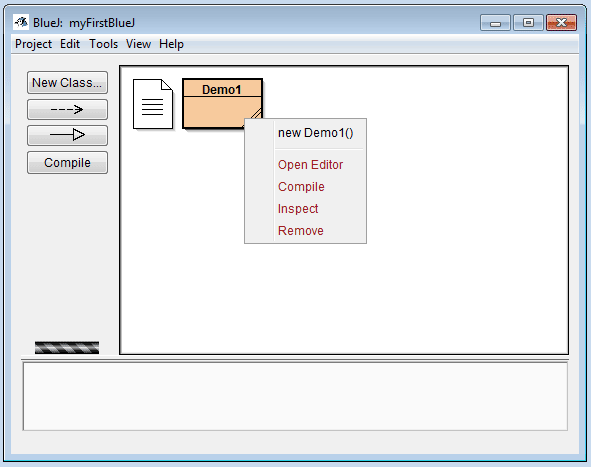
- Right-click on the compiled class icon and choose new Demo1()
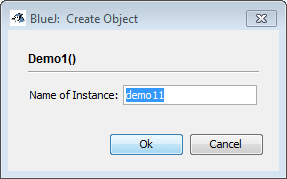
- Press OK.
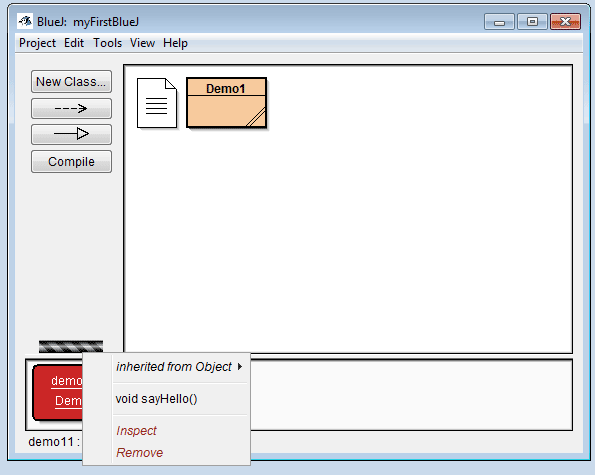
- To execute the code you have written right-click on the red rectangle that appears and choose the method named void sayHello().
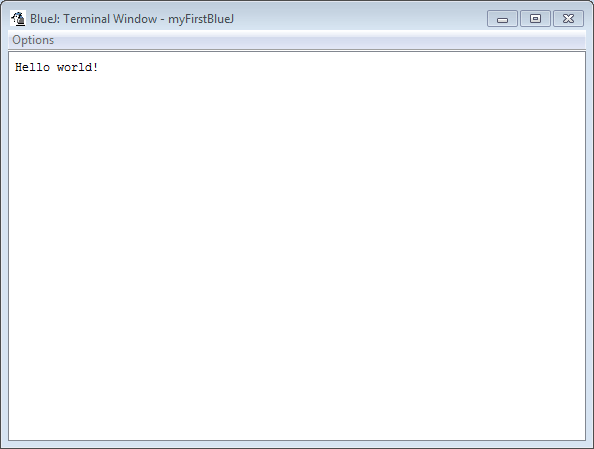
- View the program?s output in the Terminal Window. (NOTICE:It is a good idea to select ?Clear screen at method call? from the Options menu in the Terminal Window. This will cause the computer to erase output from any previous program runs.)
- Congratulations! You are now a Java programmer.
Special note: The code you write and execute in Programming 1 will always cause text to appear in a Terminal Window. While this may not be a glamorous display it is a very useful way for you to learn the basics of programming. If you take the Programming 2 course you will learn how to create applications that have that flashy graphical user interface (GUI) that you are used to seeing on a computer.
|