|
Unlike if-then and if-then-else, the switch statement allows for any number of possible execution paths.
The following program, SwitchDemo, declares an int variable named month whose value represents a month out of the year. The program displays the name of the month, based on the value of month, using the switch statement.
class SwitchDemo
{
   public static void main(String[] args)
  {
   int month = 8;
   switch (month)
   {
    case 1: System.out.println("January"); break;  //break causes computer
    case 2: System.out.println("February"); break; //to leave switch block
    case 3: System.out.println("March"); break;    //because once the
    case 4: System.out.println("April"); break;    //correct response is
    case 5: System.out.println("May"); break;      //located there is no
    case 6: System.out.println("June"); break;     //need for further
    case 7: System.out.println("July"); break;     //searching
    case 8: System.out.println("August"); break;
    case 9: System.out.println("September"); break;
    case 10: System.out.println("October"); break;
    case 11: System.out.println("November"); break;
    case 12: System.out.println("December"); break;
    default: System.out.println("Invalid month.");break;
   }
}
}
In this case, "August" is printed to standard output.
The body of a switch statement is known as a switch block. Any statement immediately contained by the switch block may be labeled with one or more case or default labels. The switch statement evaluates its expression and executes the appropriate case.
Of course, you could also implement the same thing with if-then-else statements:
int month = 8;
if (month == 1)
  {
   System.out.println("January");
  }
   else if (month == 2)
  {
   System.out.println("February");
  }
. . . // and so on
Deciding whether to use if-then-else statements or a switch statement is sometimes a judgment call. You can decide which one to use based on readability and other factors. An if-then-else statement can be used to make decisions based on ranges of values or conditions, whereas a switch statement can make decisions based only on a single integer or enumerated value.
Another point of interest is the break statement after each case. Each break statement terminates the enclosing switch statement. Control flow continues with the first statement following the switch block. The break statements are necessary because without them, case statements fall through; that is, without an explicit break, control will flow sequentially through subsequent case statements. The following program, SwitchDemo2, illustrates why it might be useful to have case statements fall through:
class SwitchDemo2
{
public static void main(String[] args)
 {

int month = 2;
int year = 2000;
int numDays = 0;

switch (month)
  {
  case 1:
  case 3:
  case 5:
  case 7:
  case 8:
  case 10:
  case 12:
    numDays = 31;
    break;
  case 4:
  case 6:
  case 9:
  case 11:
    numDays = 30;
    break;
  case 2:
    if ( ((year % 4 == 0) && !(year % 100 == 0))|| (year % 400 == 0) )
     numDays = 29;
   else
    numDays = 28;
   break;
  default:
    System.out.println("Invalid month.");
    break;
   }
System.out.println("Number of Days = " + numDays);
  }
}
This is the output from the above program:
Number of Days = 29
Technically, the final break is not required because flow would fall out of the switch statement anyway. However, we recommend using a break so that modifying the code is easier and less error-prone. The default section handles all values that aren't explicitly handled by one of the case sections.
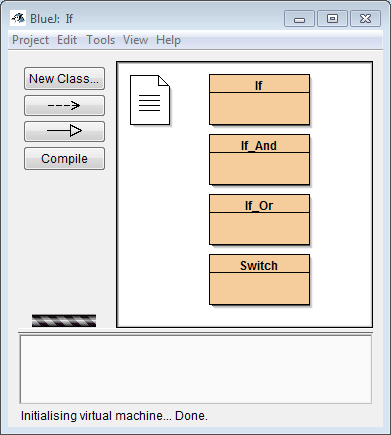
For each of the Programming 1 lessons you are strongly encouraged to view and play around with the sample code provided in the BlueJ Java Student Samples folder. Open BlueJ and choose Open Project from the Project menu. Navigate to your Programming 1 folder on the I: drive and open the BlueJ Java Student Samples folder. Open the project named If. 
Lesson Example: Project If, Class Switch, methods usingSwitch_01(), usingSwitch_02() and andNowWithIf() - Right-click on the Class named Switch and select new Switch()
- Right-click on the red rectangle and choose the method named usingSwitch_01()
- Right-click on the red rectangle and choose the method named usingSwitch_02()
- Right-click on the red rectangle and choose the method named andNowWithIf()
Code for method usingSwitch_01(): void usingSwitch_01()
{
int num;
System.out.print("Enter a number: ");
num = in.nextInt();
switch(num)
{
case 1:
System.out.println("The number entered is 1");
break;
case 2:
System.out.println("The number entered is 2");
break;
case 3:
System.out.println("The number entered is 3");
break;
default:
System.out.println("The number was not 1, 2 or 3");
}
}
Code for method usingSwitch_02(): void usingSwitch_02()
{
int num;
System.out.print("Enter a number: ");
num = in.nextInt();
switch(num)
{
case 1:
case 2:
case 3:
case 4:
case 5:
System.out.println("The number entered is from 1 to 5");
break;
case 6:
case 7:
case 8:
case 9:
case 10:
System.out.println("The number entered is from 6 to 10");
break;
case 11:
case 12:
case 13:
case 14:
case 15:
System.out.println("The number entered is from 11 to 15");
break;
default:
System.out.println("The number was not from 1 to 5, or 6 to 10, or 11 to 15");
}
}
Code for method andNowWithIf(): void andNowWithIf()
{
int num;
System.out.print("Enter a number: ");
num = in.nextInt();
if(num>=1 && num <=5)
System.out.println("The number entered is from 1 to 5");
else if (num>=6 && num <=10)
System.out.println("The number entered is from 6 to 10");
else if (num>=11 && num <=15)
System.out.println("The number entered is from 11 to 15");
else
System.out.println("The number was not from 1 to 5, or 6 to 10, or 11 to 15");
}
|